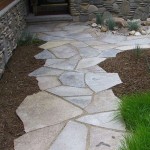
Installing a Paver Patio for Home Garden Oasis Ideas
A paver patio offers a versatile and aesthetically pleasing addition to any garden, providing a dedicated space for relaxation, entertainment, and enjoying the outdoors. Proper installation is crucial for a durable and long-lasting patio. This article guides you through the process of installing a paver patio, transforming your garden into the oasis you envision.
Planning and Preparation
Careful planning and preparation are essential for a successful patio installation. This stage involves determining the patio's size, shape, and location, considering factors like drainage, sunlight, and accessibility.
- Define the Patio Area: Use stakes and string to mark the desired patio perimeter. Consider the intended use, furniture placement, and traffic flow.
- Analyze the Soil: Assess the soil type and drainage. Compaction and proper base preparation are crucial for preventing settling and shifting.
- Calculate Materials: Estimate the number of pavers, base material, and edging required based on the patio's dimensions and chosen materials.
- Gather Tools and Equipment: Assemble necessary tools, including a shovel, tamper, level, rake, rubber mallet, measuring tape, safety glasses, and gloves.
Excavation and Base Preparation
Creating a stable and well-drained base is fundamental to a long-lasting paver patio. This process involves excavating the area and constructing a layered base.
- Excavate the Area: Dig down to the desired depth, typically 6-8 inches below the finished patio surface, allowing for the base layers. Ensure a slight slope for drainage, about 1/4 inch per foot.
- Install Edging: Secure edging around the perimeter to contain the pavers and provide a clean, finished look. Edging materials include plastic, metal, or concrete.
- Compact the Subgrade: Compact the excavated soil using a hand tamper or plate compactor to create a firm and stable foundation.
- Add Base Layers: Lay down a layer of gravel, followed by a layer of sand. Compact each layer thoroughly to create a level and even surface.
Paver Installation
With the base prepared, the paver installation process can begin. Careful placement and alignment are vital for an aesthetically pleasing and functional patio.
- Lay the First Pavers: Start at a corner or straight edge and begin laying the pavers according to your chosen pattern. Maintain consistent spacing between pavers.
- Cut Pavers as Needed: Use a paver splitter or masonry saw to cut pavers to fit around curves, edges, and obstacles.
- Maintain Level and Alignment: Regularly check the level and alignment of the pavers as you progress, using a string line as a guide.
- Use a Rubber Mallet: Gently tap pavers into place with a rubber mallet to ensure a secure and even surface.
Filling the Joints and Finishing
The final stage involves filling the joints between pavers and completing the finishing touches.
- Spread Joint Sand: Spread polymeric sand or fine sand over the paved surface, sweeping it into the joints.
- Compact the Sand: Use a plate compactor to vibrate the pavers and settle the sand into the joints. Repeat this process until the joints are completely filled.
- Clean the Surface: Sweep away excess sand and debris, leaving a clean and finished patio surface.
Maintenance and Care
Proper maintenance will ensure the longevity and beauty of your paver patio.
- Regular Sweeping: Remove debris and leaves to prevent staining and weed growth.
- Periodic Cleaning: Wash the patio with a mild detergent and water to remove dirt and grime.
- Reseal as Needed: Sealing the pavers every few years helps protect them from the elements and maintains their color.
Troubleshooting Common Issues
Addressing common issues promptly can prevent further damage and maintain the integrity of the patio.
- Weed Growth: Use a weed killer or pull weeds by hand to prevent them from taking root in the joints.
- Ant Hills: Treat ant hills with insecticide and fill any voids to prevent recurrence.
- Staining: Clean spills promptly to avoid staining the pavers. Specialized cleaners can remove stubborn stains.
- Shifting or Settling: If pavers shift or settle, it may indicate a problem with the base. Releveling or rebuilding the base may be necessary.
5 Patio Designs That Wow Unilock

Backyard Patio Ideas Small Covered Concrete Brick And Wood

Patio Pergola Planning A Backyard Oasis

130 Creative Grass Pavers Ideas For A Beautiful Backyard

40 Paver Patio Ideas To Help You Design Your Outdoor Space

Design Your Backyard Oasis Using These Most Popular Additions Pa Lawn Landscape
:max_bytes(150000):strip_icc()/JS_HandsomeSalt_ConcreteCollaborative_0050-67694f64f7774e4b8ef974015b23b1f3-7b29d1ebd31d415a81034cd36ca93813.jpeg?strip=all)
32 Ideas For Creating The Ultimate Backyard Oasis

Paver Patios An Inexpensive Guide To A Backyard Makeover

130 Creative Grass Pavers Ideas For A Beautiful Backyard

31 Paver Patio Ideas For Your Home Angi
Related Posts


