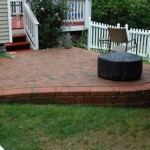
How To Build A Concrete Paver Patio
Constructing a concrete paver patio is a rewarding do-it-yourself project that adds value and aesthetic appeal to any outdoor space. This article presents a comprehensive guide to building a durable and visually pleasing patio using concrete pavers. The process involves careful planning, site preparation, and precise installation techniques. Following these steps will ensure a long-lasting and attractive outdoor living area.
Planning and Design
The initial stage of building a concrete paver patio involves meticulous planning and design. This phase sets the foundation for a successful project, ensuring that the finished patio meets the homeowner's needs and complements the existing landscape. A well-thought-out plan minimizes errors, reduces material waste, and streamlines the construction process.
First, determine the desired size and shape of the patio. Consider the intended use of the space, such as dining, lounging, or entertaining. Measure the area where the patio will be located and mark the boundaries clearly. Factor in any existing structures or features that may affect the patio's layout, such as trees, fences, or utilities.
Next, choose the paver style and color that best suits the overall aesthetic of the property. Concrete pavers are available in a wide variety of shapes, sizes, colors, and textures. Consider the architectural style of the house and the surrounding landscape when making this decision. Obtain samples of different pavers to visualize how they will look in the space.
Create a detailed design plan that includes the dimensions of the patio, the layout of the pavers, and any special features, such as borders or patterns. A scaled drawing or digital rendering can be helpful in visualizing the finished project. Include details such as the location of any steps, retaining walls, or drainage systems that may be necessary.
Finally, calculate the amount of materials needed for the project. This includes the pavers themselves, as well as the base materials, such as gravel and sand. Consult with a local supplier or use online calculators to estimate the quantity of each material needed based on the size of the patio and the recommended depth of the base layers. It is advisable to purchase slightly more materials than estimated to account for cuts, breakage, and unforeseen circumstances. Also, consider the necessary tools for the project, such as a shovel, rake, tamper, level, and saw. Having all the necessary materials and tools on hand before starting the project will help ensure a smooth and efficient construction process.
Site Preparation
Proper site preparation is crucial for the stability and longevity of a concrete paver patio. A well-prepared base provides a solid and level foundation for the pavers, preventing them from shifting, settling, or cracking over time. This phase involves several steps, including excavation, grading, and compaction.
Begin by excavating the area where the patio will be located. The depth of excavation will depend on the type of soil and the load-bearing requirements of the patio. As a general guideline, excavate to a depth of at least 6-8 inches below the desired finished grade. Remove any topsoil, vegetation, and debris from the area.
After excavation, grade the soil to create a uniform slope for drainage. A slope of approximately 1/4 inch per foot is recommended to allow water to run off the patio and prevent pooling. Use a level and a string line to ensure that the slope is consistent across the entire area. Use a tamper to compact the soil and create a firm base.
Install a layer of gravel base material. The gravel base provides a stable and well-draining foundation for the pavers. Spread the gravel evenly across the excavated area and compact it thoroughly using a plate compactor. The thickness of the gravel layer will depend on the soil conditions and the anticipated load on the patio, but a minimum of 4 inches is typically recommended. For areas with poor drainage, consider using a thicker layer of gravel or installing a perforated drain pipe.
Add a layer of bedding sand on top of the gravel base. The bedding sand provides a level and smooth surface for the pavers to rest on. Spread the sand evenly across the gravel and use a screed board to create a uniform thickness of approximately 1 inch. Avoid compacting the sand, as this can make it difficult to adjust the pavers during installation. Using PVC pipes as guides can aid in achieving a consistent sand depth. These are removed after the sand is screeded.
Paver Installation
The paver installation process is the final and most visually impactful stage of building a concrete paver patio. This phase requires careful attention to detail and precise placement of each paver to create a smooth, level, and aesthetically pleasing surface. Proper installation techniques will ensure the long-term stability and durability of the patio.
Begin by laying the first row of pavers along a straight edge, such as a wall or a string line. Use a rubber mallet to gently tap each paver into place, ensuring that it is level and flush with the adjacent pavers. Maintain a consistent joint spacing between the pavers, typically around 1/8 to 1/4 inch. Paver spacers can be used to ensure consistent gaps.
Continue laying pavers in rows, following the established pattern and maintaining consistent joint spacing. Check the level of the pavers frequently using a level and adjust as needed. If a paver is too high, remove it and add more sand to the base. If a paver is too low, add sand to the base.
Around the perimeter of the patio, it may be necessary to cut pavers to fit the desired shape. Use a concrete saw or a paver splitter to make clean and precise cuts. Wear safety glasses and a dust mask when cutting pavers to protect yourself from debris and dust.
After all the pavers are installed, sweep joint sand into the joints between the pavers. The joint sand provides stability and prevents weeds from growing in the joints. Use a broom or a push broom to distribute the sand evenly across the patio surface. Sweep the excess sand into the joints until they are completely filled.
Compact the pavers using a plate compactor with a rubber mat. The rubber mat will protect the pavers from damage during compaction. Run the compactor over the entire patio surface several times, ensuring that the pavers are firmly seated in the base. This process helps lock the pavers in place and creates a smooth and even surface.
Finally, sweep away any remaining joint sand and lightly water the patio. The water will help settle the sand into the joints and further stabilize the pavers. Add more joint sand as needed to fill any gaps that may appear after watering. Regular maintenance, such as sweeping and occasional washing, will help keep the patio looking its best for years to come.

Diy Patio With Grass Between Pavers And A Fire Pit

Installing A Diy Paver Patio Is The Ultimate Spring Project

Budget Friendly Diy Paver Block Patio Interior Frugalista

How To Build A Paver Patio Budget Dumpster

How To Install A Paver Patio Garden Gate

How To Build A Paver Patio Like Pro Start Finish

Diy Patio With Grass Between Pavers And A Fire Pit

Poured Concrete Pavers Create A Stylish Patio The Home Depot

Poured Concrete Pavers Create A Stylish Patio The Home Depot

How To Lay A Paver Patio The Easy Way Build With Roman
Related Posts


