How to Build a Cinder Block Patio
A cinder block patio offers a durable and cost-effective solution for creating an outdoor living space. This type of patio, when properly constructed, provides a stable and long-lasting surface suitable for various outdoor activities. This article provides a comprehensive guide on how to build a cinder block patio, outlining the necessary steps, materials, and considerations for a successful project.
Planning and Preparation
Prior to beginning the physical construction, careful planning and preparation are essential. This stage encompasses several critical elements that influence the final outcome of the patio project.
Determining Patio Size and Location: The initial step is to determine the desired size and location of the patio. Consider the intended use of the space, the available area in the yard, and proximity to the house. Mark the perimeter of the patio area using stakes and string. Accurately measuring and marking the area ensures that the finished patio will fit the intended space and meet the desired functional requirements.
Checking Local Codes and Regulations: Prior to any digging or construction, it is crucial to ascertain whether any local building codes or regulations apply to patio construction. Some jurisdictions may require permits for patios exceeding a certain size or located near property lines. Contacting the local building department can provide clarity on applicable regulations and prevent potential legal complications down the line.
Gathering Materials and Tools: Assembling the necessary materials and tools before beginning construction streamlines the process and minimizes delays. Essential materials include cinder blocks, gravel base material, sand leveling material, landscape fabric, and optionally, polymeric sand for joint filling. Required tools include a shovel, rake, tamper (hand or plate compactor), level (spirit or laser), measuring tape, wheelbarrow, safety glasses, work gloves, and a rubber mallet.
Calculating Material Quantities: Accurately calculating the required quantities of materials prevents shortages and excess purchases. The amount of cinder blocks required depends on the patio's square footage and the size of the blocks. Calculate the volume of gravel and sand needed based on the desired base depth and the patio area. Using online calculators or consulting with a landscape supply professional can aid in accurate material estimation.
Excavation and Base Preparation
The foundation for a durable cinder block patio is a properly prepared base. This involves excavation and layering materials to ensure stability, drainage, and a level surface.
Excavating the Area: Excavate the area within the marked perimeter to a depth sufficient to accommodate the gravel base, sand leveling layer, and the cinder blocks themselves. A general guideline is to excavate approximately 6-8 inches deep. The depth may need to be adjusted based on local soil conditions and expected traffic load. Ensure that the bottom of the excavation is reasonably level.
Installing Landscape Fabric: Lay landscape fabric over the excavated area. The fabric helps prevent weed growth and prevents the gravel base from mixing with the underlying soil. Overlap the edges of the fabric to ensure complete coverage. Secure the fabric with landscape staples or by weighing it down with gravel.
Adding and Compacting the Gravel Base: Spread a layer of gravel base material evenly over the landscape fabric. A gravel base typically consists of crushed gravel or road base. The depth of the gravel base should be approximately 4-6 inches. Compact the gravel thoroughly using a hand tamper or plate compactor. Proper compaction is crucial for creating a stable and long-lasting base. Compacting in multiple passes, with light watering between passes, often yields better results.
Adding and Leveling the Sand Layer: Spread a layer of coarse sand over the compacted gravel base. This sand layer serves as a leveling bed for the cinder blocks. The depth of the sand layer should be approximately 1-2 inches. Use a rake or screed board to create a smooth and level surface. Precise leveling is critical for achieving a flat and even patio surface. Use a level to check for any unevenness and make adjustments as needed. Consider using PVC pipes as guides for screeding the sand to ensure an even thickness.
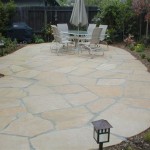
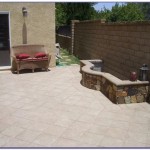
Laying the Cinder Blocks
Once the base is prepared, the next step is to lay the cinder blocks. This process requires careful attention to alignment, spacing, and leveling to achieve a professional-looking result.
Planning the Layout: Before laying the cinder blocks, plan the layout to minimize cuts and ensure an aesthetically pleasing pattern. Consider starting from a straight edge, such as a house foundation or a property line. Dry-lay the first row of cinder blocks to check for proper alignment and spacing. Adjust the sand layer as needed to ensure that the blocks are level.
Laying the First Row: Begin laying the first row of cinder blocks along the planned starting point. Use a level to ensure that each block is level both horizontally and vertically. Adjust the sand layer beneath the blocks as needed to achieve a perfectly level surface. Use a rubber mallet to gently tap the blocks into place. Maintain consistent spacing between the blocks to create uniform joints.
Continuing the Pattern: Continue laying the cinder blocks, following the chosen pattern. Stagger the joints between rows to create a stronger and more visually appealing patio. Use a level frequently to check for proper alignment and leveling. Adjust the sand layer beneath the blocks as needed to maintain a consistent surface. Avoid walking directly on the newly laid blocks until the patio is complete to prevent shifting.
Cutting Cinder Blocks: Inevitably, some cinder blocks will need to be cut to fit along the edges of the patio. A circular saw with a masonry blade is typically used for cutting cinder blocks. Wear safety glasses and a dust mask to protect against flying debris and dust. Score the block along the cut line before making a full cut. This helps prevent chipping and ensures a clean cut. Exercise caution when operating power tools and follow all safety guidelines.
Filling Joints (Optional): Once the cinder blocks are laid, the joints can be filled with sand or polymeric sand. Sand provides a natural look, while polymeric sand hardens when wetted, preventing weed growth and erosion. Sweep the sand or polymeric sand into the joints, ensuring that they are completely filled. For polymeric sand, follow the manufacturer's instructions for watering and curing. The hardening process helps to lock the cinder blocks in place and create a more stable patio surface.
Addressing Potential Issues
While following these steps meticulously increases the likelihood of a successful patio build, several potential issues can arise that require proactive solutions. Addressing these issues promptly prevents minor problems from escalating into major setbacks.
Poor Drainage: If the patio is located in an area prone to water accumulation, poor drainage can lead to instability and damage to the cinder blocks. Ensure that the gravel base is properly compacted and sloped away from the house to promote water runoff. Consider installing a drainage system, such as a French drain, if necessary. Properly addressing drainage issues prevents water damage and prolongs the lifespan of the patio.
Shifting Blocks: Over time, cinder blocks may shift due to ground movement or improper base preparation. Regularly inspect the patio for any signs of shifting or unevenness. If blocks have shifted, remove them, re-level the base, and reinstall the blocks. Filling the joints with polymeric sand can help prevent future shifting. Promptly addressing shifting blocks prevents further damage and maintains the integrity of the patio.
Weed Growth: Weeds can grow between the cinder blocks, detracting from the patio's appearance. Regularly remove weeds by hand or with a weeding tool. Applying a weed preventer can help inhibit weed growth. Filling the joints with polymeric sand can also help prevent weed growth. Maintaining a weed-free patio preserves its aesthetic appeal and prevents damage to the structure.
Cracked or Damaged Blocks: Cinder blocks can crack or become damaged due to impact or weathering. Replace any cracked or damaged blocks promptly to prevent further deterioration. Carefully remove the damaged block and replace it with a new one, ensuring that it is properly leveled and aligned. Addressing cracked or damaged blocks maintains the structural integrity and appearance of the patio.
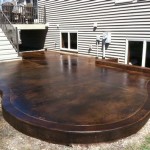
By carefully planning, preparing the base, laying the cinder blocks meticulously, and addressing potential issues promptly, a durable and aesthetically pleasing cinder block patio can be created. This outdoor living space provides a valuable extension of the home, offering a comfortable and functional area for relaxation and entertainment.

Diy Cinder Block Bench Mince Republic

Diy Cinder Block Bench C R A F T

Diy Cinder Block Bench Only 4 Materials Somewhat Simple

6 Creative Cinder Block Projects The Owner Builder Network Backyard Ideas For Small Yards Diy Patio

Concrete Thinking How To Make Mod Stackable Sculptures With Blocks The Horticult

Create More Outdoor Seating With A Diy Cinderblock Bench

Cinder Block And Pavers Step Patio Steps Diy Paver

Diy Projects 15 Ideas For Using Cinder Blocks Survivopedia

Create More Outdoor Seating With A Diy Cinderblock Bench

24 Amazing Diy Cinder Block Ideas For Garden Balcony Web
Related Posts