How To Build A Roof Over Your Patio
Adding a roof over an existing patio can significantly enhance outdoor living space, providing protection from the elements and increasing the usability of the area throughout the year. This project, while demanding, is achievable for experienced DIY enthusiasts with a solid understanding of construction principles and access to the necessary tools and materials. This article outlines the key steps involved in building a patio roof, emphasizing planning, permitting, structural considerations, and construction techniques.
Planning and Preparation: Laying the Foundation for Success
The initial phase of building a patio roof is crucial and involves thorough planning and preparation. This stage encompasses defining the scope of the project, obtaining necessary permits, designing the structure, and gathering materials and tools. Failure to adequately address these aspects can lead to costly errors, delays, and potential safety hazards.
First and foremost, determine the desired size and shape of the roof. Consider the existing patio dimensions, the desired coverage area, and any architectural constraints. Visualizing the finished product through sketches or 3D models can be beneficial at this stage. Consider the functionality of the space. Is the primary goal to provide shade, shelter from rain, or a combination of both? The answer will influence the design choices.
Next, research local building codes and regulations. Most municipalities require permits for any structural modification to a property, including adding a roof. Contact the local building department to obtain the necessary applications and information regarding required inspections. This may involve submitting detailed plans of the proposed roof structure, including dimensions, materials, and anchoring methods. Adhering to building codes is essential for ensuring the safety and structural integrity of the roof and avoiding potential fines or legal issues.
The design phase involves selecting the type of roof desired (e.g., gable, shed, flat) and calculating the necessary dimensions and load-bearing capacity. Gable roofs offer good water runoff and a traditional aesthetic, while shed roofs are simpler to construct and can be effective for deflecting sunlight. Flat roofs require meticulous waterproofing to prevent leaks and are generally suitable for smaller patios. Consult with a structural engineer or experienced contractor to ensure the design meets local building codes and can withstand anticipated wind and snow loads.
Once the design is finalized, create a detailed materials list. This should include lumber for posts, beams, rafters, and sheathing; roofing materials; fasteners (nails, screws, bolts); concrete for post footings; and any decorative elements. Purchase high-quality materials that are suitable for outdoor use and resistant to weather damage. When choosing lumber, consider pressure-treated wood for posts and any components in direct contact with the ground. Create a corresponding tool list, including items like a circular saw, drill, level, measuring tape, hammer, post-hole digger, and safety glasses.
Structural Considerations: Ensuring Stability and Safety
The structural integrity of the patio roof is paramount. It must be able to withstand wind, snow, and other environmental loads without collapsing or causing damage. This requires careful attention to the selection of materials, the design of the framing, and the method of anchoring the roof to the existing structure or ground.
The foundation of the roof structure typically consists of vertical posts that support the beams and rafters. The posts should be set in concrete footings that extend below the frost line to prevent heaving due to freezing temperatures. The size and depth of the footings should be determined based on the local soil conditions and the weight of the roof. Use a post-hole digger to create the holes for the footings, ensuring they are level and plumb. Place the posts in the holes and pour concrete around them, ensuring they are properly aligned and braced while the concrete sets.
Beams are horizontal structural members that span the distance between the posts and support the rafters. The size and spacing of the beams depend on the span and the load they are designed to carry. Use appropriately sized lumber for the beams, ensuring it is straight and free from defects. Attach the beams to the posts using bolts or lag screws, ensuring a secure and rigid connection. Consider using metal connectors to enhance the strength of the connection.
Rafters are angled structural members that extend from the beam to the roof ridge or edge. They provide the framework for the roof sheathing and roofing materials. The spacing of the rafters depends on the type of roofing material used and the anticipated load. Cut the rafters to the correct length and angle, ensuring they are accurately aligned. Attach the rafters to the beams and ridge board using nails or screws. Consider using hurricane ties to further secure the rafters to the beams, especially in areas prone to high winds.
Sheathing is the material that covers the rafters and provides a solid surface for the roofing materials. Typically, plywood or OSB (oriented strand board) is used for sheathing. Attach the sheathing to the rafters using nails or screws, ensuring it is properly aligned and tightly secured. Leave small gaps between the sheathing panels to allow for expansion and contraction due to temperature changes.
The Construction Process: Step-by-Step Guide
With the planning and structural considerations addressed, the construction process can begin. This involves erecting the posts, installing the beams and rafters, applying the sheathing, and installing the roofing material. Precision and attention to detail are crucial at this stage to ensure a structurally sound and aesthetically pleasing roof.
Begin by setting the posts. Dig the post holes according to the designed depth and diameter, ensuring they are positioned accurately according to the plans. Place the posts into the holes, verifying plumb with a level. Pour concrete into the holes, surrounding the posts, and brace them until the concrete is fully cured. This process typically takes 24-48 hours.
Once the posts are firmly set, install the beams. Lift the beams into position and attach them to the posts using appropriate fasteners. Ensure the beams are level and securely fastened. Consider using temporary supports to hold the beams in place while attaching them to the posts. Double-check that all connections are tight and secure.
Next, install the rafters. Cut the rafters to the correct length and angle, following the roof design. Attach the rafters to the beams and ridge board, ensuring they are evenly spaced and properly aligned. Use nails or screws to fasten the rafters securely. Consider using hurricane ties or other metal connectors to enhance the strength of the connections, especially in areas prone to high winds. Maintaining consistent spacing and accurate angles during rafter installation is key to achieving a structurally sound roof.
After the rafters are in place, apply the sheathing. Cut the sheathing panels to size and attach them to the rafters using nails or screws, ensuring they are properly aligned and tightly secured. Leave small gaps between the sheathing panels to allow for expansion and contraction due to temperature changes. Overlap the seams of the sheathing panels to prevent water from penetrating the roof structure.
Finally, install the roofing material. The choice of roofing material will depend on the aesthetic preferences, budget, and local climate. Common roofing materials include asphalt shingles, metal roofing, and wood shingles. Follow the manufacturer's instructions for installing the roofing material, ensuring it is properly aligned and securely fastened. Pay close attention to flashing details around vents, chimneys, and other roof penetrations to prevent water leaks. Proper roofing installation is essential for protecting the roof structure from the elements and ensuring long-term durability.
After the roof is complete, inspect it thoroughly for any defects or areas of concern. Address any issues promptly to prevent them from escalating into more significant problems. Apply a sealant or protective coating to the roof to enhance its durability and resistance to weathering.
This project requires knowledge in structural engineering, and it's highly recommended getting a professional when you have no prior experience.

Design Of A Roof Addition Over An Existing Concrete Patio In Bozeman Mt Part 1

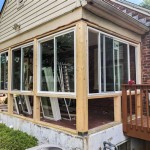
How To Build A Roof Over My Existing Deck Costs Designs

Patio Cover Plans Build Your Or Deck

Patio Cover Plans Build Your Or Deck

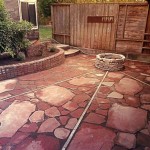
Building A Covered Patio With 30ft Span The Awesome Orange

How Much Does It Cost To Build A Roof Over My Deck Or Patio In Colorado

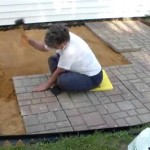
Diy Turning A Concrete Slab Into Covered Deck Catz In The Kitchen

How To Build A Roof Over My Existing Deck Costs Designs

Building A Roof Over Deck What To Know Sponsored State Journal Com

How Much Does It Cost To Build A Roof Over My Deck Or Patio In Colorado
Related Posts