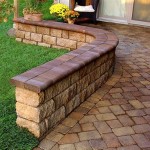
Leveling Patio Pavers: The Perfect Finishing Touch
A well-constructed patio significantly enhances a property's aesthetic appeal and functional outdoor living space. While design and material selection are crucial, the long-term success and visual appeal of any paver patio hinges on meticulous leveling. Uneven pavers not only detract from the overall appearance but also pose potential safety hazards, create drainage issues, and contribute to premature material degradation. Ensuring perfectly level pavers is, therefore, the definitive finishing touch that guarantees a durable, beautiful, and safe outdoor area.
This article will explore the essential steps and considerations involved in leveling patio pavers, emphasizing the importance of each phase and providing detailed guidance for achieving professional-quality results. From proper base preparation to the final adjustments, a systematic approach to leveling ensures a patio that will stand the test of time.
Proper Base Preparation: The Foundation for Level Pavers
The base is the bedrock of any paver patio, and inadequate preparation is the most common cause of uneven pavers. A solid, well-compacted base provides the necessary support and stability, preventing shifting and settling that leads to surface irregularities. The process involves several critical steps, each contributing to the overall levelness and longevity of the patio.
First, the area must be excavated to the appropriate depth. This depth depends on several factors, including the anticipated load (foot traffic vs. vehicular traffic), soil type, and climate. A general guideline for a standard patio designed for foot traffic is 6-8 inches of base material. However, local building codes and material supplier recommendations should always be consulted for specific requirements.
Following excavation, the subgrade must be compacted. This is accomplished using a plate compactor, which consolidates the soil, creating a stable and level surface. Compaction should be performed in multiple passes, ensuring the entire area is thoroughly treated. The subgrade should be free of any organic material, large rocks, and debris, which can compromise its stability.
The next step is the installation of the base material. This typically consists of crushed aggregate, such as gravel or crushed stone. The aggregate should be applied in layers, typically 2-4 inches thick per layer, and each layer must be compacted before adding the next. This layered approach ensures uniform compaction and prevents voids within the base. A plate compactor is essential for this step, ensuring each layer is dense and stable.
Maintaining a slight slope for drainage is also crucial during base preparation. A gradient of approximately 1/8 inch per foot is generally recommended to direct water away from the house and prevent standing water on the patio surface. This drainage slope should be integrated into each layer of the base material, ensuring consistent water runoff across the entire patio area.
Once the base material is fully compacted and the drainage slope is established, a layer of bedding sand is added. This sand layer, usually 1-inch thick, provides a smooth and level surface upon which the pavers will be placed. The bedding sand should be screeded using two pipes or boards set level and a flat board to drag across them, creating a perfectly level surface. It is crucial to avoid compacting the bedding sand, as compaction will affect the final paver level.
Laying Pavers and Achieving a Consistent Surface
With a properly prepared base, the paver installation process is significantly simplified. However, careful attention to detail is still required to ensure a level and aesthetically pleasing surface. This involves selecting appropriate laying patterns, maintaining consistent spacing, and making incremental adjustments to ensure each paver sits perfectly level.
Before laying any pavers, it is helpful to dry-lay a section of the patio to visualize the chosen pattern and make any necessary adjustments. This allows for the identification of potential issues, such as the need to cut pavers to fit specific areas or to adjust the overall layout for aesthetic balance. Planning is crucial to preventing problematic cuts later.
The laying process should begin from a straight edge, such as a house foundation or a pre-existing border. This ensures a consistent starting point and helps maintain alignment throughout the project. Pavers should be carefully placed on the bedding sand, using spacers to maintain consistent joint spacing. Consistent joint spacing is not only aesthetically pleasing but also essential for the proper application of joint sand later.
As pavers are laid, their level should be checked regularly using a level and a rubber mallet. If a paver is too high, it can be gently tapped down with the mallet, taking care not to damage the paver. If a paver is too low, it can be lifted, and a small amount of bedding sand can be added underneath to raise it to the desired level.
Maintaining the established drainage slope is also crucial during the paver laying process. Pavers should be laid in a manner that follows the slope of the base, ensuring water continues to drain away from the house. A level can be used in conjunction with the established slope to verify the proper gradient.
Cutting pavers to fit edges or around obstacles is often necessary. A paver saw with a diamond blade is the most effective tool for this task, providing clean and precise cuts. Safety glasses and hearing protection should always be worn when operating a paver saw. Remember, measure twice, cut once.
Final Adjustments and Joint Sand Application
Even with meticulous base preparation and careful paver placement, minor adjustments are often necessary to achieve a perfectly level surface. This involves a final inspection of the entire patio, identifying any areas that are slightly uneven and making the necessary corrections. The application of joint sand is the final step in securing the pavers and providing a stable, interlocking surface.
After all the pavers are laid, a thorough inspection of the entire patio is required. Any pavers that are slightly out of level should be adjusted using the same techniques described earlier – tapping them down with a rubber mallet or adding bedding sand underneath.
A long straight edge and a level are invaluable tools for this final inspection. By placing the straight edge across multiple pavers, any high or low spots can be easily identified. A level placed on top of the straight edge confirms the degree of unevenness, allowing for precise adjustments.
Once all the pavers are level, joint sand is applied. This sand fills the gaps between the pavers, providing lateral support and preventing movement. The joint sand should be swept into the joints using a broom, ensuring all gaps are completely filled. It is recommended to use polymeric sand, which hardens when wet, providing a more durable and weed-resistant joint.
After sweeping in the joint sand, the patio should be lightly watered to help the sand settle into the joints. This watering process may need to be repeated several times to ensure the joints are completely filled. For polymeric sand, follow the manufacturer's instructions for wetting, as excessive water can damage the product.
Finally, the patio should be swept clean of any excess sand. This ensures a clean and aesthetically pleasing finished product. Maintaining the patio involves periodically inspecting the joints and reapplying joint sand as needed to prevent weed growth and maintain surface stability.

How To Get Your Yard Leveled For Paverspavestone Brick Paving

Laying Patio Pavers Polycor Inc

We Built A Paver Patio Like Pro Start To Finish

Do S And Don Ts Of Paver Installation Step 2 3 Base Preparation

Amazing Diy Paver Patio Using The Brock Base Panel System

How To Build A Paver Patio Rogue Engineer

Take The Fun Outside With A Paver Patio Seattle Times

Paver Step Replacing Concrete Steps Avoiding Shifting

How To Build A Paver Patio Young House Love

Elevate Your Outdoor Ultimate Paver Patio Installation Tips
Related Posts


