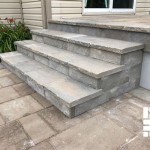
Creating a patio with patio blocks is a great way to add character to your outdoor living space. Patio blocks are easy to install and can be done in a few hours, depending on the size of the area you are covering. Patio blocks are available in a variety of sizes, shapes and colors, allowing for a wide range of creative possibilities. With the right tools and materials, you can quickly and easily create a beautiful patio.
The first step in installing patio blocks is to measure the area you plan to cover. This will help you determine the number and type of blocks you will need. Once you have the measurements, it is time to prepare the surface. This can be done by removing any existing debris or vegetation, and then leveling the ground with a shovel. It is important to make sure the ground is level, to ensure the blocks are laid properly.
Once the surface is prepared, you can begin to lay the blocks. Start at one corner and lay the first block, making sure it is level and properly aligned. Place the next block next to it, making sure the sides are flush and the blocks are properly connected. Continue laying the blocks until the entire area is covered. It is important to check the level of each block as you go, to ensure a uniform look.
Once the blocks are laid, it is time to secure them. This can be done by using a masonry adhesive or by placing the blocks into a mortar mix. If using mortar, make sure to use enough to fill in any gaps between the blocks. This will help keep the blocks secure and prevent any shifting or movement.
Finally, you can add sand to the newly laid patio blocks. This will help fill in any cracks or gaps, and will also help to keep the blocks from shifting or moving. Once the sand is in place, you can use a broom to sweep it into the cracks and make sure the patio looks even and uniform. With a little time and effort, you can create a beautiful patio that will last for years.


Related Posts


