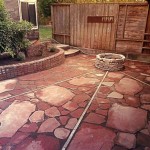
How To Replace Patio Stones
Replacing patio stones is a task that can significantly enhance the aesthetic appeal and functionality of an outdoor living space. Whether due to wear and tear, cracking, or simply a desire for a new look, understanding the process of replacing patio stones is crucial for achieving a durable and visually pleasing result. This article provides a comprehensive guide to replacing patio stones, covering the necessary tools, materials, and step-by-step instructions.
Before initiating the replacement process, a thorough assessment of the existing patio is essential. This assessment will help determine the extent of the damage and the number of stones that need replacing. It is also important to consider the type of stones currently in place, as matching the existing style and colour will ensure a seamless integration of the new stones. Identifying any underlying issues, such as drainage problems or unstable base materials, is equally important, as these issues must be addressed before laying the new stones to prevent future problems.
Preparing for the Replacement
Effective preparation is paramount for a successful patio stone replacement. This stage involves gathering the necessary tools and materials, as well as preparing the work area. A well-prepared workspace minimizes disruptions and ensures a smoother, more efficient project.
The following tools are typically required for replacing patio stones: a rubber mallet, a brick chisel, a hand tamper, a level, a measuring tape, a shovel, a wheelbarrow, a stiff-bristled brush, safety glasses, and work gloves. The rubber mallet is used for gently tapping the new stones into place without damaging them. The brick chisel aids in removing damaged stones and shaping surrounding materials. The hand tamper is employed to compact the base material, providing a stable foundation. A level is crucial for ensuring that the new stones are laid flat and even with the surrounding surface. A measuring tape is necessary for accurately measuring the area and ensuring that the new stones fit properly. The shovel and wheelbarrow are used for moving materials, such as gravel and sand. The stiff-bristled brush is helpful for sweeping away debris and cleaning the stones. Safety glasses and work gloves are essential for protecting the eyes and hands during the project.
In addition to the tools, the following materials will be required: replacement patio stones (matching the existing style and colour), base material (such as gravel or crushed stone), leveling sand, and polymeric sand (for filling the joints between the stones). The amount of base material and leveling sand required will depend on the size of the area being repaired and the depth of the existing base. It is generally recommended to purchase slightly more materials than estimated to account for any waste or unforeseen needs. The polymeric sand is a crucial component for ensuring the stability and longevity of the patio, as it hardens when wet, preventing weeds from growing and minimizing stone movement.
Preparing the work area involves several steps. First, the area should be cleared of any furniture, plants, or other obstructions. Next, the damaged stones that need replacing should be identified and marked. It is helpful to take photographs of the existing patio layout before removing the stones, as this will serve as a reference when laying the new stones. Finally, ensure that the work area is well-ventilated and that there is adequate lighting, especially if working in the evening.
Removing the Damaged Patio Stones
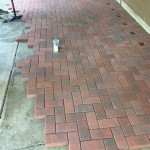
The removal of damaged patio stones requires careful attention to avoid further damaging surrounding stones or the underlying base. This process should be performed methodically to ensure a clean and efficient removal.
Begin by using the brick chisel and rubber mallet to gently loosen the damaged patio stone. Place the chisel at the edge of the stone and tap it firmly with the mallet. Repeat this process around the perimeter of the stone until it is sufficiently loosened. If the stone is particularly stubborn, it may be necessary to chip away at the edges to break it into smaller pieces. Once the stone is loosened, carefully lift it out of place. If the stone is heavy, it may be necessary to use a pry bar to assist in the removal.
After removing the damaged stone, inspect the underlying base material. Remove any loose debris, weeds, or other contaminants. If the base material is compacted and stable, it may only be necessary to add a thin layer of leveling sand. However, if the base material is uneven or unstable, it will need to be repaired or replaced. This may involve adding more gravel or crushed stone and compacting it with the hand tamper. The goal is to create a solid and level base for the new patio stone.
Ensure that the surrounding stones are clean and free of any debris. Use a stiff-bristled brush to sweep away any dirt or sand. If necessary, use a mild detergent and water to clean the stones. Rinse thoroughly with clean water and allow the stones to dry completely before proceeding.
Laying the New Patio Stones
Laying the new patio stones requires precision and attention to detail to ensure a level and aesthetically pleasing result. This stage involves preparing the base, placing the stones, and leveling them to match the surrounding surface.
Begin by adding a layer of leveling sand to the prepared base. The depth of the sand layer will depend on the thickness of the patio stones and the desired level of the finished surface. Use a level to ensure that the sand layer is flat and even. If necessary, use a hand tamper to compact the sand lightly. Remember that the new stone needs to be flush with the existing stones with no tripping hazards. This is one of the most important aspects of doing this job correctly.
Carefully place the new patio stone into position. Ensure that it aligns with the surrounding stones and that the joints are consistent. Use the rubber mallet to gently tap the stone into place. Avoid striking the stone too forcefully, as this can damage it. Continue tapping the stone until it is level with the surrounding surface. Use a level to check the stone for proper alignment in all directions.
If necessary, adjust the sand layer to fine-tune the level of the stone. Add or remove sand as needed until the stone is perfectly level. Once the stone is in place, check the joints between the stones. The joints should be consistent in width and depth. If necessary, use a brick chisel to adjust the edges of the stones to ensure a uniform joint. Proper joint width is important for the next step when installing the polymeric sand.
Repeat this process for each new patio stone. As you lay the stones, periodically step back and assess the overall appearance. Make any necessary adjustments to ensure that the stones are evenly spaced and level. Taking the time to do this accurately will result in a more professional and long-lasting patio.
Filling the Joints with Polymeric Sand
Filling the joints between the patio stones with polymeric sand is a critical step in ensuring the stability and longevity of the patio. Polymeric sand hardens when wet, creating a durable and weed-resistant joint that prevents stone movement.
Before applying the polymeric sand, ensure that the patio stones are clean and dry. Sweep away any debris or loose sand from the joints. The joints should be completely dry to allow the polymeric sand to bond properly. Applying the polymeric sand when the joints are wet will prevent proper bonding and lead to the polymeric sand failing.
Pour the polymeric sand onto the patio surface. Use a stiff-bristled brush to sweep the sand into the joints. Ensure that the joints are completely filled with sand. Use your fingers to pack the sand tightly into the joints. It is important to completely fill the joints to prevent water from penetrating and undermining the stones.
Once the joints are filled, use a broom to sweep away any excess sand from the patio surface. It is important to remove all excess sand to prevent staining or discoloration. Use a leaf blower, if available, to remove any remaining sand particles. Sweep the broom in multiple directions to ensure all the polymeric sand is removed from the pavers.
Lightly water the patio surface using a garden hose with a gentle spray nozzle. Avoid using a high-pressure nozzle, as this can wash away the polymeric sand. Water the patio until the sand is thoroughly saturated. The water will activate the polymers in the sand, causing it to harden. Watering the pavers heavily will cause the polymeric sand to clump and leave a film on the pavers.
Allow the polymeric sand to dry completely. This may take several hours or even a full day, depending on the weather conditions. Avoid walking on the patio until the sand is fully hardened. Once the sand is hardened, the patio is ready for use. Check the product information on the polymeric sand to know when it is safe for heavy use and furniture placement.
Maintaining the Repaired Patio
Proper maintenance will extend the life of the repaired patio and keep it looking its best. Regular cleaning and inspection are essential for preventing damage and identifying potential problems early on.
Sweep the patio regularly to remove any debris, leaves, or dirt. This will prevent the accumulation of organic matter that can stain the stones or promote weed growth. A stiff-bristled broom is ideal for this task. You should also sweep the joints between the pavers to keep the polymeric sand intact.
Wash the patio periodically with a mild detergent and water. Use a garden hose to rinse away any soap residue. Avoid using harsh chemicals or abrasive cleaners, as these can damage the stones. Power washing can be used but should be approached with caution, as excessive pressure can damage the stones and joints.
Inspect the patio regularly for any signs of damage, such as cracking, chipping, or shifting stones. Address any problems promptly to prevent them from worsening. Replace any damaged stones as soon as possible. If you identify low spots or sunken areas, you may need to remove the stones and add more base material or leveling sand. It is also important to inspect the joints for erosion or damage.
To prevent weed growth, apply a weed killer to the joints between the stones. Choose a weed killer that is safe for use on patios and that will not stain the stones. Reapply the weed killer as needed. Pulling weeds by hand is another option, but it is important to remove the entire root to prevent regrowth.
Protect the patio from extreme weather conditions, such as heavy snow or ice. Use a snow shovel or ice scraper to remove snow and ice. Avoid using salt or other de-icing chemicals, as these can damage the stones. Consider covering the patio with a tarp or plastic sheeting during the winter months to protect it from the elements.

Dammann S Garden Company Diy Series How To Install Level Pavers And Patio Stones

How To Remove Pavers And Replace Them Diy

Quick Patio Makeover Installing Pavers Over Old Concrete Paul Ricalde

How To Remove Paver Stone Without Damage 4 Ways Diy

Easiest Patio Pavers You Ll Ever Install

How To Install Patio Pavers The Home Depot

How To Repair Sinking Patio Pavers Diy

How To Repair Stone Walkway Mortar This Old House

How To Lay Patio Pavers

Installing A Diy Paver Patio Is The Ultimate Spring Project
Related Posts