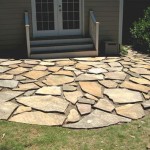
How to Replace a Patio Slab
A patio is a great place to relax and enjoy the outdoors, but over time, the slabs that make up the patio can become damaged or cracked. This can be due to a number of factors, such as tree roots, frost heave, or simply wear and tear. If you have damaged patio slabs, you can replace them yourself, saving money and gaining a sense of satisfaction from a DIY project. This guide will provide you with the necessary steps to replace a patio slab effectively.
Prepare the Area
Before you start replacing the slab, you need to prepare the area. This involves clearing away any obstacles, such as plants, furniture, and debris. It's also recommended to mark the slab you're replacing with spray paint or chalk, and remove the surrounding sand or gravel to expose the base of the slab. This will provide you with a clear workspace to work with.
Remove the Damaged Slab
The next step is to remove the damaged slab. This can be done using a combination of tools like a pry bar, hammer, and a small sledgehammer. Be sure to wear safety glasses and gloves to protect yourself from flying debris. If the slab is sitting on a concrete base, you may need to use a chisel and hammer to break up the concrete around the edges before prying up the slab. Carefully remove any remaining mortar or glue from the surrounding slabs to ensure a proper fit for the new slab.
Prepare the New Slab
Once the old slab is removed, you need to prepare the new slab. This involves cleaning the new slab of any dirt or debris. If the new slab is made of concrete, you can use a wire brush or a power washer to clean it. If the slab is made of another material, like stone or pavers, you can use a damp cloth to wipe it down. Measure the dimensions of the new slab and compare them to the dimensions of the space you intend to replace. Any significant discrepancies may require additional adjustment to the base.
Install the New Slab
Now it's time to install the new slab. This involves placing the new slab in the space formerly occupied by the old slab. Before placing it, ensure the ground beneath is level and even. You can use a shovel to adjust the base as needed. If the slab is being installed on a concrete base, use mortar or a concrete adhesive to secure the slab. If the slab is being installed on a sand or gravel base, you can use a heavy rubber mallet to tap the slab into place. As you install the new slab, ensure it is level with the surrounding slabs and that the spacing between the slabs is uniform. Once the slab is in place, allow the mortar or adhesive to cure completely, as per the manufacturer's instructions.
Settling and Grouting
Allow the newly installed slab some time to settle. This could take a few days, depending on weather conditions and the type of adhesive used. After settling, it's recommended to fill the gaps between slabs with grout. This will give your patio a finished look, protect the base from moisture, and prevent weeds from growing between the slabs.
Safety Precautions
Replacing a patio slab requires some physical exertion and involves working with heavy objects and tools. Always prioritize safety when working on this type of project. Wear appropriate safety gear like gloves, safety glasses, and steel-toe boots. If you have to use power tools such as a jackhammer or power saw, be sure to unplug them before you make any adjustments. It's crucial to follow the instructions provided with your tools and equipment to ensure safe and efficient operation. Additionally, if you are unsure about any part of the replacement process or if you are dealing with a very large or complex patio, consider seeking professional assistance from a qualified contractor.
Tips for a Successful Replacement
To ensure a successful outcome when replacing a patio slab, consider these tips: *
Choose a high-quality slab:
Select a slab made from durable materials that can withstand weather conditions and foot traffic. *Use the right tools and materials:
Ensure you have the appropriate tools and materials for the job. *Take your time and be patient:
Replacing a slab is a meticulous process. Don't rush the job, as it may lead to errors. *Seek professional help if needed:
If you are unsure about any part of the process or if you are dealing with a very large or complex patio, don't hesitate to call a professional contractor.By following these steps, you can successfully replace a patio slab and restore your patio to its former glory. Remember to prioritize safety and plan your project carefully.

Julian Cas S Diy Blog Archive Replacing A Broken Slab How To What Use Where Buy

Removing A Concrete Patio By Hand Delineate Your Dwelling

How To Repair A Patio S Grouting Sinking Checkatrade

How To Fix Loose Paving Slabs

How To Lay A Patio Expert Guide Laying Slabs Garden Ideas Tips Homebase

Patio Slab Pointing With Mortar 3 Diffe Methods

How To Install Pavers Over A Concrete Patio Family Handyman

Quick Patio Makeover Installing Pavers Over Old Concrete Paul Ricalde

How To Replace Old Patio Cover And Pour A New Concrete

How To Repair Paving Ideas Advice B Q
Related Posts