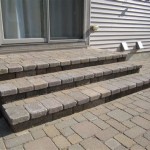
How To Repair Uneven Patio Pavers
Uneven patio pavers are a common issue for homeowners, leading to tripping hazards, aesthetic detractions, and potential long-term damage to the patio structure. Addressing these issues promptly and effectively is crucial for maintaining a safe and attractive outdoor living space. This article provides a comprehensive guide on how to identify, diagnose, and repair uneven patio pavers, enabling informed decision-making and successful project execution.
Before embarking on the repair process, a thorough assessment of the patio is necessary. This includes identifying the extent of the unevenness, determining the underlying causes, and selecting the appropriate tools and materials. Proper preparation will streamline the repair process and ensure a durable and aesthetically pleasing outcome.
Identifying the Causes of Uneven Pavers
Several factors can contribute to uneven patio pavers. Understanding these causes is critical for implementing effective and lasting repairs. The most common reasons include:
Subgrade Instability: The subgrade, the layer of compacted soil beneath the base material, is the foundation of any patio. If the subgrade is not properly compacted or is subject to erosion, settlement, or improper drainage, it can lead to uneven paver surfaces. This instability allows pavers to sink or shift over time, creating noticeable dips and bumps. Signs of subgrade issues include widespread unevenness across the patio and potential water pooling in certain areas.
Base Material Degradation: The base material, typically compacted gravel or crushed stone, provides a stable platform for the pavers. Over time, this material can compact unevenly, erode due to water infiltration, or become contaminated with organic matter. Poor compaction during initial installation is a common culprit. Degradation of the base material manifests as localized unevenness around specific pavers or sets of pavers, often accompanied by soft spots in the patio surface.
Improper Installation Techniques: Inadequate installation techniques, such as insufficient base material depth, improper paver spacing, or failure to use a leveling bed of sand, can result in uneven pavers. These errors often lead to immediate problems or manifest within a relatively short period after installation. Uneven joints between pavers and a lack of consistent paver height are indicative of installation flaws.
Environmental Factors: Extreme weather conditions, such as heavy rainfall, freeze-thaw cycles, and prolonged exposure to sunlight, can contribute to paver unevenness. Water infiltration can erode the base material, while freeze-thaw cycles can cause expansion and contraction, leading to paver displacement. Sunlight can also degrade polymeric sand, weakening the joint stabilization and allowing pavers to shift.
Root Intrusion: Tree roots or other vegetation growing beneath or near the patio can exert pressure on the pavers and disrupt the subgrade. This can cause localized unevenness and even cracking of pavers. Visible root growth near the patio edge or between pavers is a clear indication of this issue.
Tools and Materials Required for Repair
Before commencing the repair, ensure all necessary tools and materials are readily available. This will prevent interruptions and facilitate a smooth and efficient process. Essential items include:
Paver Lifter or Flathead Screwdriver: These tools are used to carefully remove the affected pavers without damaging them or surrounding pavers. A paver lifter is designed specifically for this purpose, offering better leverage and reducing the risk of chipping or cracking the pavers. A flathead screwdriver can be used as a substitute, but requires greater care to avoid damage.
Rubber Mallet: A rubber mallet is used to gently tap the pavers into place without damaging them. It provides a cushioned impact, preventing chipping or cracking that can occur with a metal hammer.
Level: A level is essential for ensuring that the repaired pavers are even with the surrounding surface. A standard spirit level or a laser level can be used, depending on the size of the repair area.
Shovel and Tamper: A shovel is used for removing and replacing base material, while a tamper is used for compacting the subgrade and base material to provide a stable foundation.
Wheelbarrow: A wheelbarrow is necessary for transporting materials such as base material, sand, and removed pavers.
Work Gloves and Safety Glasses: Personal protective equipment, such as work gloves and safety glasses, is crucial for protecting hands and eyes from debris and potential injury.
Base Material (Gravel or Crushed Stone): This material is used to rebuild the base beneath the pavers. The type of base material should match the original material used in the patio construction.
Leveling Sand: Leveling sand, typically coarse sand or paver sand, is used to create a smooth and even bedding layer for the pavers. This sand should be clean and free of organic matter.
Polymeric Sand: Polymeric sand is used to fill the joints between the pavers and stabilize them. It hardens when wetted, preventing weed growth and resisting erosion. Ensure the polymeric sand is compatible with the type of pavers used.
Measuring Tape: A measuring tape is needed to accurately measure the depth of the base material and the dimensions of the repair area.
Step-by-Step Repair Process
The following steps outline the process for repairing uneven patio pavers. The specific steps may vary depending on the extent of the damage and the underlying cause of the unevenness.
1. Remove the Affected Pavers: Carefully remove the uneven pavers using a paver lifter or flathead screwdriver. Insert the tool into the joints between the pavers and gently pry them up. If the pavers are difficult to remove, use a rubber mallet to tap them lightly from underneath. Set the pavers aside in a safe location, ensuring they are not damaged.
2. Excavate and Inspect the Subgrade and Base Material: Once the pavers are removed, excavate the area around the affected area to expose the subgrade and base material. Remove any loose or degraded base material. Inspect the subgrade for signs of instability, such as soft spots, erosion, or root intrusion. If root intrusion is present, carefully remove the roots without disturbing the surrounding soil.
3. Compact the Subgrade: If the subgrade is unstable, compact it using a hand tamper. Add additional soil if necessary to bring the subgrade to the proper level. Ensure the subgrade is level and well-compacted to provide a stable foundation for the base material.
4. Rebuild the Base Material: Add new base material to the excavated area, ensuring it matches the original material used in the patio construction. Spread the base material evenly and compact it using a hand tamper. The depth of the base material should be consistent with the surrounding area. Use a measuring tape to ensure the correct depth. Compacting the base material in layers is recommended for optimal stability.
5. Add a Leveling Bed of Sand: Spread a layer of leveling sand over the compacted base material. The sand should be approximately 1 inch thick. Use a level to ensure the sand is evenly distributed and level with the surrounding area. A screed board can be used to smooth and level the sand. Avoid walking on the leveling sand to prevent compaction and disturbance.
6. Replace the Pavers: Carefully place the pavers back into position on top of the leveling sand. Ensure the pavers are aligned with the surrounding pavers and that the joints are consistent. Use a rubber mallet to gently tap the pavers into place, ensuring they are level and flush with the surrounding surface. Use a level to check the paver height and adjust as needed by adding or removing sand.
7. Fill the Joints with Polymeric Sand: Once the pavers are in place, sweep polymeric sand into the joints between the pavers. Ensure the joints are completely filled with sand. Use a broom or brush to remove any excess sand from the paver surface.
8. Water the Polymeric Sand: Lightly water the polymeric sand using a garden hose with a gentle spray nozzle. Follow the manufacturer's instructions for the proper amount of water. The water activates the binding agents in the polymeric sand, causing it to harden and stabilize the pavers. Avoid overwatering, as this can wash away the sand and weaken the joints.
9. Allow to Cure: Allow the polymeric sand to cure according to the manufacturer's instructions. This typically takes 24-48 hours. Avoid walking on the repaired area during the curing process.
10. Inspect and Adjust: After the polymeric sand has cured, inspect the repaired area for any remaining unevenness or gaps. If necessary, add additional polymeric sand to fill any voids. Ensure the pavers are stable and level. If problems persist, the underlying cause may not have been adequately addressed, requiring further investigation and repair.
Regular maintenance of the patio is crucial for preventing future unevenness. This includes sweeping the patio regularly to remove debris, filling cracks and crevices with polymeric sand, and addressing drainage issues promptly. Periodically inspecting the patio for signs of instability and addressing minor problems early can prevent more significant and costly repairs in the future.

How To Fix Uneven Patio Pavers

How To Reset Pavers The Potato

How To Fix Uneven And Sunken Pavers Step By Guide

Save Thousands And Fix Your Patio Pavers Yourself Frugal Thumb

How To Level A Concrete Patio Homeserve Usa

Save Thousands And Fix Your Patio Pavers Yourself Frugal Thumb

How To Level Uneven Brick Pavers S

How To Level Uneven Brick Pavers S

How To Repair Sinking Patio Pavers Western Interlock

How Do You Fix Uneven Pavers
Related Posts