How to Redo a Patio Concrete Floor: A Comprehensive Guide
A damaged or outdated concrete patio can significantly detract from the overall aesthetic of your outdoor space. Fortunately, redoing a patio concrete floor is a manageable project that can dramatically enhance its appearance and functionality. Follow these step-by-step instructions for a successful patio floor transformation:
1. Preparation
Begin by removing all furniture and fixtures from the patio. Thoroughly clean the concrete surface with a pressure washer to eliminate dirt, debris, and loose concrete fragments. Inspect the concrete for any cracks, holes, or uneven areas that require repair.
Mark the locations of any utilities, such as gas lines or electrical outlets, to avoid damage during the removal process.
2. Concrete Removal
Protect the surrounding areas from debris by laying down tarps or plastic sheets. Use a concrete saw or jackhammer to break up the existing concrete into manageable pieces. For smaller patios, a sledgehammer may suffice.
Wear proper safety gear, including gloves, safety goggles, and earplugs, throughout the removal process.
3. Base Preparation
Once the concrete is removed, excavate the area to a depth of 4-6 inches. Compact the soil using a plate compactor or hand tamper to create a firm base.
Install a layer of gravel or crushed stone over the compacted soil for drainage purposes. Ensure a slope of approximately 1/4 inch per foot to direct water away from the patio.
4. Concrete Mixing and Pouring
Calculate the amount of concrete required based on the area of your patio and the desired thickness (typically 4-6 inches). Mix the concrete according to the manufacturer's instructions, ensuring proper hydration for optimal strength.
Pour the concrete mixture into the prepared base, using a screed or trowel to level it and remove any air pockets. Work quickly to prevent the concrete from setting prematurely.
5. Finishing
Smooth the surface of the concrete using a power trowel or hand float. For a non-slip finish, sprinkle a trowel-on texture additive over the wet concrete and work it into the surface.
Allow the concrete to cure for several days before applying a concrete sealer to protect it from moisture and staining.
6. Expansion Joints
To prevent cracking, install expansion joints every 6-8 feet across the width of the patio. Use preformed expansion joint strips or cut grooves into the concrete and fill them with a flexible sealant.
7. Decorative Touches
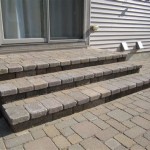
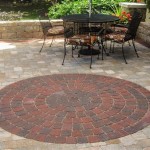
Once the concrete has cured, you can add decorative elements such as pavers, tiles, or stamp patterns to enhance the aesthetic. Stain or paint the concrete to match the surrounding decor.
Remember to maintain the patio floor regularly by sweeping, cleaning, and inspecting it for any damage. With proper care, your newly redone concrete patio will provide years of enjoyment and enhance the overall appearance of your outdoor living space.

3 Concrete Resurfacing Options For Patio

Resurfacing A Concrete Patio For Budget Diy Makeover Fab Everyday

Concrete Floor Resurfacing Refinishing Repair Sundek

4 Ways To Resurface Concrete In Minutes

9 Great Concrete Patio Ideas For A Makeover Remodelaholic

How To Remove Your Concrete Patio Dumpsters Com

Diy How To Paint Concrete Painting Patio Backyard

3 Concrete Resurfacing Options For Patio

How To Stain A Concrete Patio Easy Diy Project The Garden Glove

9 Great Concrete Patio Ideas For A Makeover Remodelaholic
Related Posts


