How To Raise Ground Level For Patio
A patio is a fantastic addition to any home, providing a dedicated outdoor space for relaxation, entertaining, and enjoying the fresh air. However, uneven ground or a low-lying patio can detract from its appeal and functionality. Raising the ground level of a patio can address these problems, creating a more level and visually appealing surface, while also enhancing drainage and accessibility.
This guide will provide a comprehensive overview of how to raise the ground level of a patio, outlining the essential steps from planning and preparation to materials and construction. By following these instructions, you can successfully transform your patio into a more functional and aesthetically pleasing space.
Assess the Existing Patio and Define the Desired Height
Before beginning any work, it's crucial to thoroughly assess the existing patio’s condition and determine the desired height for the raised level. This involves measuring the current patio’s dimensions and identifying any inconsistencies in the ground level. Consider the surrounding landscape, the height of nearby structures, and the desired functionality of the patio when determining the new height. For example, if you wish to create a more accessible patio, it may be necessary to raise it to match the height of your home's entryway.
Once you have established the desired height, calculate the amount of fill material needed. This can be done by subtracting the current ground level from the desired height and multiplying that value by the area of the patio. It's also important to consider the type of fill material and its compaction rate, as this can affect the actual amount of material required.
Choose the Appropriate Fill Material
The selection of fill material is crucial for ensuring a stable and durable raised patio. Various options are available, each with its own advantages and disadvantages. Here are some common materials used for raising ground level:
Crushed Stone:
A popular choice for patios, crushed stone offers excellent drainage and stability. It's available in various sizes, allowing you to choose an appropriate option for your project. However, it can be more expensive than other options.Gravel:
Gravel is a more affordable alternative to crushed stone, providing good drainage but potentially less stability. It's available in various colors and sizes, offering some aesthetic flexibility.Sand:
Sand is a budget-friendly option with good compaction properties. However, it can be prone to settling and may not offer sufficient drainage. It's best suited for smaller areas or projects where drainage is not a major concern.Soil:
Soil is the most cost-effective option but typically offers the least stability. It's not recommended for areas with heavy foot traffic or where drainage is a concern. If you choose soil, consider mixing it with other materials like sand or compost to improve its drainage and stability.When selecting fill material, consider the following factors:
• Drainage: Choose a material that allows for adequate drainage to prevent water accumulation and potential damage.
• Stability: Select a material that provides sufficient stability for the weight of the patio and its intended use.
• Aesthetics: If desired, choose a material that complements the existing landscaping and the overall aesthetic of your patio.
Prepare the Existing Patio and Ground
Before starting any construction, ensure the existing patio is properly prepared. This involves removing any loose or damaged pavers, cleaning the surface, and ensuring a level base. In addition, any vegetation growing around the perimeter of the patio needs to be removed to prevent future growth and potential damage to the raised level.
If necessary, you may need to excavate the ground around the patio to achieve a level base. This will also allow you to create a gradual slope for drainage, directing water away from the patio. For example, if you want to slope the patio towards a nearby garden, you can excavate a shallow channel around the perimeter.
Construct the Raised Level
Once the patio is prepared and the ground level is ready, you can start constructing the raised level. This involves layering the chosen fill material, ensuring proper compaction to achieve a stable and level surface.
Start by laying down a layer of geotextile fabric, which acts as a barrier against weeds and soil erosion. This is especially important if you are using soil as your primary fill material. Next, layer the selected fill material in increments, compacting each layer thoroughly using a tamper or plate compactor. This ensures that the fill settles evenly and provides a stable foundation for the raised level.
As you add layers of fill material, use a level to ensure that the surface is level and meets the desired height. You can adjust the amount of fill material added to each layer to achieve the desired slope and level. While compacting, be careful not to damage the existing patio surface. Take care to create smooth transitions between the existing patio surface and the new fill.
Install Edging and Finish the Raised Level
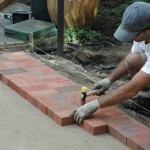
To define the raised level and prevent erosion, install edging around the perimeter of the patio. This can be done using various materials like bricks, stones, or prefabricated edging. Ensure that the edging is installed at a level that matches the desired height of the raised level.
Once the edging is installed, you can finish the raised level with a top layer of decorative gravel or pavers. Choose a material that complements the existing patio surface and the overall design of your outdoor space. Ensure that the top layer is evenly spread and compacted to provide a smooth and durable surface for your patio.
If you are using pavers, ensure that they are properly spaced and laid according to the manufacturer's instructions. Allow for drainage between the pavers by adding a layer of sand or gravel between them. This prevents water from accumulating on the surface and helps promote proper drainage.
Raising the ground level of your patio requires careful planning, preparation, and construction. By following these steps, you can create a more functional, aesthetically pleasing, and durable outdoor space for years to come.

How To Build A Raised Patio

How To Build A Raised Paver Patio Western Interlock

How To Build A Raised Patio With Retaining Wall Blocks

How To Raise Your Gardens Soil Level Successfully Buckinghamshire Landscape Gardeners

Raising And Leveling Sunken Patio Pavers Toolbox Divas

Leveling The Ground For Your Paver Patio Pavertime

Patio Lifting Leveling Repair Concrete Hero

How To Build A Raised Paver Patio Western Interlock

Raising And Leveling Sunken Patio Pavers Toolbox Divas

Avoiding Disaster Through Proper Design Of A Raised Paver Patio
Related Posts


