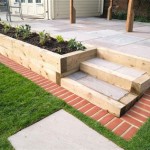
How To Properly Slope A Paver Patio
Creating a paver patio enhances outdoor living spaces, adding aesthetic value and functionality to a property. However, a crucial aspect often overlooked is proper sloping. A patio that lacks adequate slope can accumulate standing water, leading to potential damage from freeze-thaw cycles, pest infestations, and an overall unpleasant user experience. Establishing the correct slope during construction is paramount for a durable and aesthetically pleasing patio.
This article provides a comprehensive guide on how to properly slope a paver patio. Understanding the importance of slope, determining the appropriate grade, and executing the construction process with precision are all vital components of a successful paver patio project.
Understanding the Importance of Proper Patio Slope
The primary purpose of sloping a paver patio is to ensure effective water runoff. Without a slight decline, rainwater and melted snow accumulate on the patio surface. This collected water not only makes the patio unusable temporarily, but it also poses several long-term problems. The prolonged presence of water can accelerate the deterioration of paver materials through erosion and the saturation of the base layers, compromising the structural integrity of the entire patio.
Furthermore, standing water creates an ideal breeding ground for mosquitoes and other pests, detracting from the enjoyment of the outdoor space. Excess moisture can also lead to the growth of mold and mildew, posing health risks and requiring frequent cleaning. In colder climates, standing water that freezes and thaws can cause pavers to shift, crack, or heave, necessitating costly repairs. A well-sloped patio mitigates these issues by allowing water to drain efficiently, preserving the patio's longevity and usability.
Beyond functional benefits, proper sloping contributes to the overall aesthetic appeal of the patio. A level-looking surface that subtly directs water away prevents unsightly puddles and staining. This ensures that the pavers maintain their original color and texture, enhancing the visual appeal of the outdoor space for years to come.
Determining the Ideal Patio Slope and Drainage Plan
The ideal patio slope is generally recommended to be between 1/8 inch to 1/4 inch per foot. This translates to a drop of 1 to 2 inches for every 8 feet of patio length. This gradient is sufficient to allow for effective water drainage without creating a noticeable or uncomfortable incline for users. The specific slope chosen within this range may depend on factors such as the size of the patio, the type of pavers used, and the local rainfall patterns.
Before commencing any physical work, it is crucial to develop a comprehensive drainage plan. This plan dictates the direction in which water will flow off the patio surface and where it will be discharged. Several drainage options exist, including directing water towards a lawn area, a garden bed, or a dedicated drainage system such as a French drain or a catch basin. The choice of drainage solution should be based on the site's topography, the surrounding landscape, and any local building codes or regulations.
Consider the existing grade of the surrounding area when designing the drainage plan. Ideally, the patio slope should complement the natural contours of the land, allowing water to flow seamlessly away from the house foundation and other structures. Avoid directing water towards neighboring properties or creating areas where water can pool. If the existing grade poses challenges, consider incorporating landscaping features or drainage structures to facilitate proper water management.
Accuracy in measuring and marking the desired slope is essential. Utilize a level, measuring tape, and stakes to establish reference points along the patio's perimeter. Use string lines stretched between the stakes to represent the intended slope. These string lines serve as visual guides during the excavation and base preparation stages, ensuring that the surface is consistently sloped in the desired direction.
Executing the Construction Process with a Focus on Slope
The construction of a properly sloped paver patio involves several key steps, each requiring careful attention to detail. The first step is excavation. Remove topsoil and any existing vegetation from the designated patio area. Excavate to a depth that allows for the installation of the base material, bedding layer, and pavers, while maintaining the desired slope. Typically, this depth ranges from 8 to 12 inches, depending on the type of pavers and the local soil conditions.
During excavation, continuously check the slope using the string lines and a level. Ensure that the excavated surface follows the intended grade, allowing for the subsequent layers to be installed with the correct slope. Remove any high spots and fill in any low spots to create a uniform and consistent surface.
The next step is the installation of the base material. This layer typically consists of compacted gravel or crushed stone. The base provides a stable foundation for the pavers and facilitates drainage. Spread the base material evenly across the excavated area and compact it thoroughly using a plate compactor. Compact in multiple passes to achieve optimal density and stability.
As with excavation, maintain the desired slope during base material installation. Use the string lines as a guide to ensure that the base layer conforms to the intended grade. Use a level and a long screed board to create a smooth and consistent surface that mirrors the patio's final slope. This meticulous preparation is crucial for preventing future settling and ensuring a long-lasting, level patio surface.
Following the base layer, a bedding layer of sand is installed. This layer provides a smooth and uniform surface for setting the pavers. Spread a 1-inch layer of coarse sand evenly over the compacted base material. Use screed rails or pipes to create a level and consistent sand bed. Remove the screed rails and fill the resulting gaps with sand, ensuring a smooth transition.
While the sand layer is primarily intended for leveling, it's also important to maintain the overall slope established in the base layer. Avoid creating pockets or depressions in the sand that could impede water drainage. The sand should consistently follow the grade established previously.
Finally, set the pavers on the prepared bedding layer. Start at one edge of the patio and work systematically across the entire surface. Use a rubber mallet to gently tap each paver into place, ensuring that it is level with adjacent pavers and conforms to the overall patio slope. Use string lines as a visual guide to maintain alignment and ensure that the pavers are installed in a straight line.
As you set each paver, double-check the slope using a level. Make minor adjustments to the sand bed as needed to ensure that the paver aligns with the intended grade. This meticulous attention to detail will result in a paver patio that not only looks aesthetically pleasing but also functions effectively by draining water away from the surface.
After all the pavers are in place, sweep joint sand into the spaces between the pavers. This sand helps to lock the pavers together and prevent them from shifting. Compact the pavers one last time with a plate compactor, using a protective mat to prevent damage to the paver surfaces. Then, thoroughly sweep off any excess sand.
Following these steps diligently ensures a paver patio with proper sloping, effective drainage, and lasting durability. While the process requires precision and attention to detail, the resulting benefits of a well-constructed patio will enhance the outdoor living space for years to come.

How Do I Slope A Patio Toward One Of Its Corners Home Improvement Stack Exchange

How To Measure Slope For Paver Patio S Pavers

Your Guide To Installing A Paver Patio On Slope West Hills Masonry

Paving A Patio How To Lay Pavers For Diy

Part 1 How To Build A Paver Patio On Slope And Prevent Soil Erosion
Paver Patio Slope Diy Home Improvement Forum

All The Basics Of How To Screed Lay A Paver Patio

How To Prep Lay A Base For Pavers Western Interlock

How To Finish Retaining Wall For A Paver Patio On Sloping Ground Home Improvement Stack Exchange
Questions On Sloping A Raised Patio Lawn Care Forum
Related Posts


