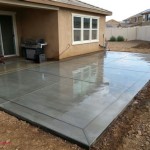
How To Paint Outdoor Concrete Patio
Painting an outdoor concrete patio can revitalize the space, enhance curb appeal, and protect the concrete from the elements. The process involves careful preparation, appropriate material selection, and proper application techniques. This article provides a comprehensive guide to painting an outdoor concrete patio, ensuring a durable and aesthetically pleasing finish.
Surface Preparation: The Foundation of a Successful Paint Job
Proper surface preparation is paramount for paint adhesion and longevity. Neglecting this step can result in peeling, chipping, and premature paint failure. The preparation process involves cleaning, repairing, and profiling the concrete surface.
Cleaning: The first step is to thoroughly clean the concrete patio. Remove all furniture, planters, and other items from the area. Use a stiff-bristled brush or broom to sweep away loose debris, leaves, and dirt. For ingrained dirt, stains, and mildew, a pressure washer is highly recommended. When using a pressure washer, maintain a safe distance from the surface to avoid damaging the concrete. If a pressure washer is unavailable, scrub the patio with a solution of water and a concrete cleaner or degreaser. Follow the manufacturer's instructions for dilution and application. Rinse the patio thoroughly with clean water to remove all traces of the cleaning solution.
Repairing: Inspect the concrete patio for cracks, chips, and other damage. Small cracks can be filled with a concrete patching compound. Clean the crack thoroughly using a wire brush to remove loose debris. Apply the patching compound according to the manufacturer's instructions, using a putty knife to press it firmly into the crack. Allow the patching compound to dry completely before sanding it smooth to be level with the surrounding concrete. For larger cracks or damaged areas, consult a professional concrete contractor. Ignoring structural damage can compromise the integrity of the patio and affect the paint's performance.
Profiling: Concrete surfaces can be very smooth, preventing paint from adhering properly. Profiling the surface involves creating a slightly rough texture to improve adhesion. This can be achieved through several methods. Acid etching involves applying a diluted solution of muriatic acid to the concrete surface. This process etches the concrete, creating a porous surface. Exercise caution when handling muriatic acid, wearing appropriate protective gear, including gloves, eye protection, and a respirator. Follow the manufacturer's instructions for dilution and application. After etching, thoroughly rinse the patio with clean water to neutralize the acid. Alternatively, mechanical methods such as grinding or sanding can be employed to roughen the surface. These methods are generally less hazardous than acid etching but require specialized equipment. Regardless of the method used, ensure the surface is clean and free of debris before proceeding.
Selecting the Right Paint and Primer
Choosing the appropriate paint and primer is crucial for achieving a durable and attractive finish that withstands outdoor conditions. Consider the type of concrete, the anticipated traffic, and the desired aesthetic when making your selection.
Primer Selection: Primer acts as a bonding agent between the concrete and the topcoat, improving adhesion and preventing the paint from being absorbed into the porous concrete. It also helps to create a uniform surface, ensuring even color distribution. For outdoor concrete patios, use a concrete-specific primer designed for exterior use. These primers are formulated to withstand moisture, temperature fluctuations, and UV exposure. Epoxy primers are an excellent choice for high-traffic areas as they provide exceptional adhesion and durability. Acrylic primers are also suitable and generally more cost-effective. Apply the primer according to the manufacturer's instructions, using a brush, roller, or sprayer. Allow the primer to dry completely before applying the topcoat.
Paint Selection: Choose a paint specifically formulated for concrete patios. These paints are designed to resist cracking, chipping, and fading caused by exposure to sunlight, rain, and foot traffic. Options include acrylic latex paints and epoxy paints. Acrylic latex paints are generally easier to apply and clean up, while epoxy paints offer superior durability and resistance to chemicals and abrasion. For added traction, consider using a paint with a non-slip additive. These additives provide a textured surface that reduces the risk of slipping, especially when the patio is wet. When selecting a paint color, consider the overall aesthetic of your outdoor space. Lighter colors can help to reflect sunlight and keep the patio cooler, while darker colors can add warmth and sophistication. Always read the manufacturer's instructions before applying the paint. Pay attention to the recommended application temperature, drying time, and number of coats.
Testing: Before committing to a specific primer and paint, it is beneficial to test a small, inconspicuous area of the patio. This will allow you to assess the color, adhesion, and overall appearance of the finish. Apply the primer and paint to the test area according to the manufacturer's instructions. Allow it to dry completely and then inspect the surface for any signs of peeling, blistering, or discoloration. If the test area looks satisfactory, you can proceed with painting the entire patio.
Applying the Paint: Techniques for a Professional Finish
Proper paint application ensures a smooth, even, and durable finish. The application process involves using the correct tools and techniques to achieve optimal results. Prior to beginning the painting process, ensure the weather forecast is favorable, as rain or excessive humidity can negatively impact the drying and curing of the paint.
Tools and Equipment: Gather the necessary tools and equipment before starting the painting process. This includes a paint roller with an extension pole, a paint brush for edging and detail work, paint trays, painter's tape, and safety gear such as gloves and eye protection. Choose a roller with a nap length appropriate for the texture of the concrete. A thicker nap is suitable for rough surfaces, while a shorter nap is better for smooth surfaces. Use high-quality brushes for edging and detail work to ensure clean, crisp lines. Painter's tape can be used to protect adjacent surfaces, such as walls or landscaping, from overspray.
Priming the Surface: Apply the primer according to the manufacturer's instructions. Typically, this involves using a roller to apply a thin, even coat of primer to the entire patio surface. Use a brush to prime the edges and any hard-to-reach areas. Allow the primer to dry completely before proceeding to the next step. This drying time is crucial for proper adhesion of the topcoat. Consult the manufacturer's instructions for the recommended drying time, as it can vary depending on the type of primer and the ambient temperature.
Painting the Patio: Begin by edging the patio with a brush, carefully painting along the perimeter and around any obstacles. This creates a clean, defined edge and prevents the roller from splattering paint onto adjacent surfaces. Next, pour the paint into a paint tray and load the roller with paint. Avoid overloading the roller, as this can result in drips and uneven coverage. Apply the paint to the patio in long, even strokes, overlapping each stroke slightly to ensure complete coverage. Work in small sections at a time to maintain a wet edge and prevent lap marks. If the patio is large, divide it into manageable sections using painter's tape. Apply a second coat of paint if necessary, following the same application techniques as the first coat. Allow each coat of paint to dry completely before applying the next. The number of coats required will depend on the type of paint, the color, and the desired level of coverage. After applying the final coat of paint, remove the painter's tape carefully to reveal clean, crisp lines. Allow the paint to cure completely before placing furniture or other items on the patio. The curing time can vary depending on the type of paint and the ambient temperature. Consult the manufacturer's instructions for the recommended curing time.
Maintaining the Painted Patio
Once the painting process is complete, maintaining the painted patio will extend its lifespan and preserve its appearance. Regular cleaning and preventative measures can help prevent damage and ensure the paint continues to look its best.
Cleaning: Regularly sweep the patio to remove loose debris and dirt. This will prevent the buildup of grime and stains. Periodically wash the patio with a mild detergent and water. Use a soft-bristled brush or mop to scrub the surface. Avoid using harsh chemicals or abrasive cleaners, as these can damage the paint. Rinse the patio thoroughly with clean water to remove all traces of the detergent. For stubborn stains, consider using a specialized concrete cleaner. Follow the manufacturer's instructions for application and always test the cleaner in an inconspicuous area first.
Preventative Measures: Protect the painted patio from heavy objects and sharp edges. Use mats or rugs under furniture to prevent scratches and abrasions. Avoid dragging heavy objects across the surface. Apply a concrete sealer to the painted patio to provide an additional layer of protection against moisture, stains, and UV damage. Choose a sealer specifically designed for use on painted concrete. Reapply the sealer every few years, or as needed, to maintain its protective properties. Inspect the patio regularly for any signs of damage, such as cracks or peeling paint. Repair any damage promptly to prevent it from worsening. By following these simple maintenance tips, you can ensure that your painted concrete patio remains beautiful and functional for many years to come.

How To Paint A Concrete Porch Or Patio

How To Paint A Concrete Porch Or Patio

Painted Concrete Slab And Brick Pavers One Year Later So Much Better With Age
:max_bytes(150000):strip_icc()/faux-painted-rug2-5d0d2b1a8ddd4c60a39ffd329840874e.jpg?strip=all)
15 Painted Concrete Patio Designs

How To Paint A Concrete Porch Or Patio

Before And After Painted Concrete Patio Thistlewood Farm

Backyard Makeover How To Paint Concrete Look Like Oversize Pavers A House Full Of Sunshine
:max_bytes(150000):strip_icc()/cement-tile-1-of-1-683x1024-f5a283b105e04abf8729e7390f9148bc.jpg?strip=all)
15 Painted Concrete Patio Designs

How To Paint A Porch Floor With Concrete The Honeycomb Home

How To Paint A Concrete Patio Exquisitely Unremarkable
Related Posts


