How to Make Pointing Cement for Patio
A patio is a great addition to any home, providing an outdoor space for relaxation, entertaining, and enjoying the fresh air. However, over time, the mortar between the patio pavers can erode, crack, or become discolored, diminishing the aesthetic appeal and structural integrity of the patio. Pointing cement, also known as grout or jointing compound, is a mixture of cement, sand, and water that is used to fill the gaps between pavers, creating a clean and durable finish. This article will provide a comprehensive guide on how to make pointing cement for patio, covering the materials, tools, and steps involved in the process.
Choosing the Right Materials
The success of your pointing cement depends on the quality of the materials used. Here's a breakdown of the essential components:
- Portland Cement: This is the key ingredient that binds the mixture together. Choose a high-quality Portland cement, such as Type I/II or Type N, for optimal strength and durability.
- Sand: Sand provides the bulk and texture to the pointing cement. Select a fine-grained sand, like masonry sand, for smooth and even filling of the joints.
- Water: Water is essential for the chemical reaction that creates the hardening effect of cement. Use clean and fresh water for optimal results.
- Pigment (Optional): If you desire a specific color for your pointing cement, you can add pigments to the mixture. Choose pigments specifically designed for concrete and mortar.
Preparing the Patio
Before preparing the pointing cement, it's crucial to prepare the patio surface to ensure proper adhesion and a smooth finish:
- Clean the Joints: Remove any existing debris, dirt, weeds, and loose mortar from the joints using a wire brush, a stiff-bristled broom, or a pressure washer. This step is essential to create a clean surface for the new pointing cement to adhere to.
- Dampen the Pavers: Lightly dampen the pavers and joints with water using a hose or watering can. This will help prevent the pointing cement from drying too rapidly and ensure proper adhesion.
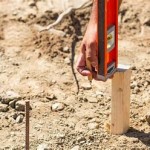
- Create a Dam (Optional): For wider joints, consider using a dam to prevent the pointing cement from spilling over onto the pavers. This can be achieved using masking tape or a temporary barrier made of wood or plastic.
Mixing the Pointing Cement
The next step involves carefully mixing the pointing cement to achieve the desired consistency. Here's a step-by-step guide:
- Determine the Ratio: The ideal ratio of cement to sand for pointing cement typically ranges from 1:2 to 1:3 (cement to sand). Adjust the ratio based on the desired strength and thickness of the joint.
- Mix Dry Ingredients: In a clean wheelbarrow or mixing container, combine the cement and sand thoroughly. This step ensures the mixture is well-blended before adding water.
- Add Water Gradually: Slowly add water to the dry mixture, stirring continuously with a shovel or trowel. The goal is to achieve a consistency similar to thick peanut butter. The pointing cement should be workable without being too watery.
- Mix Thoroughly: Continue mixing the mixture until all ingredients are fully incorporated and there are no dry patches. This step is crucial to ensure a consistent and durable pointing cement.
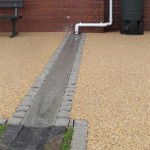
Applying the Pointing Cement
Once the pointing cement is prepared, it's time to apply it to the joints between the pavers. Follow these steps for a professional finish:
- Fill the Joints: Using a pointing trowel or a grout bag, press the pointing cement into the joints, ensuring that the gaps are completely filled and the cement is level with the surface of the pavers.
- Tool the Joints: After applying the pointing cement, use a pointing tool, a grout float, or a damp sponge to smooth and shape the joints, creating a clean and uniform finish. This process helps remove excess cement and creates a consistent appearance.
- Clean Up: Immediately after applying the pointing cement, clean the pavers using a damp cloth or sponge to remove any excess cement splatter. This step helps prevent cement from hardening on the pavers and creating unsightly stains.
Curing the Pointing Cement
After applying the pointing cement, it needs time to cure and harden. This process involves maintaining a consistent moisture level to allow the cement to solidify properly. Here's how to cure the pointing cement:
- Keep the Pointing Cement Moist: Mist the pointing cement regularly with water for a few days, ensuring it doesn't dry out too quickly. You can cover the patio with plastic sheeting for a longer curing period.
- Avoid Foot Traffic: Avoid walking on the patio for at least 24 hours to prevent disturbing the freshly applied pointing cement. Allow the pointing cement sufficient time to cure before applying any weight or pressure.
- Let it Cure Completely: Depending on weather conditions, the pointing cement will typically take 7 to 14 days to cure completely. During this time, avoid exposure to extreme temperatures and direct sunlight.

How To Repoint A Patio Create Neat Finish Checkatrade

How To Point A Patio Diy Doctor

How To Repoint Paving Slabs

Jointing And Pointing For Stone Paving Dry Grouting Pavingexpert

How To Mix Up Mortar For Patio Pointing In 6 Mins

Re Jointing A Patio Or Driveway Pavingexpert

Paving Repointing Explained By Ncc Streetscape

Re Jointing A Patio Or Driveway Pavingexpert

Pointing And Sealing N Stone Edecks Blog

How To Dry Point A Patio Simple Tutorial
Related Posts