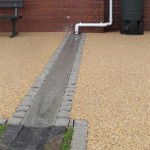
How to Lay a Patio on Uneven Ground
Creating a beautiful and functional patio can be a rewarding project, but uneven ground can pose a significant challenge. However, with careful planning and the right techniques, even uneven surfaces can be transformed into a stunning outdoor space. This article will guide you through the steps of laying a patio on uneven ground, ensuring a level and durable surface.
1. Preparing the Site
The first step involves preparing the site and ensuring a solid foundation for your patio. This step is crucial for achieving a level surface and preventing future settling or shifting.
- Clear the area: Remove any existing vegetation, debris, and landscaping elements from the designated patio area. This will allow you to accurately assess the ground conditions.
- Mark the outline: Use stakes and string to outline the desired shape and size of the patio. Ensure that the outline is rectangular or square for a consistent and aesthetically pleasing design.
- Remove topsoil: Depending on the unevenness of the ground, you may need to remove a portion of the topsoil to create a level base. Aim for a minimum depth of 4-6 inches for proper support and drainage.
2. Creating a Level Base
Once the site is prepared, it's time to create a level base for the patio pavers. This involves using a combination of compacted gravel and sand to create a stable and even surface.
- Lay a gravel base: Spread a layer of compacted gravel, typically 4-6 inches deep, over the prepared ground. The gravel should be well-compacted to provide drainage and support for the pavers. Use a plate compactor or a hand tamper to achieve optimal compaction.
- Add a sand bedding layer: On top of the compacted gravel, spread a layer of sand, typically 1-2 inches deep. The sand layer acts as a leveling and bedding material for the pavers, allowing for adjustments to achieve a level surface.
- Level the sand: Use a long level and a straight edge to ensure the sand is completely level across the entire patio area. Utilize a rake or a tamper to adjust the sand levels as needed.
3. Laying the Pavers
With the level base in place, you can begin laying the pavers. This step requires precision and attention to detail to ensure a visually appealing and durable patio.
- Start at a corner: Begin laying the pavers from one corner of the patio, working outward. Consider using a string line or a laser level to maintain straight lines.
- Maintain consistent spacing: Use spacers to ensure uniform gaps between the pavers. This spacing allows for drainage and expansion and contraction due to temperature changes.
- Use a rubber mallet: Gently tap the pavers into place using a rubber mallet. Ensure that they are firmly seated in the sand bedding layer. It's important to avoid excessive force to prevent cracking or damage to the pavers.
- Cut pavers as needed: For areas where pavers need to be cut, use a wet saw or a diamond blade to achieve precise cuts. This ensures a clean and professional finish.
4. Finishing Touches
Once all the pavers are laid, you can focus on adding the finishing touches to create a complete and beautiful patio. This involves compacting the sand, adding edging, and sealing the pavers.
- Compact the sand: Once the pavers are fully installed, use a plate compactor or a hand tamper to compact the sand between the pavers. This step ensures a stable and level surface and prevents uneven settling.
- Install edging: Add edging around the perimeter of the patio to create a defined and neat border. This helps to prevent the pavers from shifting and maintains a professional look.
- Seal the pavers: Applying a sealer to the patio pavers can enhance their appearance, protect them from stains and weathering, and make them easier to clean. Choose a sealer that is compatible with the type of pavers you have used.
By following these steps, you can successfully lay a patio on uneven ground, transforming your outdoor space into a beautiful and functional area for relaxation and enjoyment. Remember to prioritize safety and use appropriate tools and techniques throughout the project.

My Garden Is Sloped Can I Still Install A Patio Home Logic

How To Lay Decking On Uneven Ground Pi Gardening

Outdoor Flooring Over Grass Or Dirt Interlocking Tiles

Building A Surface Deck Over An Uneven Concrete Patio

How To Lay A Patio On Concrete Or Over Paving Marshalls

How To Install Composite Wood Decking On Uneven Ground Unfloor

How To Build A Raised Patio

Transforming Uneven Patio Slabs With Levato Mono Pavers

How To Fix Uneven Patio Pavers

Decking On Uneven Ground Benefits Mid Atlantic Deck Fence
Related Posts


