How To Lay a Patio on Sloping Ground
Building a patio on sloping ground presents a unique set of challenges compared to laying one on level ground. However, with careful planning and execution, it is entirely achievable. This article will guide you through the process of laying a patio on sloping ground, covering crucial steps from preparation to finishing touches.
1. Planning and Preparation
Before embarking on the construction, meticulous planning is essential. Here's a breakdown of vital preparation steps:
A. Site Assessment:
- Slope Analysis: Determine the slope's angle and direction. A gentle slope is easier to work with than a steep one.
- Drainage Evaluation: Assess the existing drainage system. Ensure water can flow away from the patio area, mitigating potential problems such as erosion and pooling.
- Soil Conditions: Analyze the soil type. Clay soil may require additional compaction, while sandy soil may need stabilization.
- Sunlight Exposure: Consider where the sun hits the area during different times of the day. This will influence the placement of the patio and help you determine the best location for enjoying the space.
B. Design Considerations:
- Shape and Size: Choose a shape and size that complements the surrounding landscape and suits your needs.
- Material Selection: Select patio materials that withstand the climate and are aesthetically pleasing. Consider factors like durability, maintenance requirements, and cost.
- Accessibility: Plan for safe and easy access to the patio area. Consider the needs of all potential users, including those with limited mobility.
C. Permits and Regulations:
- Local Building Codes: Research and comply with any local building codes and regulations regarding patio construction.
- Property Lines: Ensure the patio stays within your property boundaries.
2. Preparing the Site
Once the planning is complete, it's time to prepare the site for construction. This involves:
A. Clearing the Area:
- Vegetation Removal: Clear out any existing vegetation, including trees, shrubs, and weeds.
- Debris Removal: Remove rocks, debris, and other obstacles that could interfere with the construction.
- Leveling the Ground: If the slope is too steep, consider using a retaining wall or terraced design to create a more level patio area.
B. Setting Out the Patio:
- Mark the Outline: Use stakes and string to mark the outline of the patio on the prepared ground.
- Adjust for Slope: Make sure the patio is level or slightly sloped towards the drainage point.
- Consider Drainage: Include a slight slope to ensure water runs away from the patio, preventing pooling and potential damage.
C. Excavating the Base:
- Digging the Trench: Dig a trench for the base of the patio, ensuring it is at least the depth required for the chosen patio material.
- Compacting the Base: Tamp down the excavated area to create a solid foundation.
3. Laying the Base and Patio
Once the foundation is prepared, the next step is to lay the base and then the patio itself. The process involves:
A. Base Installation:
- Laying a Subbase: Install a layer of gravel or crushed stone to improve drainage and create a stable base for the patio.
- Compacting the Subbase: Compact the subbase thoroughly using a plate compactor or tamper.
B. Patio Installation:
- Laying the First Row: Begin by laying the first row of patio slabs or pavers, ensuring they are level and aligned using a spirit level.
- Installing Subsequent Rows: Lay subsequent rows, ensuring each row is secured and level.
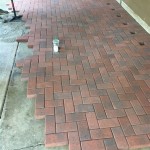
- Adhering to the Slope: If the patio is on a slope, make sure the pavers are laid with a consistent slope to ensure proper drainage.
- Grouting and Sealing: Apply grout between the slabs or pavers to create a cohesive surface and prevent weed growth. Seal the patio with a sealant to protect it from stains, moisture, and weather damage.
C. Finishing Touches:
- Installing Edging: Install edging around the perimeter of the patio to define the area and prevent the patio material from shifting.
- Adding Features: Consider adding features like a fire pit, outdoor lighting, or a pergola to enhance the functionality and aesthetics of the patio.

Paver Patio Slope Diy Pavers Building A

How To Build A Raised Patio

How To Cope With A Sloping Garden Alda Landscapes

How Much Should A Patio Slope Away From House

Dry Laying Slabs On Gravel Or Sand Instruction Kronos Ceramiche Floor Coverings In Porcelain Stoneware

How To Cope With A Sloping Garden Alda Landscapes

Dry Laying Slabs On Gravel Or Sand Instruction Kronos Ceramiche Floor Coverings In Porcelain Stoneware

Part 1 How To Build A Paver Patio On Slope And Prevent Soil Erosion

Can You Build A Patio On Sloped Yard Lawn Landscape

How To Make A Sloped Lawn Into Tiers The Step By Guide
Related Posts