How To Install Pavers On A Patio
Installing pavers on a patio is a rewarding home improvement project that can significantly enhance the aesthetic appeal and functionality of an outdoor space. While it requires some physical labor and attention to detail, the process is manageable for a diligent homeowner willing to invest the time and effort. This article will detail the steps involved in installing pavers, ensuring a durable and visually pleasing patio.
Before embarking on the installation, thorough planning and preparation are crucial. This includes determining the patio's size, shape, and location, as well as selecting the appropriate pavers and gathering the necessary tools and materials. Neglecting these preliminary steps can lead to complications and potentially compromise the final result.
The initial phase involves assessing the existing site conditions. Consider factors such as drainage, soil composition, and proximity to structures. Proper drainage is essential to prevent water from pooling on the patio surface, which can lead to erosion, cracking, and other damage. The soil should be stable and well-compacted to provide a solid foundation for the pavers. Addressing these factors upfront will contribute to the long-term stability and integrity of the patio.
Planning and Design
The first step in installing pavers on a patio is meticulous planning and design. This phase sets the foundation for a successful project and ensures that the final result aligns with the homeowner's vision and practical needs. It encompasses various considerations, including patio size and shape, paver selection, layout patterns, and material quantification.
Determining the appropriate size and shape of the patio is critical. Consider the intended use of the patio, the number of individuals it will accommodate, and its relationship to surrounding landscape features. Mark the proposed patio area using stakes and string, allowing for adjustments as needed. Consider factors like furniture placement, traffic flow, and the overall aesthetic balance of the outdoor space. A well-proportioned patio complements the surrounding environment and enhances its usability.
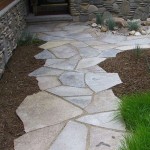
Paver selection is another crucial aspect of the planning phase. Pavers are available in a wide range of materials, sizes, shapes, colors, and textures. Common paver materials include concrete, brick, natural stone, and interlocking pavers. Each material offers unique aesthetic qualities and performance characteristics. Concrete pavers are a versatile and cost-effective option, available in various styles and colors. Brick pavers offer a classic and timeless look. Natural stone pavers provide a more rustic and organic feel. Interlocking pavers are designed to interlock tightly, creating a stable and durable surface. Consider the overall style of the home and landscape when selecting pavers to ensure a cohesive and harmonious design.
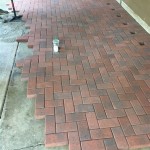
The layout pattern significantly influences the visual appeal and structural integrity of the patio. Common paver patterns include running bond, herringbone, basketweave, and circular patterns. The running bond pattern is a simple and classic pattern in which pavers are laid in a staggered row. The herringbone pattern creates a visually dynamic and structurally sound surface. The basketweave pattern resembles a woven basket and adds a textural element to the patio. Circular patterns offer a unique and eye-catching design. Choose a pattern that complements the paver style and desired aesthetic. If the pattern involves cuts and changes to the paver shape, factor in additional paver materials.
Once the size, shape, paver selection, and layout pattern have been determined, it is essential to quantify the necessary materials. This includes pavers, base material (gravel and sand), edging restraints, polymeric sand, and any other required supplies. Accurately calculating the material quantities helps avoid shortages or excess materials. Use a paver calculator or consult with a landscaping professional to ensure accurate estimations. Overestimate slightly (around 5-10%) to account for potential cuts and breakage during installation.
Preparation and Excavation
Following the planning and design phase, the next crucial step involves site preparation and excavation. This stage is essential for creating a stable and level foundation for the pavers, ensuring their long-term stability and preventing issues such as settling or shifting. It encompasses marking the area, excavating the soil, and compacting the sub-base layer.
Accurately marking the area designated for the patio is the first step. This is typically accomplished using stakes and string, outlining the planned dimensions and shape. Ensure that the marked area accurately reflects the previously determined patio size and shape, as any discrepancies can lead to issues later in the installation process. Double-check the measurements and alignment before proceeding to the next step.
After marking the area, begin excavating the soil within the outlined perimeter. The depth of excavation will depend on the type of pavers used, the thickness of the base materials (gravel and sand), and the desired finished height of the patio. A general rule of thumb is to excavate to a depth that allows for at least 4 inches of gravel base, 1 inch of sand bedding layer, and the thickness of the pavers themselves. Ensure that the excavated area extends slightly beyond the marked perimeter to accommodate edging restraints.
During excavation, pay close attention to sloping the ground away from the house or any other adjacent structures. This is crucial for proper drainage and prevents water from pooling on the patio surface or seeping into the foundation. A slight slope of approximately 1/4 inch per foot is generally recommended. Use a level and a measuring tape to ensure accurate and consistent sloping. Address any existing drainage issues, such as poor soil permeability or inadequate grading, before proceeding with backfilling.
After excavating to the required depth and ensuring proper drainage, compact the sub-base soil using a plate compactor. This step is critical for creating a solid and stable foundation for the gravel base. Compact the soil in multiple passes, overlapping each pass to ensure uniform compaction. Proper compaction minimizes the risk of settling or shifting of the pavers over time. Add water to the soil during compaction if it is dry. This helps the soil particles bind together more effectively.
Laying the Base and Pavers
With the excavation and sub-base preparation complete, the following step involves laying the base materials and placing the pavers. This requires careful attention to detail and precise execution to ensure a level, stable, and visually appealing patio surface. This includes installing edging restraints, adding and compacting the gravel base, applying the sand bedding layer, and laying the pavers according to the planned pattern.
Start by installing edging restraints around the perimeter of the excavated area. Edging restraints provide structural support to the pavers, preventing them from shifting or spreading over time. Common types of edging restraints include plastic edging, metal edging, and concrete curbing. Install the edging restraints according to the manufacturer's instructions, ensuring they are securely anchored to the ground. The top of the edging restraints should be slightly below the finished height of the pavers to allow for proper drainage and aesthetic appeal. Add additional support to joints as needed.
Next, add the gravel base to the excavated area, spreading it evenly and compacting it thoroughly using a plate compactor. The gravel base provides a stable and well-draining foundation for the pavers. Use a crushed aggregate gravel with a particle size distribution that promotes compaction and drainage. Spread the gravel in layers of no more than 2-3 inches thick, compacting each layer before adding the next. Ensure that the gravel base is compacted to a consistent density across the entire patio area. This step is crucial for preventing settling and ensuring the long-term stability of the pavers.
After compacting the gravel base, apply a layer of sand bedding over the gravel. The sand bedding layer provides a smooth and level surface for the pavers to rest on. Use a coarse sand that is specifically designed for paver installations. Spread the sand evenly to a depth of approximately 1 inch, using screed rails and a screed board to achieve a consistent and level surface. Avoid compacting the sand, as this can create an uneven surface. The sand bedding layer should be slightly higher than the desired finished height of the pavers, as it will settle slightly when the pavers are placed.
Carefully lay the pavers onto the prepared sand bedding layer, following the planned pattern. Start at one edge of the patio and work your way across, placing each paver snugly against its neighbors. Use a rubber mallet to gently tap each paver into place, ensuring it is level and flush with the surrounding pavers. Check the level of the pavers frequently using a level and adjust as needed. If necessary, add or remove sand under the pavers to achieve a level surface. Cut pavers as needed using a paver cutter or wet saw to fit the edges of the patio. Maintain consistent joint spacing between the pavers according to the manufacturer's recommendations. A uniform joint spacing enhances the aesthetic appeal and structural integrity of the patio.
After laying all the pavers, sweep polymeric sand into the joints between the pavers. Polymeric sand hardens when wetted, creating a durable and weed-resistant joint filler. Follow the manufacturer's instructions for applying and activating the polymeric sand carefully. Avoid overfilling the joints, as this can leave a residue on the paver surface. Once the polymeric sand has been activated, sweep away any excess sand from the paver surface and allow it to cure completely before using the patio. A properly installed paver patio will provide years of enjoyment and enhance the beauty of your outdoor living space.

How To Prep Lay A Base For Pavers Diy

How To Lay Patio Pavers
.jpg?strip=all)
How To Install Patio Pavers Lv

How To Install Pavers 15 Steps With Pictures Wikihow

Easiest Patio Pavers You Ll Ever Install

How To Install Pavers Installing A Patio Step By Guide
Dammann S Garden Company Diy Series How To Install Level Pavers And Patio Stones

Diy Patio Installation How To Build A Paver Scrappy Geek

How To Install Pavers Over A Concrete Patio Family Handyman

Diy Paver Patio And Firepit Life On Shady Lane
Related Posts


