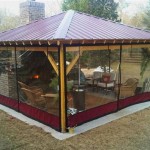
How To Install Lights On Alumawood Patio Cover
Alumawood patio covers are a great way to add value and functionality to your home. They provide shade from the sun, rain, and snow, and they can also extend your living space outdoors. One of the best ways to enhance your Alumawood patio cover is to install lighting. Lighting can create a warm and inviting atmosphere, and it can also make your patio cover safer and more secure.
Installing lights on an Alumawood patio cover is a relatively simple project that can be completed in a few hours. However, there are a few things you need to keep in mind before you get started. First, you need to choose the right type of lighting. There are a variety of lighting options available, so you need to decide what type of lighting will best suit your needs. Second, you need to make sure that you have the proper tools and materials. Finally, you need to follow the manufacturer's instructions carefully.
Here are the steps on how to install lights on an Alumawood patio cover:
1. Choose the Right Type of LightingThe first step is to choose the right type of lighting. There are a variety of lighting options available, so you need to decide what type of lighting will best suit your needs. If you want to create a warm and inviting atmosphere, you may want to choose incandescent or halogen lights. If you want to save energy, you may want to choose LED lights.
2. Gather the Proper Tools and MaterialsOnce you have chosen the right type of lighting, you need to gather the proper tools and materials. You will need a drill, a screwdriver, wire cutters, and electrical tape. You will also need the following materials:
- Lights
- Wire
- Conduit
- Electrical box
- Mounting brackets
Once you have gathered the proper tools and materials, you need to follow the manufacturer's instructions carefully. The manufacturer's instructions will vary depending on the type of lighting you have chosen. However, there are some general steps that you will need to follow:
- Mount the electrical box to the ceiling of the patio cover.
- Run the wire from the electrical box to the lights.
- Connect the lights to the wire.
- Mount the lights to the patio cover.
Once you have installed the lights, you need to test them to make sure they are working properly. Turn on the lights and make sure that they are all working. If any of the lights are not working, check the connections and make sure that the bulbs are not burned out.
5. Enjoy Your New LightsOnce you have installed and tested the lights, you can enjoy your new outdoor lighting. You can now use your patio cover at night, and you can also enjoy the added security that the lights provide.

How To Install A Patio Cover With Recessed Lights Fans

Alumahangers

String Lighting Hooks And Hangers For Alumawood Patios Quick Easy To Install No Holes Or S

Alumatable How To Installation Aluminum Patio Covers

Patio Light Installation

How To Install Outdoor Fan Into Hollow Aluminum Patio Ceiling Frame Doityourself Com Community Forums

Patiokitsdirect Com How To Install A Fan On Your Alumawood Patio Cover Kit

Alumawood Patio Cover Sizes S Green Bee Covers

Aluminum Patio Covers Alumawood Diy Kits

Diy Alumawood Patio Cover Kits Shipped Nationwide
Related Posts