Installing your own brick patio can be a great way to add value and beauty to your backyard. With the right materials and a bit of elbow grease, it’s easier than you may think. In this article, we’ll walk you through the steps of installing a brick patio, from planning to completion.
Before getting started, you’ll need to decide on the size and shape of your patio. Draw a plan on paper to get a better idea of the measurements. Once you’ve settled on a design, calculate the amount of sand, bricks and other materials you’ll need. You’ll also need to purchase and rent certain tools, such as a plate compactor, shovel and wheelbarrow.
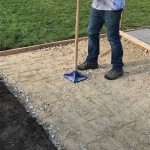
Now it’s time to get to work. Begin by marking the outline of your patio with a garden hose or landscaping paint. To ensure the patio is level and even, you’ll need to remove the topsoil and dig a shallow trench, then line the base with sand. Use a long level to check the area for levelness, and adjust the sand as needed. Compacting the sand is also important for a sturdy base.
Once the sand is level and compacted, it’s time to lay the bricks. Start at one corner and lay the bricks along the length of the patio. Fit them together tightly and use a rubber mallet to make sure they’re flush with the ground. As you go, use a level to check the brick pattern for levelness. If necessary, you can add or remove sand underneath the bricks.
Once all the bricks are in place, it’s time to fill in the gaps with sand. Use a broom to spread the sand over the patio, and then use a plate compactor to tamp it down. This will fill the joints between the bricks and keep them in place. Finally, sweep off any excess sand and you’re done.
Installing your own brick patio can add value and beauty to your home. By following the steps outlined above, you can save money and have a beautiful outdoor space to enjoy in no time.


Related Posts


