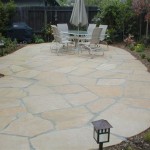
How To Fix Patio Stones: A Comprehensive Guide
Patio stones, also known as pavers, are a popular choice for creating aesthetically pleasing and functional outdoor spaces. However, over time, these surfaces can become uneven, cracked, or otherwise damaged due to factors such as weather exposure, soil erosion, and regular use. Addressing these issues promptly is crucial for maintaining the patio's appearance, structural integrity, and safety. This article provides a detailed guide on how to fix common patio stone problems, ensuring a long-lasting and attractive outdoor area.
Before commencing any repair work, it is essential to properly assess the extent of the damage. This involves a thorough inspection of the entire patio surface to identify all areas that require attention. Note the type of damage (e.g., cracked stones, unevenness, loose stones) and the location of each issue. This initial assessment will inform the selection of appropriate repair methods and materials.
Identifying Common Patio Stone Problems
Various issues can affect the condition of patio stones. Understanding what has gone wrong is crucial to deciding what repairs need to occur.
Uneven Stones: This is a prevalent problem, often caused by settling of the underlying base material. Over time, the soil beneath the stones can compact or erode, leading to a loss of support and resulting in an uneven surface. This issue can create tripping hazards and detract from the patio's overall appearance.
Cracked or Broken Stones: Cracks and breaks can occur due to several factors, including freeze-thaw cycles, heavy impact, and improper installation. Water that seeps into the stone can expand when it freezes, exerting pressure that leads to cracking. Dropping heavy objects onto the patio or using improper base materials can also contribute to this type of damage.
Loose Stones: Stones that are no longer securely seated in place can shift and wobble, posing a safety risk and potentially damaging adjacent stones. This issue often arises because the bedding sand has been washed away or has deteriorated over time.
Weed Growth: Weeds sprouting between the stones can not only look unsightly but also contribute to the displacement of the stones over time. The roots of weeds can push the stones apart and compromise the integrity of the patio surface.
Staining and Discoloration: Exposure to the elements and spills can cause staining and discoloration of patio stones. Algae, mold, and mildew can grow on the surface, particularly in damp or shaded areas. Oil, fertilizer, and other substances can also leave unsightly stains that require specialized cleaning methods.
Repairing Uneven Patio Stones
Addressing uneven patio stones involves lifting the affected stones, adjusting the underlying base material, and resetting the stones level with the surrounding surface. This restores the patio's uniformity and prevents potential hazards.
Gathering Necessary Tools and Materials: Before starting the repair, gather the required tools and materials. A flathead screwdriver or a specialized paver removal tool will be needed to lift the stones. A rubber mallet will be used for resetting the stones. Leveling sand or gravel will be needed to adjust the base, and a level will ensure that the stones are properly aligned. Safety glasses and gloves are also essential for personal protection.
Removing the Affected Stone: Locate the uneven stone and carefully insert the flathead screwdriver or paver removal tool into the gap between the stone and its adjacent stones. Gently pry the stone upward. If the stone is difficult to remove, try tapping the edges with a rubber mallet to loosen it. Once the stone is free, lift it out of the patio surface.
Adjusting the Base Material: With the stone removed, examine the base material underneath. If the base is compacted or uneven, remove a portion of it and add fresh leveling sand or gravel. Use a trowel or small shovel to spread the material evenly and compact it firmly. The goal is to create a level surface that will support the stone at the correct height.
Resetting the Stone: Place the stone back onto the prepared base. Use a level to ensure that the stone is flush with the surrounding stones. If necessary, add or remove leveling sand until the stone is perfectly aligned. Once the stone is level, gently tap it into place with a rubber mallet to secure it. Ensure that the stone is stable and does not wobble.
Adding Joint Sand: After resetting the stone, fill the joints around it with joint sand. This will help to stabilize the stone and prevent weed growth. Use a broom or brush to sweep the sand into the joints, ensuring that they are completely filled. Water the patio lightly to help the sand settle.
Replacing Cracked or Broken Patio Stones
Replacing cracked or broken patio stones is essential for maintaining the patio's structural integrity and appearance. This process involves removing the damaged stone and replacing it with a new one that matches the existing material.
Gathering Necessary Tools and Materials: Similar to repairing uneven stones, replacing cracked stones requires a flathead screwdriver or paver removal tool, a rubber mallet, safety glasses, and gloves. In addition, a new patio stone matching the existing ones will be needed. If the original stones are no longer available, a close match in terms of size, shape, and color should be sought.
Removing the Damaged Stone: Carefully remove the damaged stone using the same method as described for uneven stones. Insert the flathead screwdriver or paver removal tool into the gap between the damaged stone and its adjacent stones. Gently pry the stone upward. If the stone is broken into multiple pieces, remove each piece individually. Exercise caution to avoid damaging the surrounding stones.
Preparing the Base: After removing the damaged stone, inspect the base material underneath. Remove any debris or loose material. Add fresh leveling sand or gravel as needed to create a level surface that will support the new stone. Compact the base material firmly.
Installing the New Stone: Place the new patio stone onto the prepared base. Ensure that the stone fits snugly into the space and is level with the surrounding stones. If necessary, adjust the base material until the stone is properly aligned. Gently tap the stone into place with a rubber mallet to secure it. Make sure the stone is stable and does not wobble.
Adding Joint Sand: Fill the joints around the new stone with joint sand. Sweep the sand into the joints using a broom or brush, ensuring that they are completely filled. Water the patio lightly to help the sand settle. This will help to stabilize the new stone and integrate it seamlessly with the existing patio surface.
Preventive Measures for Long-Term Patio Stone Maintenance
While repairs are necessary, implementing preventive measures can significantly extend the lifespan of a patio and minimize the need for frequent maintenance. These measures include proper cleaning, sealing, and regular inspection.
Regular Cleaning: Cleaning the patio regularly helps to remove dirt, debris, and organic matter that can contribute to staining and deterioration. Use a broom or leaf blower to remove loose debris. For more thorough cleaning, use a garden hose with a spray nozzle or a pressure washer. Avoid using harsh chemicals or abrasive cleaners that can damage the stones. For stubborn stains, use a specialized patio cleaner designed for the specific type of stone.
Sealing: Applying a sealant to the patio stones can protect them from moisture, stains, and UV damage. Sealants penetrate the stone and create a barrier that prevents water and other substances from seeping into the pores. Choose a sealant that is appropriate for the type of stone used in the patio. Follow the manufacturer's instructions for application. Reapply the sealant every one to three years, depending on the product and the level of exposure to the elements.
Weed Control: Preventing weed growth between the stones is essential for maintaining the patio's appearance and structural integrity. Apply a pre-emergent herbicide to the patio surface in the spring to prevent weed seeds from germinating. Manually remove any weeds that do appear, using a weeding tool or a solution of vinegar and water. Avoid using harsh chemicals that can damage the stones or harm the surrounding plants.
Proper Drainage: Ensuring proper drainage around the patio is crucial for preventing water damage. Make sure that the patio is sloped slightly away from any buildings to allow water to drain away. Clean out any gutters or downspouts that may be clogged, preventing water from pooling on the patio surface. Consider installing a drainage system if the patio is located in an area that is prone to flooding.
Avoiding Heavy Loads: Avoid placing excessively heavy objects on the patio, as this can lead to cracking and damage. Distribute the weight evenly when placing furniture or other items. Use protective mats or pads under heavy objects to prevent them from scratching or damaging the stones.
Regular Inspection: Inspect the patio regularly for any signs of damage, such as cracks, unevenness, or loose stones. Addressing these issues promptly can prevent them from escalating into more significant problems. Repair any minor damage as soon as it is detected to maintain the patio's appearance and structural integrity.
By understanding the common issues that affect patio stones and implementing appropriate repair and prevention methods, homeowners can maintain a beautiful and functional outdoor space for years to come. Regular maintenance and timely repairs will ensure that the patio remains a valuable asset to the property and a source of enjoyment for those who use it.

Raise Sunken Patio Pavers

How To Repair Sinking Patio Pavers Diy

How To Fix Uneven Patio Pavers

Fix Your Rocking Patio Slabs With This Easy Solution

How To Repair A Patio S Grouting Sinking Checkatrade

How To Repair Sinking Patio Pavers Splendour In Stone

How To Repair Stone Walkway Mortar This Old House

How To Fix Sinking Pavers Davel Construction Inc

How To Repair Sinking Patio Pavers Diy

Fixing Sunken Or Crooked Bricks Pavers Yourself Diy
Related Posts


