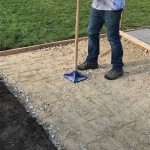
How to Fix Patio Pavers: A Comprehensive Guide
Patio pavers offer a durable and aesthetically pleasing surface for outdoor living spaces. However, like any outdoor installation, they are susceptible to wear and tear, shifting, and damage over time. Proper maintenance and timely repairs are crucial to preserving the integrity and appearance of your paver patio. This article provides a detailed guide on how to address common paver patio problems and restore your outdoor space to its former glory.
The reasons for paver patio issues are multifaceted. Exposure to the elements, including freeze-thaw cycles and heavy rainfall, can contribute to instability in the base material and cause pavers to shift. Foot traffic, especially in high-traffic areas, compacts the bedding sand layer, leading to unevenness. Improper installation techniques, such as inadequate base preparation or insufficient compaction, are also a common source of problems. Furthermore, tree roots and burrowing animals can disrupt the paver system, creating gaps and displacement.
Identifying Common Paver Patio Problems
Before embarking on any repair project, it is essential to accurately diagnose the issue. A thorough inspection of the patio will reveal the extent of the damage and the underlying causes. Common problems include:
Uneven Pavers: This is perhaps the most frequent issue. Pavers may sink or lift, often due to settling of the base material or shifting of the bedding sand. This can create tripping hazards and detract from the overall appearance of the patio.
Cracked or Broken Pavers: Impact from heavy objects, extreme temperature fluctuations, or underlying soil movement can cause pavers to crack or break. Replacement is usually necessary in these cases.
Weeds and Grass Growth: Vegetation between pavers is a common nuisance. It is often a sign of insufficient joint sand or a degraded polymeric sand layer. Ignoring this can lead to further destabilization of the paver system.
Staining and Discoloration: Exposure to the elements, spills, and organic matter can lead to staining and discoloration of the paver surface. Algae, mildew, and rust stains are common culprits.
Loose or Missing Joint Sand: The joint sand between pavers provides stability and prevents lateral movement. Over time, it can be washed away by rain, blown away by wind, or displaced by foot traffic. This weakens the interlocking system and allows pavers to shift.
Efflorescence: This is a white, powdery deposit that can appear on the surface of pavers. It is caused by soluble salts rising to the surface and crystallizing as water evaporates. While generally harmless, it can be unsightly.
Preparing for Paver Patio Repairs
Once the problems have been identified, the next step is to gather the necessary tools and materials. The specific items required will depend on the nature of the repairs, but a basic toolkit should include:
Paver Lifting Tool: This specialized tool is designed to grip and lift pavers without damaging them. Alternatively, a pair of flathead screwdrivers and a pry bar can be used, though this method requires more care.
Rubber Mallet: Used for gently tapping pavers into place without cracking or chipping them.
Level: Essential for ensuring a level surface during paver reinstallation.
Shovel and Trowel: For moving and leveling base material and bedding sand.
Wheelbarrow: For transporting materials.
Push Broom: For sweeping away debris and spreading joint sand.
Tamper or Plate Compactor: For compacting the base material and bedding sand (especially important for larger repair areas).
Work Gloves and Safety Glasses: For personal protection.
Materials: Depending on the repairs, you may need replacement pavers (ideally from the original batch to ensure a match in color and texture), base material (such as crushed stone), bedding sand, polymeric sand, paver cleaner, and a sealant (optional).
Step-by-Step Repair Procedures
The following sections outline the procedures for addressing common paver patio problems:
Repairing Uneven Pavers:
1.
Identify Affected Pavers:
Carefully examine the patio to identify the pavers that are uneven or sinking.2.
Remove Pavers:
Use the paver lifting tool or screwdrivers and a pry bar to carefully remove the affected pavers. Work slowly and gently to avoid damaging the pavers or surrounding ones.3.
Inspect the Base:
Once the pavers are removed, inspect the base material and bedding sand beneath. Look for signs of settling, erosion, or displacement. Remove any debris, weeds, or roots that may be present.4.
Add Base Material and Bedding Sand:
If the base material has settled, add more crushed stone in small increments, compacting each layer with a tamper or plate compactor. Add a layer of bedding sand, ensuring it is level and compacted. A consistent bedding sand layer of approximately 1 inch is usually ideal.5.
Reinstall Pavers:
Carefully place the pavers back into position, ensuring they are level with the surrounding pavers. Use a rubber mallet to gently tap them into place.6.
Check for Level:
Use a level to verify that the pavers are even with the surrounding surface. Adjust the bedding sand as needed to achieve a perfectly level surface.7.
Add Joint Sand:
Once the pavers are level, sweep polymeric sand into the joints between the pavers. Polymeric sand hardens when wetted, providing a more stable and weed-resistant joint. Follow the manufacturer's instructions for watering the polymeric sand.Replacing Cracked or Broken Pavers:
1.
Remove Damaged Paver:
Carefully remove the cracked or broken paver using the paver lifting tool or screwdrivers and a pry bar. Be extra cautious, as the broken pieces may be sharp.2.
Prepare the Base:
Inspect the base material and bedding sand beneath the damaged paver. Remove any debris or broken pieces of the old paver. Add bedding sand to ensure a level surface for the new paver.3.
Install Replacement Paver:
Place the replacement paver into the opening, ensuring it fits snugly and is level with the surrounding pavers. Use a rubber mallet to gently tap it into place.4.
Add Joint Sand:
Sweep polymeric sand into the joints surrounding the new paver, following the manufacturer's instructions.Addressing Weeds and Grass Growth:
1.
Remove Vegetation:
Manually remove weeds and grass growing between the pavers. A weeding tool or narrow trowel can be helpful for dislodging the roots.2.
Clean Joints:
Thoroughly clean the joints between the pavers to remove any remaining debris or organic matter. A pressure washer can be used with caution, but avoid blasting away the joint sand.3.
Refill Joints with Polymeric Sand:
Fill the joints with polymeric sand to inhibit future weed growth. Follow the manufacturer's instructions for installation and watering.Cleaning Stained or Discolored Pavers:
1.
Identify the Stain:
Determine the type of stain to select the appropriate cleaning solution. Different types of stains require different treatments.2.
Apply Cleaning Solution:
Apply the cleaning solution to the affected area, following the manufacturer's instructions. Some cleaners may require scrubbing with a brush.3.
Rinse Thoroughly:
Rinse the area thoroughly with water to remove all traces of the cleaning solution.4.
Consider Sealing:
After cleaning, consider applying a paver sealant to protect the pavers from future staining and discoloration. Follow the sealant manufacturer's instructions.Correcting Loose or Missing Joint Sand:
1.
Clean the Joints:
Thoroughly clean the joints between the pavers to remove any debris or old joint sand. A pressure washer can be used with caution, or a broom and vacuum can be employed.2.
Apply Polymeric Sand:
Sweep polymeric sand into the joints, ensuring they are completely filled. Follow the manufacturer's instructions for watering the polymeric sand.Removing Efflorescence:
1.
Dry Brushing:
In many cases, efflorescence can be removed by simply dry brushing the pavers with a stiff brush.2.
Efflorescence Cleaner:
If dry brushing is ineffective, use a commercially available efflorescence cleaner. Follow the manufacturer's instructions carefully.3.
Rinse Thoroughly:
Rinse the pavers thoroughly with water after using an efflorescence cleaner.Preventative Maintenance
Preventative maintenance is key to extending the life of a paver patio and minimizing the need for extensive repairs. Regular maintenance practices should include:
Sweeping: Regularly sweep the patio to remove debris, leaves, and dirt. This prevents organic matter from accumulating and staining the pavers.
Weed Control: Regularly inspect the patio for weeds and remove them promptly. Consider using a pre-emergent herbicide to prevent weed growth.
Sealing: Applying a paver sealant can protect the pavers from staining, discoloration, and water damage. The frequency of sealing will depend on the type of sealant and the level of exposure to the elements.
Joint Sand Maintenance: Periodically inspect the joint sand and refill it as needed to maintain the interlocking integrity of the paver system. Polymeric sand is a durable and weed-resistant option.
Avoid Heavy Loading: Avoid placing excessively heavy objects on the patio, as this can cause pavers to crack or sink. Consider using protective mats under heavy furniture.
Proper Drainage: Ensure that the patio has proper drainage to prevent water from pooling and damaging the pavers. Address any drainage issues promptly.
By following these steps for repair and maintenance, a paver patio can provide years of enjoyment and beauty. Regular attention and prompt action will help to keep the patio in optimal condition and avoid costly repairs in the future.

Raise Sunken Patio Pavers

How To Fix Uneven Patio Pavers

How To Repair Sinking Patio Pavers Diy

How To Repair Sinking Patio Pavers Splendour In Stone

Fixing Sunken Or Crooked Bricks Pavers Yourself Diy

How To Fix Sinking Pavers Davel Construction Inc

How To Fix An Uneven Paver Patio Ask This Old House

Patio Paver Restoration Diy Step By How To Easy

How To Fix Sunken Patio Pavers Family Handyman

How To Repair Sinking Patio Pavers Diy
Related Posts


