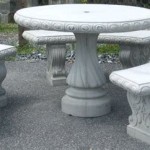
How To Fix Old Cement Patio Furniture
Cement patio furniture, prized for its durability and classic aesthetic, can endure decades of outdoor use. However, exposure to the elements inevitably leads to wear and tear. Cracks, chips, discoloration, and general deterioration are common problems that detract from the furniture’s appearance and structural integrity. Fortunately, most of these issues can be addressed with appropriate tools, materials, and techniques. Repairing cement patio furniture not only restores its beauty but also extends its lifespan, preserving a valuable investment for years to come.
Before embarking on any repair project, a thorough assessment of the damage is crucial. This evaluation determines the extent of the work required and helps select the appropriate repair methods. Note all areas of damage, including cracks, chips, loose joints, stains, and crumbling surfaces. Photographs can be helpful for documenting the original condition and tracking progress throughout the repair process.
Required Tools and Materials
Successful cement furniture repair hinges on having the right tools and materials. This section will detail the essentials for achieving a professional-looking and long-lasting restoration.
Cleaning Supplies: A stiff-bristled brush (wire or nylon), a pressure washer (optional but recommended), trisodium phosphate (TSP) or a comparable heavy-duty cleaner, and clean water are fundamental for preparing the surface. TSP effectively removes dirt, mildew, algae, and other contaminants that impede bonding of repair materials.
Crack and Chip Repair: Hydraulic cement, concrete patch, or epoxy resin are the primary materials for filling cracks and chips. Hydraulic cement is a fast-setting option, ideal for quick repairs, while concrete patch offers a more durable and natural-looking finish. Epoxy resin provides exceptional bonding strength and is suitable for structural repairs or larger voids. A margin trowel, putty knife, or small trowel is needed for applying and smoothing these materials. A mixing container and stirring stick are also essential for preparing the repair compounds according to the manufacturer's instructions.
Joint Repair: For loose or broken joints, a concrete adhesive or epoxy resin specifically designed for bonding concrete is necessary. Clamps, shims, or supports may be required to hold the pieces in place while the adhesive cures. Wire brushes or abrasive pads are useful for cleaning and preparing the bonding surfaces.
Surface Preparation: A wire brush or concrete grinder is essential for removing loose or crumbling concrete and creating a rough surface for better adhesion. Safety glasses, dust mask, and gloves are imperative to protect against dust and debris. A chisel and hammer may be necessary for removing severely damaged sections of concrete.
Finishing and Sealing: A concrete sealer is essential for protecting the repaired surfaces from moisture penetration, freeze-thaw cycles, and staining. Choose a sealer specifically designed for outdoor concrete furniture. A paint brush, roller, or sprayer can be used to apply the sealer. Concrete stain or paint, if desired, allows for color matching or a complete color change. Proper surface preparation, including priming, is crucial for achieving a uniform and long-lasting finish.
Safety Equipment: Safety glasses, a dust mask or respirator, gloves, and appropriate clothing are essential to protect against concrete dust, cleaning chemicals, and potential injuries. Working outdoors in a well-ventilated area is highly recommended.
Repairing Cracks and Chips
Cracks and chips are common issues in cement patio furniture, often caused by freeze-thaw cycles, impacts, or general weathering. Addressing these imperfections is essential for maintaining the furniture's structural integrity and aesthetic appeal.
Surface Preparation: Begin by thoroughly cleaning the affected area with a stiff-bristled brush and TSP solution. Rinse thoroughly with clean water and allow the surface to dry completely. Use a wire brush or concrete grinder to remove any loose or crumbling concrete around the crack or chip. This step is crucial for ensuring proper adhesion of the repair material. For larger cracks, consider widening the crack slightly with a chisel and hammer to create a better key for the repair compound.
Mixing the Repair Material: Prepare the hydraulic cement, concrete patch, or epoxy resin according to the manufacturer's instructions. Pay close attention to the mixing ratios and working time. Overmixing can weaken the material, while undermixing can result in poor bonding. When using epoxy resin, ensure thorough mixing of the resin and hardener components.
Applying the Repair Material: Use a margin trowel, putty knife, or small trowel to apply the repair material into the crack or chip. Press the material firmly into the void, ensuring that it fills the space completely. Overfill the area slightly to allow for shrinkage during curing. For deep cracks, apply the material in layers, allowing each layer to partially cure before applying the next.
Smoothing and Finishing: Once the repair material has partially cured, use a damp sponge or trowel to smooth the surface and blend it seamlessly with the surrounding concrete. Feather the edges of the repair to create a smooth transition. For concrete patch, consider using a texture roller or sponge to match the existing surface texture. Allow the repair material to cure completely according to the manufacturer's instructions. This curing time can vary depending on the type of material and environmental conditions.
Sanding and Blending: After the repair material has fully cured, use a fine-grit sandpaper or sanding block to further smooth the surface and remove any imperfections. Blend the repaired area with the surrounding concrete by lightly sanding the edges. Be careful not to remove too much material, as this can weaken the repair. Dust off the sanded area with a clean brush or cloth.
Repairing Loose Joints and Structural Damage
Loose joints and structural damage can compromise the stability and safety of cement patio furniture. These issues often arise from years of use, weathering, or impact. Addressing these problems requires careful assessment and appropriate repair techniques.
Assessment and Disassembly: Carefully inspect the loose joints or damaged areas to determine the extent of the problem. If possible, disassemble the furniture to gain better access to the affected areas. This may involve removing bolts, screws, or other fasteners. If the joint is simply loose, cleaning and re-gluing may be sufficient. If the joint is broken or severely damaged, more extensive repairs may be necessary.
Surface Preparation: Thoroughly clean the bonding surfaces with a wire brush or abrasive pad. Remove any loose concrete, dirt, or old adhesive. Ensure that the surfaces are clean and dry before applying any adhesive. For optimal bonding, consider roughening the surfaces with a concrete grinder or sandpaper.
Applying Concrete Adhesive or Epoxy Resin: Apply a generous amount of concrete adhesive or epoxy resin to both bonding surfaces. Ensure that the adhesive or resin covers the entire surface area. For epoxy resin, follow the manufacturer's instructions for mixing and application. Use clamps, shims, or supports to hold the pieces in place while the adhesive cures. Ensure that the pieces are properly aligned before clamping. Allow the adhesive to cure completely according to the manufacturer's instructions. This curing time can vary depending on the type of adhesive and environmental conditions.
Reinforcement (if needed): For severely damaged joints or structural components, consider reinforcing the repair with steel dowels or reinforcement bars. Drill holes into the concrete on both sides of the joint and insert the dowels or bars with epoxy resin. This will provide additional strength and stability to the repaired area. Ensure that the dowels or bars are long enough to provide adequate support.
Reassembly and Securing: After the adhesive has fully cured, carefully remove the clamps and supports. Reassemble the furniture, ensuring that all fasteners are properly tightened. If necessary, replace any damaged or missing fasteners. Inspect the repaired joint for any signs of weakness or instability. If needed, apply additional adhesive or reinforcement.
Finishing and Sealing: Once the repairs are complete, smooth any rough edges or imperfections with a concrete grinder or sandpaper. Clean the repaired area with a brush or cloth. Apply a concrete sealer to protect the repaired surfaces from moisture penetration and weathering. This will help to prolong the life of the repair and prevent future damage.
Cleaning, Sealing, and Maintaining Cement Patio Furniture
Proper cleaning, sealing, and regular maintenance are essential for preserving the beauty and longevity of cement patio furniture. These practices protect the furniture from the elements and prevent premature deterioration.
Regular Cleaning: Clean cement patio furniture regularly with a mild soap and water solution. Use a soft-bristled brush or sponge to remove dirt, dust, and debris. Avoid using harsh chemicals or abrasive cleaners, as these can damage the concrete surface. Rinse thoroughly with clean water and allow the furniture to dry completely. For stubborn stains or mildew, consider using a pressure washer with a low-pressure nozzle. Be careful not to damage the concrete surface with excessive pressure.
Sealing: Apply a concrete sealer every one to two years to protect the furniture from moisture penetration, freeze-thaw cycles, and staining. Choose a sealer specifically designed for outdoor concrete furniture. Before applying the sealer, ensure that the furniture is clean and dry. Follow the manufacturer's instructions for application. Apply the sealer evenly, avoiding pooling or streaking. Allow the sealer to dry completely before using the furniture.
Winter Protection: In regions with harsh winters, consider covering cement patio furniture with waterproof covers or storing it indoors. This will protect the furniture from snow, ice, and extreme temperatures. If covering the furniture, ensure that the covers are breathable to prevent moisture buildup. If storing the furniture indoors, clean it thoroughly before storing. Elevate the furniture slightly off the ground to prevent moisture from wicking up into the concrete.
Addressing Stains: Remove stains from cement patio furniture as soon as possible. Different stains require different cleaning methods. For oil stains, use a degreasing cleaner or absorbent material such as kitty litter. For rust stains, use a rust remover specifically designed for concrete. For organic stains, such as leaves or berries, use a solution of bleach and water. Always test the cleaning solution in an inconspicuous area before applying it to the entire surface. Rinse thoroughly with clean water after stain removal.
Preventative Measures: Use coasters or placemats to protect the furniture from spills and scratches. Avoid placing heavy or sharp objects directly on the concrete surface. Trim vegetation around the furniture to prevent moisture buildup and mildew growth. Inspect the furniture regularly for signs of damage or deterioration. Address any issues promptly to prevent further damage. With proper care and maintenance, cement patio furniture can provide years of enjoyment.

Resurfacing A Concrete Patio For Budget Diy Makeover Fab Everyday

Ed Concrete See How We Repaired Our Gross Patio 2024

Concrete Patio Repair 5 Ways To Improve Your

Ed Concrete See How We Repaired Our Gross Patio 2024

Any Suggestions On How To Re A Concrete Bench Hometalk

Ed Concrete See How We Repaired Our Gross Patio 2024

How To Fix Patio Chairs That Leave Rust Stains On Cement Diy Grampa

Ed Concrete See How We Repaired Our Gross Patio 2024

Ed Concrete See How We Repaired Our Gross Patio 2024 Cement Painted Porch

9 Great Concrete Patio Ideas For A Makeover Remodelaholic
Related Posts