How To Create A Patio Space On Grass
Establishing a patio space on an existing lawn presents a cost-effective and visually appealing method to expand usable outdoor living areas. Careful planning and execution are crucial to ensure a durable and aesthetically pleasing result. This article outlines the necessary steps to create a functional and long-lasting patio space directly on a grass surface.
Planning and Preparation
Before commencing any physical work, a comprehensive plan should be developed. This involves considering several key factors, including the patio's intended use, size, shape, materials, and drainage. The intended use of the patio will directly influence its size and the type of materials selected. For example, a small patio designed for a bistro table and chairs will require less space and structural support than a larger patio meant for outdoor dining and entertainment.
The size and shape of the patio should complement the existing landscape. Consider the overall proportions of the yard and the architecture of the house. Marking the proposed patio area with stakes and string is a practical way to visualize its dimensions and ensure it fits harmoniously within the surrounding lawn. This step helps identify potential obstacles such as trees, underground utilities, or existing landscaping features that may need to be relocated or worked around.
Material selection is a critical aspect of patio construction. Popular choices include pavers, flagstone, gravel, and composite decking. Each material offers different advantages and disadvantages in terms of cost, durability, maintenance, and aesthetic appeal. Pavers, for instance, provide a wide range of colors, shapes, and patterns, offering flexibility in design. Flagstone offers a natural, rustic look but may require more skilled installation. Gravel is a cost-effective and permeable option, allowing for good drainage, but it may shift over time and require periodic replenishment. Composite decking provides a low-maintenance and durable surface but may be more expensive than other options.
Drainage is a crucial consideration, especially when building a patio on grass. Poor drainage can lead to water accumulation, which can damage the patio surface, promote weed growth, and create a muddy environment. The patio should be designed with a slight slope to direct water away from the house and towards a designated drainage area. The slope should be subtle, typically around ¼ inch per foot, to ensure water flows efficiently without being noticeable. Installing a drainage system, such as a French drain or a surface drain, may be necessary in areas with poor natural drainage.
Obtaining necessary permits and adhering to local building codes is essential. Contacting the local building department to inquire about permits and regulations related to patio construction is a proactive step that can prevent potential legal issues and ensure the project complies with safety standards. Some municipalities may have specific requirements regarding setbacks from property lines, drainage, and the use of certain materials.
Before any digging occurs, it is critical to call the local utility companies to mark the locations of underground utilities, such as gas lines, water pipes, and electrical cables. This is a free service that can prevent accidental damage to utilities, which can be dangerous and expensive to repair. The utility companies will typically mark the locations of underground lines with colored flags or paint.
Installation Process
Once the planning stage is complete, the physical installation process can begin. This involves removing the existing grass, preparing the base, laying the patio surface, and finishing the edges.
The first step is to remove the existing grass and topsoil from the designated patio area. Using a sod cutter or a shovel, carefully remove the sod in sections. The sod can be composted or reused elsewhere in the yard. The depth of the excavation should be determined by the thickness of the base materials and the desired finished height of the patio. Typically, an excavation depth of 4 to 6 inches is sufficient.
After removing the sod, the soil should be compacted to provide a stable base for the patio. A plate compactor is the most effective tool for compacting soil, but a hand tamper can be used for smaller areas. Compacting the soil prevents settling and ensures the patio surface remains level over time. The soil should be compacted in layers, typically 2 to 3 inches thick, to achieve optimal density.
A layer of compacted gravel should be installed over the compacted soil to provide drainage and further stabilize the base. The gravel should be spread evenly and compacted to a depth of 4 to 6 inches. Using crushed gravel, such as ¾ inch minus, provides a good balance of drainage and compaction. A geotextile fabric can be placed between the soil and the gravel layer to prevent the soil from mixing with the gravel and compromising drainage.
A layer of leveling sand should be spread over the compacted gravel to provide a smooth and even surface for laying the patio surface. Using coarse sand, such as concrete sand, is recommended. The sand should be spread evenly and screeded to a uniform depth of 1 to 2 inches. Screeding involves using a straight board to level the sand, ensuring a consistent surface for the pavers or other patio materials.
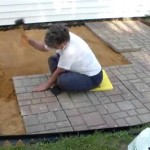
The patio surface can now be installed. If using pavers or flagstone, carefully lay each piece, ensuring it is level and properly spaced. Using a rubber mallet to gently tap each paver or stone into place can help ensure it is firmly seated in the sand. Maintaining consistent spacing between the pavers or stones is essential for a uniform and aesthetically pleasing appearance. Spacers can be used to ensure consistent spacing.
If using gravel as the patio surface, spread the gravel evenly over the compacted gravel base. The gravel should be spread to a depth of 2 to 4 inches. Raking the gravel to create a smooth and even surface can improve its appearance. Consider using a border material, such as edging stones or metal edging, to contain the gravel and prevent it from spreading into the surrounding lawn.
Once the patio surface is installed, the joints between the pavers or stones should be filled with polymeric sand. Polymeric sand is a special type of sand that hardens when wet, locking the pavers or stones in place and preventing weed growth. Sweeping the polymeric sand into the joints and then wetting it down according to the manufacturer's instructions is crucial to achieving the desired results.
Finishing Touches and Maintenance
After the patio surface is installed, several finishing touches can enhance its appearance and functionality. These include edging, landscaping, and furniture placement.
Edging is an important element that defines the patio's boundaries and prevents the surrounding lawn from encroaching on the patio surface. A variety of edging materials can be used, including edging stones, metal edging, plastic edging, and wood edging. The choice of edging material depends on the desired aesthetic and the overall design of the landscape. Edging should be installed securely to prevent it from shifting or coming loose over time.
Landscaping can enhance the beauty and functionality of the patio. Planting flowers, shrubs, and trees around the patio can create a more inviting and relaxing atmosphere. Consider the mature size of plants when selecting them, and ensure they are placed in a location that receives adequate sunlight and water. Container gardening is a versatile option for adding greenery to a patio, allowing for easy movement and seasonal changes.
Selecting appropriate furniture is essential for creating a comfortable and functional patio space. Consider the size of the patio and the intended use when choosing furniture. Outdoor dining sets, lounge chairs, and coffee tables are popular choices. Selecting furniture that is durable and weather-resistant is crucial for ensuring its longevity. Consider furniture made from materials such as aluminum, teak, or wicker.
Regular maintenance is essential for preserving the appearance and functionality of the patio. This includes sweeping or washing the patio surface regularly to remove dirt and debris. Weeds should be removed promptly to prevent them from spreading. Applying a sealant to the patio surface can protect it from stains and weathering. Inspecting the patio regularly for cracks or damage and making repairs as needed can prevent minor problems from becoming major issues.
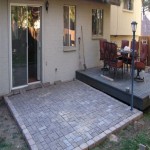
By carefully planning and executing each step of the construction process, a durable and aesthetically pleasing patio space can be successfully created on grass. Proper drainage, meticulous material selection, and regular maintenance are crucial for ensuring the patio remains a valuable asset to the outdoor living space for years to come.

How To Make Outdoor Space Feel Bigger From Interior Designers

10 Small Backyard Ideas For Artificial Grass Purchase Green

How To Build A Diy Patio For Less Than 300 The Rose Table

Diy Crushed Pea Gravel Patio Install

12 Stunning Backyard Landscaping Ideas For A Small Area

The Best Patio Ground Cover Options You Should Consider

Diy Paver Artificial Turf Patio

How To Build A Diy Patio For Less Than 300 The Rose Table

Diy Patio With Grass Between Pavers And A Fire Pit

16 Green Upgrades For Your Backyard Extra Space Storage
Related Posts