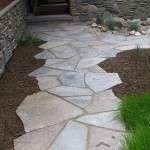
How To Build A Stone Patio On Uneven Ground
Constructing a stone patio can significantly enhance the aesthetics and functionality of an outdoor space. However, laying a stone patio on uneven ground presents unique challenges. This article outlines the process of building a durable and visually appealing stone patio on an unlevel surface, focusing on proper preparation, material selection, and installation techniques.
1. Site Preparation and Grading
The initial and arguably most crucial step in building a stone patio on uneven ground is thorough site preparation. This involves clearing the area of all vegetation, debris, and topsoil. Removing organic material prevents decomposition, which can lead to settling and an unstable patio surface over time. The depth of removal will depend on the extent of unevenness, but typically, a minimum of 6-8 inches is recommended.
Once the area is cleared, the process of grading begins. Grading refers to leveling the ground to create a stable base for the patio. For severely uneven ground, it may be necessary to bring in fill material, such as gravel or compacted soil. The goal is to achieve a relatively flat and consistent surface with a slight slope (approximately 1-2%) away from the house to facilitate water runoff. This prevents water from pooling on the patio and causing damage or safety hazards.
The use of a transit level or laser level is highly recommended for accurate grading. These tools provide precise measurements to ensure the ground is level and sloped correctly. Stakes should be driven into the ground at regular intervals, and string lines attached to the stakes at the desired level. This creates a visual guide for adding or removing fill material. A plate compactor should be used to compact the fill material in layers, typically 2-3 inches at a time. Compacting ensures that the fill material is dense and stable, minimizing the risk of settling.
Proper drainage is paramount. If the existing soil has poor drainage, consider installing a French drain or other drainage system beneath the patio. A French drain consists of a perforated pipe surrounded by gravel, which allows water to drain away from the patio. The drain should be sloped slightly to ensure proper water flow. Failure to address drainage issues can lead to water damage, such as frost heave in colder climates or increased weed growth.
2. Base Construction and Material Selection
With the ground properly graded, the next step is to construct a solid base for the stone patio. The base provides a stable and level foundation for the stones, preventing them from shifting or settling over time. The base typically consists of multiple layers of materials, each serving a specific purpose. The bottom layer is usually a layer of crushed stone or gravel, followed by a layer of compacted sand.
The crushed stone layer provides drainage and helps to distribute the weight of the patio evenly. The size of the crushed stone should be approximately 3/4 inch to 1 inch. This layer should be at least 4-6 inches thick and compacted thoroughly with a plate compactor. Compaction is essential to create a stable base that will not shift or settle.
The sand layer serves as a leveling bed for the stones. It allows for minor adjustments in height and ensures that the stones are evenly supported. The sand should be coarse and well-draining. Avoid using fine sand, as it can compact too easily and prevent proper drainage. The sand layer should be approximately 1-2 inches thick and screeded to create a smooth and level surface.
The selection of stone for the patio is an important consideration. The type of stone will affect the appearance, durability, and cost of the patio. Common choices include flagstone, slate, bluestone, and pavers. Flagstone is a popular choice due to its natural appearance and irregular shapes. Slate is a durable and elegant option, while bluestone is known for its distinctive blue-gray color. Pavers are manufactured stones that come in various shapes, sizes, and colors. The choice of stone will depend on personal preference and budget.
When choosing stone, consider its thickness and strength. The thicker the stone, the more durable it will be. For areas with heavy foot traffic, thicker stones are recommended. Also, consider the climate and whether the stone is resistant to weathering and frost damage. Porous stones may be more susceptible to damage in colder climates.
3. Stone Placement and Joint Filling
With the base prepared and the stones selected, the next step is to lay the stones. This process requires careful planning and attention to detail. Start by arranging the stones in the desired pattern. Consider the size, shape, and color of each stone and how it will fit with the surrounding stones. It may be helpful to lay out the stones on the ground before setting them in place to get a better sense of the overall design. It is useful to have a layout plan ready.
When setting the stones, use a rubber mallet to gently tap them into place. Ensure that each stone is level with the surrounding stones. Use a level to check the levelness and adjust as necessary. If a stone is too high, remove it and add more sand to the base. If a stone is too low, remove it and remove some of the sand. Take the time to get each stone level and stable.
Leave a small gap between each stone to allow for expansion and contraction due to temperature changes. The gap should be approximately 1/4 inch to 1/2 inch wide. These gaps will be filled with jointing material. Several options exist for jointing material, including polymeric sand, mortar, and gravel. Polymeric sand is a popular choice because it is easy to install and helps to prevent weed growth. Mortar is a more durable option, but it requires more skill to install. Gravel is a simple and inexpensive option, but it may require more maintenance.
When using polymeric sand, follow the manufacturer's instructions carefully. Typically, the sand is poured into the joints and then compacted with a plate compactor. The sand is then wetted down to activate the polymers, which bind the sand particles together and create a solid joint. Allow the polymeric sand to dry completely before using the patio.
When using mortar, mix the mortar according to the manufacturer's instructions. Use a trowel to apply the mortar to the joints, being careful not to get mortar on the surface of the stones. Smooth the mortar joints with a pointing tool. Allow the mortar to cure completely before using the patio.
Finally, clean the patio surface to remove any dirt or debris. Rinse the patio with water to remove any remaining sand or mortar. Inspect the patio for any cracks or unevenness. Make any necessary repairs promptly to prevent further damage. With proper care and maintenance, a stone patio built on uneven ground can provide years of enjoyment and enhance the beauty of the outdoor space.
4. Addressing Specific Unevenness Challenges
While the general principles outlined above apply to most uneven ground situations, some specific scenarios require tailored solutions. For example, if the unevenness is due to a large rock or tree root, it may be necessary to excavate around or remove the obstruction. Consult with a professional if the obstruction is too large or complex to handle independently.
In areas with significant slopes, terracing the patio can be an effective solution. Terracing involves creating multiple levels or tiers within the patio, connected by steps or retaining walls. This not only addresses the slope but also adds visual interest to the design. Each tier is essentially treated as a separate, level patio area, following the base construction and stone placement steps outlined earlier.
For areas with unstable soil, such as clay or poorly draining soil, consider using a geotextile fabric beneath the base layer. Geotextile fabric is a permeable material that allows water to drain through while preventing soil from mixing with the base material. This helps to maintain the stability of the base and prevent settling.
Dealing with minor unevenness can be addressed by varying stone thickness. Selecting a range of stone thicknesses can allow for adjustments on the fly, compensating for subtle differences in elevation. This approach requires careful selection and placement of stones but can be a less labor-intensive alternative to extensive grading.
Remember to account for settling. Even with thorough compaction, some settling is inevitable over time. Designing the patio with a slight over-slope can compensate for this, ensuring proper drainage even after some settling occurs. Regularly inspecting the patio and addressing any issues promptly will help to maintain its integrity and longevity.

Back Yard Patio On Sloped Terrain Small Garden Backyard

How To Fix Uneven Patio Pavers

Paver Stone Patio Tutorial For Beginners To Intermediates

How To Install Pavers On Unlevel Ground Hunker

Laying Patio Pavers Polycor Inc

Flagstone Patio Diy Livingston Farm Outdoor Structures Landscaping S And Creative Spaces In Vermont

Build A Patio Or Walkway From Pavers Extreme How To

Re Do On A Subpar Uneven Patio Hometalk

How To Build A Raised Patio With Retaining Wall Blocks

How To Build A Patio An Easy Do It Yourself Project
Related Posts


