How to Build a Small Flagstone Patio
Constructing a flagstone patio can significantly enhance outdoor living spaces. A small flagstone patio offers a manageable project for homeowners with basic landscaping skills and provides a durable and aesthetically pleasing area for relaxation, dining, or entertainment. This article will outline the process of building a small flagstone patio, covering site preparation, material selection, installation, and finishing touches.
Planning and Preparation: Defining the Space and Gathering Materials
The initial step in building a flagstone patio involves careful planning and thorough preparation. This phase ensures that the final project is both functional and visually appealing.
First, determine the desired location for the patio. Consider factors such as sunlight exposure, proximity to the house, prevailing winds, and existing landscaping. Mark the perimeter of the patio using stakes and string. Ensure the area is large enough to accommodate the intended use, factoring in the size and placement of furniture or other features.
Next, calculate the required amount of flagstone. Estimate the square footage of the patio area by multiplying the length and width. Flagstone is typically sold by weight or by the pallet, so understanding the dimensions of the intended patio is crucial for accurate material ordering. It is generally advisable to order approximately 10-15% more flagstone than calculated to account for breakage, irregular shapes, and cutting waste. In addition to flagstone, the project will require materials such as landscape fabric, gravel base material (often referred to as Class 5 road base or crushed aggregate), leveling sand (such as coarse sand or polymeric sand), a rubber mallet, a level, a shovel, a rake, a tamper, and safety glasses and gloves.
Before commencing any excavation, it is imperative to check for underground utilities. Contact local utility companies to locate and mark any buried lines or pipes to avoid potential hazards and property damage. After confirming the absence of underground obstructions, begin excavating the area. A typical excavation depth is 6-8 inches, allowing for a 4-inch gravel base and a 1-2 inch sand setting bed. This depth may need to be adjusted based on local frost lines and soil conditions. Use a shovel to remove the topsoil and any existing vegetation within the marked perimeter. Ensure the excavated area is level, using a level and string to guide the process.
Proper drainage is essential to prevent water from pooling on the patio surface. Grade the excavated area to slope slightly away from the house, typically at a rate of 1/4 inch per foot. This subtle slope will facilitate water runoff and prevent water damage to the patio and surrounding structures. Once the excavation is complete, it is time to move on to the next stage: base preparation.
Base Construction and Flagstone Placement
A stable and well-drained base is crucial for the longevity and stability of a flagstone patio. The base provides a solid foundation for the flagstone and prevents shifting or settling over time.
Begin by laying down landscape fabric over the excavated area. The landscape fabric acts as a barrier, preventing weeds from growing up through the patio and stabilizing the soil. Spread the fabric evenly across the area, overlapping the edges by at least 6 inches. Secure the fabric with landscape staples or heavy stones to prevent it from shifting during the next steps.
Next, add the gravel base material. Pour the gravel evenly over the landscape fabric to a depth of approximately 4 inches. Use a rake to distribute the gravel uniformly across the area. Once the gravel is evenly distributed, use a tamper to compact the base thoroughly. Compacting the gravel base is essential for creating a stable foundation. A plate compactor is recommended for larger areas; however, a hand tamper can be used for smaller patios. Ensure the base is level and maintains the slight slope for drainage. Add or remove gravel as necessary to achieve a consistent and even surface.
After compacting the gravel base, add a layer of leveling sand. Pour the sand evenly over the gravel base to a depth of approximately 1-2 inches. Use a rake or a screed board to smooth the sand and create a level setting bed for the flagstone. The sand layer should be uniformly thick and free of any clumps or debris. A level is essential during this stage to ensure that the sand bed is perfectly flat and level before placing the flagstone.
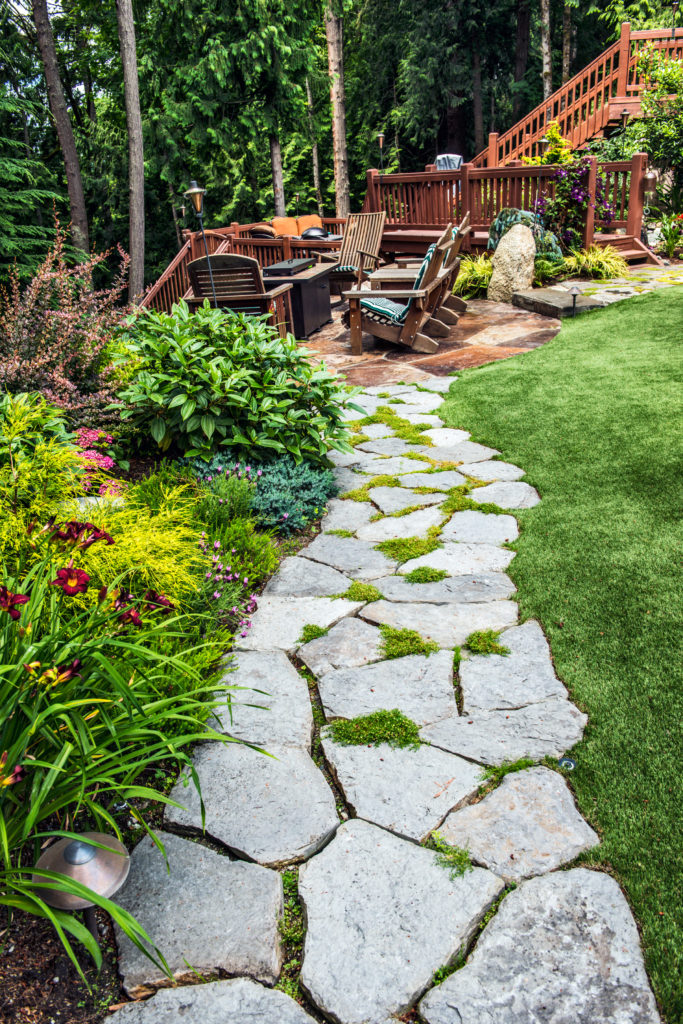
Now comes the process of laying the flagstone. Begin by selecting the largest stones and placing them strategically within the patio area. Consider the shape, size, and color of each stone to create a visually appealing and balanced design. Leave approximately 1-3 inches between each flagstone to allow for joint filling material. Use a rubber mallet to gently tap each stone into the sand, ensuring it is firmly seated and level with the surrounding stones. A level should be used frequently during this stage to check for any inconsistencies. If a stone is too high or too low, add or remove sand as necessary to achieve a level surface. Continue placing the flagstones, working from the center outwards. As the patio expands, use smaller stones to fill the gaps between the larger stones. Cutting flagstone may be necessary to achieve a proper fit. Use a masonry saw or a hammer and chisel to shape the stones as needed. Safety glasses and gloves are essential when cutting flagstone.
Once all the flagstones are in place, step back and assess the overall appearance of the patio. Make any necessary adjustments to achieve the desired aesthetic. Check for any uneven surfaces or gaps and address them before proceeding to the next stage: joint filling.
Joint Filling and Finishing
Filling the joints between the flagstones is a crucial step in securing the patio and preventing weed growth. The choice of joint filling material can significantly impact the appearance and durability of the patio.
There are several options for filling the joints between flagstones, including polymeric sand, decomposed granite, or mortar. Polymeric sand is a popular choice for its ease of installation and weed-inhibiting properties. Decomposed granite offers a more natural look but may require more frequent maintenance. Mortar provides a durable and long-lasting solution but requires more skill to install.
If using polymeric sand, ensure the flagstone surface is completely dry. Sweep the polymeric sand into the joints using a broom. Fill the joints completely, leaving no gaps or voids. Once the joints are filled, use a brush to remove any excess sand from the flagstone surface. Lightly mist the patio surface with water, following the manufacturer's instructions. The water activates the polymers in the sand, causing it to harden and bind together. Avoid overwatering, as this can wash away the sand and prevent it from setting properly. Allow the polymeric sand to dry completely before walking on the patio. This typically takes 24-48 hours, depending on the weather conditions.
If using decomposed granite, simply sweep the material into the joints using a broom. Pack the decomposed granite firmly into the joints using a tamper or a hand trowel. Water the patio lightly to help settle the decomposed granite. Repeat the process as needed to fill any gaps or voids.
If using mortar, mix the mortar according to the manufacturer's instructions. Use a pointing trowel to apply the mortar into the joints, ensuring it is packed tightly and flush with the flagstone surface. Smooth the mortar joints with a damp sponge to create a clean and professional finish. Allow the mortar to cure completely before walking on the patio.
Once the joints are filled, clean the patio surface thoroughly to remove any remaining debris or residue. Use a broom or a hose to wash away any dirt or dust. Inspect the patio for any imperfections and make any necessary repairs. Add edging or borders to the patio to provide additional support and enhance its aesthetic appeal. Consider adding plants, furniture, or other decorative elements to create a welcoming and inviting outdoor space.
Proper maintenance is essential for preserving the beauty and longevity of a flagstone patio. Regularly sweep the patio to remove leaves, dirt, and debris. Periodically inspect the joints for any cracks or erosion and repair them as needed. Apply a sealant to the flagstone surface to protect it from staining and weathering. With proper care and maintenance, a flagstone patio can provide years of enjoyment and enhance the value of the property.

How To Build A Flagstone Patio In One Day Merrypad
:strip_icc()/101427270-f2fbe431e7174e86945a62e011e4d361.jpg?strip=all)
How To Install A Flagstone Patio Our Step By Guide

How To Install A Flagstone Patio Step By

Flagstone Patios How To Guide Paving Cost Diy Vs Contractor Install Mutualmaterials Com

How To Build A Flagstone Patio In One Day Merrypad

How To Build A Flagstone Patio Greenacresodfarm Com

Flagstone Patio Unique Backyard Ideas And Installation Guide
:strip_icc()/101617128-0e66ceedb766432d87beaef6e6a3dea3.jpg?strip=all)
How To Install A Flagstone Patio Our Step By Guide

Flagstone Patios How To Guide Paving Cost Diy Vs Contractor Install Mutualmaterials Com

Build A Flagstone Pathway In 5 Minutes
Related Posts


