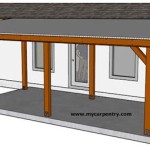
Adding a screened-in patio to your home is a great way to extend your living space and enjoy the outdoors without being exposed to the elements. It is a relatively simple project that can be accomplished in just a few days. Here are the steps to take when designing and building a screened-in patio.
First, consider the size and shape of the area you want to screen in. Measure the space and draw up a plan that fits within the parameters. Make sure to consider the amount of sun the space will receive, and factor in any existing features that may affect the design, such as trees or existing patio furniture.
Once you have a plan, you will need to purchase the necessary materials. This includes the screen, framing, and any hardware you may need. Make sure to buy enough material to cover the entire space. Also, be sure to buy a durable material that can withstand the elements.
Next, you will need to install the framing. This is a fairly straightforward process, but it is important to make sure everything is level and secure. Once the framing is in place, you can begin to attach the screen. Start at one corner and attach the screen to the frame, using the hardware provided.
Finally, finish the project by adding any additional features you may want, such as a door or windows. Make sure to use the same durable materials you used for the screen and framing. Once everything is in place, you can enjoy the comfort of your screened-in patio!


Related Posts


