How to Build a Pavestone Patio: A Comprehensive Guide
Constructing a pavestone patio is a rewarding home improvement project that enhances outdoor living spaces. A well-built patio adds value to a property while providing an area for relaxation, entertainment, and dining. Careful planning and execution are essential for creating a durable and aesthetically pleasing result. This guide outlines the necessary steps for building a pavestone patio, from initial planning to final installation.
Planning and Preparation
The initial phase of building a pavestone patio involves careful planning and preparation. This includes selecting the desired location, determining the patio size and shape, choosing appropriate pavestone materials, and ensuring proper drainage. Neglecting these initial steps can lead to structural problems and aesthetic dissatisfaction later on.
Location and Layout: Select a location that complements the existing landscape and provides convenient access from the house. Consider factors such as sun exposure, wind direction, and proximity to trees. Mark the desired patio area using stakes and string, ensuring the layout is accurate and reflects the intended design. The shape of the patio can be rectangular, square, circular, or irregular, depending on personal preference and the overall landscape design. A clearly defined layout ensures accurate material estimates and facilitates the construction process.
Material Selection: Pavestones are available in a variety of materials, including concrete, brick, natural stone, and interlocking pavers. Concrete pavers are a cost-effective option that offers diverse styles and colors. Brick pavers provide a classic aesthetic and are known for their durability. Natural stone pavers, such as flagstone or slate, offer a unique and natural appearance. Interlocking pavers are designed for easy installation and provide a stable, uniform surface. When choosing pavestone materials, consider the overall design aesthetic, budget constraints, and anticipated usage of the patio. Select pavers with a thickness suitable for the intended load, typically 2 3/8 inches for pedestrian traffic and heavier for vehicular traffic. It's also crucial to accurately calculate the amount of paving material needed based on the patio's dimensions, adding an extra 5-10% for cuts and waste.
Drainage Considerations: Proper drainage is crucial for preventing water accumulation and potential damage to the patio. The patio should be designed with a slight slope, typically 1/8 inch per foot, to allow water to drain away from the house. Consider the existing drainage patterns in the yard and ensure the patio does not impede natural water flow. In areas with poor soil drainage, installing a subsurface drainage system may be necessary. This could involve incorporating a perforated pipe system beneath the base layer to channel water away from the patio area. Failure to address drainage issues can result in erosion, cracking, and premature deterioration of the patio surface.
Permits and Regulations: Before commencing any construction, it is essential to check local building codes and regulations. Some municipalities require permits for installing patios, particularly if they exceed a certain size or alter existing drainage patterns. Obtaining the necessary permits ensures compliance with local ordinances and avoids potential fines or legal complications. Contact the local building department or planning office for specific requirements in the area.
Excavation and Base Preparation
Proper base preparation is paramount for creating a stable and long-lasting pavestone patio. The base layer provides a solid foundation for the pavers and prevents settling or shifting over time. This involves excavating the area, installing a compacted gravel base, and leveling a sand setting bed.
Excavation: Excavate the area to a depth that accommodates the pavestone thickness, the sand setting bed, and the gravel base. Typically, this requires removing 6-8 inches of soil. The exact depth depends on the specific materials used and the soil conditions. Ensure the excavation extends beyond the perimeter of the planned patio to accommodate edge restraints. Remove any vegetation, roots, or debris from the excavated area. Use a shovel and wheelbarrow to remove the excavated soil, and dispose of it properly according to local regulations.
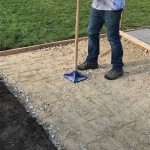
Gravel Base Installation: Install a compacted gravel base to provide drainage and structural support. Use a well-graded gravel, such as crushed stone or road base, with a particle size ranging from fine to coarse. Spread the gravel evenly over the excavated area to a depth of 4-6 inches. Use a plate compactor to compact the gravel in layers, ensuring each layer is thoroughly compacted before adding the next. Compacting the gravel base is crucial for preventing settling and maintaining a level surface. The gravel base should extend slightly beyond the perimeter of the planned patio to provide additional support for edge restraints.
Sand Setting Bed: After compacting the gravel base, install a 1-inch layer of sand setting bed. Use coarse sand that is free of organic matter and debris. Spread the sand evenly over the compacted gravel base, using a screed board to create a smooth and level surface. The screed board should be long enough to span the width of the patio and should be guided along two parallel pipes or boards set at the desired height. Use a level to ensure the sand setting bed is perfectly level. Avoid walking on the sand setting bed after it has been leveled, as this can disrupt the surface and create unevenness. The sand setting bed provides a cushion for the pavers and allows for minor adjustments during installation.
Pavestone Installation and Finishing
The final stage involves laying the pavestones according to the chosen pattern, installing edge restraints, and filling the joints with polymeric sand. Precise installation and proper finishing techniques are essential for achieving a professional and durable patio.
Paver Placement: Begin laying the pavestones according to the chosen pattern, starting from one edge and working across the patio. Use a string line to ensure the pavers are aligned correctly and maintain consistent spacing. Gently press each paver into the sand setting bed, ensuring it is level with the surrounding pavers. Use a rubber mallet to tap the pavers into place and adjust their height as needed. Maintain consistent spacing between the pavers, typically 1/8 to 1/4 inch, to allow for joint filling. Cut pavers as needed to fit the perimeter of the patio, using a paver splitter or circular saw with a diamond blade. Wear safety glasses and gloves when cutting pavers. Check the level of the pavers frequently using a level and adjust as needed. The consistency of the sand setting bed and the accuracy of the paver placement are critical for creating a smooth, uniform surface.
Edge Restraints: Install edge restraints around the perimeter of the patio to prevent the pavers from shifting or moving over time. Edge restraints can be made from plastic, metal, or concrete. Secure the edge restraints to the compacted gravel base using stakes or spikes. Ensure the edge restraints are level with the top of the pavers. The edge restraints prevent lateral movement of the pavers and maintain the structural integrity of the patio.
Joint Filling: After the pavers are installed and the edge restraints are in place, fill the joints between the pavers with polymeric sand. Polymeric sand is a mixture of sand and polymers that hardens when wetted, creating a stable and weed-resistant joint. Sweep the polymeric sand into the joints, ensuring they are completely filled. Use a broom or brush to remove any excess sand from the surface of the pavers. Lightly mist the polymeric sand with water, following the manufacturer's instructions. Avoid over-watering, as this can cause the polymeric sand to wash away or become discolored. Allow the polymeric sand to cure for the recommended time, typically 24 to 48 hours. The polymeric sand creates a strong, flexible joint that prevents weed growth and keeps the pavers from shifting.
Following these comprehensive steps will result in a professionally built and durable pavestone patio that enhances the value and enjoyment of any outdoor living space. Regular maintenance, such as sweeping debris and occasional cleaning, will ensure the patio remains in excellent condition for years to come.

How To Prep Lay A Base For Pavers Western Interlock

How To Build A Paver Patio Budget Dumpster

How To Build A Paver Patio Bob Vila

How To Build A Patio In Weekend Finegardening

How To Build A Diy Paver Patio With Firepit

How To Build A Paver Patio It S Done Young House Love

How To Install Pavers Installing A Patio Step By Guide
.jpg?strip=all "How To Install Patio Pavers Lv")
How To Install Patio Pavers Lv

Diy Paver Patio For Normal People

Budget Friendly Diy Paver Block Patio Interior Frugalista
Related Posts