How to Build a Patio on Sloped Ground
Building a patio on sloped ground presents unique challenges, but it can be overcome with careful planning and execution. The key is to create a level surface for your patio while ensuring proper drainage and stability. This article will guide you through the process of building a patio on sloped ground, outlining key points to consider and steps to take.
1. Planning and Design
Before starting construction, careful planning is crucial. Consider the following factors:
- Desired Patio Size and Shape: Determine the dimensions and shape of your patio, keeping in mind the available space and your desired usage.
- Slope Assessment: Measure the slope of your ground to calculate the required amount of leveling. This will determine the type of construction method needed.
- Drainage: Plan for proper drainage to prevent water accumulation on the patio. Consider using a slight slope away from the house or integrating drainage channels.
- Materials: Choose suitable patio materials that can accommodate the slope. Concrete, pavers, and timber are all viable options.
- Access and Excavation: Assess access for delivery of materials and equipment. Consider the amount of excavation required for leveling the ground.
Once the planning is complete, create a detailed design plan that includes the patio's layout, materials, and construction details. This plan will serve as a guide throughout the construction process.
2. Site Preparation and Excavation
Site preparation involves removing any existing vegetation, debris, and topsoil to create a clean foundation. This will ensure a smooth and stable surface for the patio. If the slope is significant, excavation may be required. This involves removing soil to achieve a relatively level base. The depth of excavation depends on the desired patio height and the slope of the ground.
After excavation, compact the base material thoroughly to prevent settling. This is crucial for stability and to prevent future cracks or unevenness in the patio. It is recommended to use a compactor or tamper for best results.
3. Building the Patio Base
The base of your patio is crucial for its stability and longevity. The type of base depends on the chosen construction method. Here are some common options:
- Concrete Base: Pouring a concrete base is suitable for large patios and areas with significant slope. It provides a solid foundation and can be reinforced with rebar.
- Gravel Base: A gravel base is a cost-effective option for smaller patios. It requires a layer of compacted gravel followed by sand for leveling.
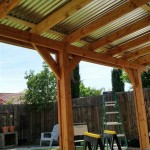
- Timber Frame: For patios with a slight slope, a timber frame can be used to create a level surface. This involves anchoring the timber frame to the ground with concrete piers or ground screws.
The base should be constructed according to the design plan, ensuring accurate leveling and proper drainage. If using concrete, ensure the base is poured with a slight slope for water runoff. If using a gravel base, the top layer of sand should be leveled to create a smooth surface.
4. Installing Patio Materials
Once the base is complete, you can install your chosen patio material. Here are some common options:
- Concrete: Concrete is durable and versatile but requires professional installation. Install the concrete in sections, ensuring proper leveling and a smooth finish.
- Pavers: Pavers are an easy-to-install and aesthetically pleasing option. Layout the pavers on the prepared base, leaving gaps for drainage and expansion. Use paver sand to fill the gaps and provide stability.
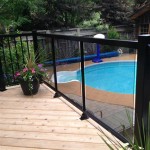
- Timber: Timber decks are a classic choice for patios. Construct a frame using pressure-treated lumber and install deck boards on top. Ensure proper fastening and drainage to prevent water damage.
Install the materials according to the manufacturer's instructions, ensuring they are properly aligned and level. Pay attention to drainage and expansion gaps, as these are crucial for the patio's longevity.
5. Finishing Touches
After installing the patio materials, add finishing touches to complete the project. This may include:
- Sealing: Seal concrete and paver patios to protect them from stains and weathering. Choose a sealer specifically designed for your chosen material.
- Lighting: Install lighting for evening enjoyment. Consider recessed lighting or string lights to enhance the ambiance.
- Furniture and Decor: Add furniture, plants, and accessories to personalize your patio and create a comfortable and inviting space.
These finishing touches enhance the beauty and functionality of your patio, making it an enjoyable space for relaxation and entertaining.

Paver Patio Slope Diy Pavers Building A

Behind The Build Sloped Backyard Transformation Master Spas Blog

Build A Deck On Sloping Yard Softwoods Pergola Decking Fencing Carports Roofing

Back Yard Patio On Sloped Terrain Small Garden Backyard

Building A Terraced Deck In Outdoor Remodel Silent Rivers

My Garden Is Sloped Can I Still Install A Patio Home Logic

How To Build A Deck Part 05 Building The Subframe With Q S

Making A Fire Pit Patio In Sloped Side Yard Space Landscapes By Tom Blog

Block Patio Slope Question Doityourself Com Community Forums

How To Build A Platform Deck Sloped Backyard Building Floating
Related Posts