How To Build A Patio On A Slope
Constructing a patio on a sloped area presents unique challenges and opportunities. Unlike building on level ground, a sloped patio requires careful planning and execution to ensure stability, functionality, and aesthetic appeal. This article provides a comprehensive guide on how to build a patio on a slope, covering essential design considerations, site preparation, material selection, and construction techniques.
Planning and Design Considerations
Before commencing any physical work, a thorough planning phase is crucial. This involves assessing the slope, determining the desired patio size and shape, and selecting appropriate materials. The slope's gradient significantly influences the complexity of the project and the type of construction method required. A gentle slope may allow for a simple tiered design, while a steeper slope might necessitate retaining walls or extensive excavation.
The intended use of the patio also dictates the design. If the primary purpose is for outdoor dining, a relatively flat surface is essential. For a more relaxed seating area, a terraced design with multiple levels can be considered. Consider the natural drainage patterns of the site. A well-designed patio should not impede water flow and, ideally, should incorporate drainage solutions to prevent water from pooling on the surface.
Furthermore, it's important to factor in local building codes and regulations. Many jurisdictions require permits for patio construction, especially if retaining walls are involved. Check with the local building department to ensure compliance and avoid potential fines or legal issues.
Visualizing the final product through sketches or 3D models can be helpful. This allows for experimentation with different designs and materials before committing to a specific plan. Consider the surrounding landscape and how the patio will integrate with the existing environment. A well-integrated patio enhances the overall aesthetic of the property.
Site Preparation and Excavation
Once the design is finalized, the next step is preparing the site. This involves clearing the area of vegetation, debris, and any obstacles that might hinder construction. Mark the perimeter of the patio using stakes and string, following the dimensions outlined in the design plan. Accurately marking the area ensures that the excavation is precise and avoids unnecessary work.
Excavation is a critical phase, particularly on a sloped site. The objective is to create a level base for the patio, which may involve removing soil from the higher areas and adding it to the lower areas. The amount of excavation required depends on the slope's gradient and the design of the patio. For steeper slopes, consider using a tiered approach or retaining walls to minimize the amount of soil that needs to be moved. For smaller slopes, you might be able to excavate down and level the area while maintaining a single patio surface.
During excavation, it's essential to maintain a slight slope away from the house to facilitate drainage. A gradual slope of approximately 1/4 inch per foot is generally sufficient. This ensures that rainwater flows away from the foundation and prevents water damage. Use a level and measuring tools to ensure the slope is consistent and accurate.
After excavation, compact the soil thoroughly using a plate compactor or hand tamper. This creates a solid base that minimizes settling and prevents the patio from shifting over time. Compaction is particularly important in areas where fill has been added. Multiple passes with the compactor may be necessary to achieve adequate compaction.
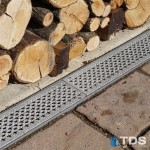
Following compaction, add a layer of gravel or crushed stone to provide a drainage layer. This layer should be at least 4 inches thick and compacted again. The gravel layer helps to prevent water from accumulating beneath the patio surface and protects against frost heave in cold climates. Consider using a geotextile fabric between the soil and the gravel layer to prevent soil from mixing with the gravel and compromising its drainage capacity.
Construction Techniques and Material Selection
The choice of construction technique and materials depends on the design, budget, and aesthetic preferences. Common materials for patio construction include pavers, flagstone, concrete, and wood. Each material has its advantages and disadvantages in terms of cost, durability, maintenance, and appearance. Pavers and flagstone offer a wide range of colors, shapes, and textures, allowing for creative designs. Concrete is a durable and cost-effective option, while wood provides a natural and warm aesthetic.
For sloped patios, retaining walls are often necessary to create level terraces or to support the patio surface. Retaining walls can be constructed from various materials, including concrete blocks, natural stone, timber, and precast concrete panels. The design and construction of retaining walls should be undertaken with care, as they are structural elements that must withstand significant pressure from the soil behind them.
When building retaining walls, ensure that they are properly footed and reinforced. A solid foundation is essential to prevent the wall from settling or leaning over time. Consider incorporating drainage behind the wall to relieve hydrostatic pressure. Weep holes or a perforated drain pipe installed behind the wall can effectively remove water and prevent damage.
If using pavers or flagstone, lay them on a bed of sand or gravel, ensuring that they are level and evenly spaced. Use a rubber mallet to gently tap the pavers into place. Fill the joints between the pavers with polymeric sand to stabilize them and prevent weed growth. Polymeric sand hardens when wetted, creating a durable and weed-resistant surface.
Concrete patios can be poured in place or precast concrete slabs can be used. For poured-in-place concrete, ensure that the formwork is sturdy and accurately aligned. Reinforce the concrete with wire mesh or rebar to prevent cracking. Provide expansion joints to accommodate thermal expansion and contraction. Finish the concrete surface with a broom or trowel to create a non-slip surface.
Wooden patios can be constructed using pressure-treated lumber or naturally durable wood species such as cedar or redwood. Ensure that the wood is properly supported and protected from moisture. Use stainless steel fasteners to prevent corrosion. Consider applying a sealant or stain to protect the wood from the elements and enhance its appearance.
Lighting can significantly enhance the ambiance and functionality of a patio. Consider incorporating landscape lighting to illuminate pathways, highlight architectural features, and create a warm and inviting atmosphere. Low-voltage lighting is a safe and energy-efficient option. Carefully plan the placement of lights to avoid glare and create a balanced and aesthetically pleasing lighting scheme.
Additionally, during patio installation on a slope, consider erosion control measures. Especially while the project is in progress, exposed soil can easily erode due to rain or wind. Utilize temporary erosion control measures like silt fences or hay bales to prevent soil runoff. After the patio is completed, ensure proper drainage to prevent any long-term erosion issues.
Adding stairs or steps to navigate different levels of the sloped patio is another crucial aspect of the construction process. The steps should be comfortable and safe to use, with consistent riser heights and tread depths. Consider adding handrails for added safety, particularly on steeper slopes. The materials used for the steps should match or complement the patio surface for a cohesive design.

Paver Patio Slope Diy Pavers Building A

My Garden Is Sloped Can I Still Install A Patio Home Logic

Block Patio Slope Question Doityourself Com Community Forums

Questions On Sloping A Raised Patio Lawn Care Forum

How To Build A Raised Patio With Retaining Wall Blocks

Building A Terraced Deck In Outdoor Remodel Silent Rivers
.jpg?strip=all "How To Install Patio Pavers Lv")
How To Install Patio Pavers Lv

How To Build A Raised Patio

Building A Patio Landscaping Network

Build A Deck On Sloping Yard Softwoods Pergola Decking Fencing Carports Roofing
Related Posts