How To Build a Patio on a Slight Slope
Constructing a patio on a property with a slight slope presents unique challenges compared to building on level ground. However, with careful planning and execution, a sloped area can be transformed into a functional and aesthetically pleasing outdoor living space. The key is to understand the principles of managing water runoff and creating a stable, level surface for the patio itself.
This article provides a comprehensive guide to building a patio on a slight slope, covering everything from initial assessment and planning to material selection and installation techniques. It emphasizes methods that address drainage concerns and ensure the long-term stability of the patio structure. A “slight slope” for the purposes of this guide is defined as a grade change that is noticeable but not so steep as to require extensive terracing or retaining walls. Generally, this falls within a range of 1% to 5% slope.
Understanding Slope and Drainage
The first crucial step is to accurately measure the slope. This can be done using a level, a measuring tape, and a stake. Place the stake at the highest point of the proposed patio area. Securely attach the level to a long, straight board. Position one end of the board on the stake. Then, adjust the board until the level indicates a perfectly horizontal line. Measure the vertical distance from the bottom of the board to the ground at the lower end. Divide this vertical distance by the horizontal distance the board spans to determine the slope percentage. For example, if the board spans 10 feet (120 inches) and the vertical drop is 6 inches, the slope is 6 inches / 120 inches = 0.05, or 5%.
Once the slope is quantified, assess the existing drainage patterns. Observe how water flows across the area during rainfall. Identify the natural drainage pathways and consider how the patio construction might affect them. The goal is to ensure that the patio does not impede water flow and potentially cause water to pool against the house foundation or flood other areas of the property. Planning for adequate drainage is paramount to prevent future problems such as erosion, structural damage, and mosquito breeding.
Several drainage solutions can be implemented when building a patio on a slope. A simple approach is to maintain the natural slope of the patio surface, allowing water to run off. However, this requires careful selection of paving materials that provide adequate traction and stability on a sloped surface. Impermeable surfaces, such as concrete or sealed pavers, can exacerbate runoff issues. Permeable paving options, like gravel, crushed stone, or permeable pavers with wide joints filled with aggregate, allow water to infiltrate into the ground, reducing runoff volume. Another option is to install a drainage system, such as a French drain along the upper edge of the patio or a channel drain integrated into the patio surface. These systems collect runoff water and redirect it to a designated drainage area, such as a dry well or a storm drain.
Planning and Design Considerations
The design phase is critical for creating a functional and aesthetically pleasing patio on a sloped area. The shape and size of the patio should be carefully considered in relation to the surrounding landscape and the intended use of the space. Choose a layout that complements the natural contours of the slope and minimizes the need for extensive excavation or grading.
The choice of materials is also a significant factor. Pavers, concrete, natural stone, and gravel are all common patio materials, each with its own advantages and disadvantages in terms of cost, durability, aesthetics, and ease of installation. For sloped patios, consider materials that offer good traction and are resistant to movement or erosion. Interlocking pavers, for example, provide a stable surface and can be easily installed on a compacted base. Natural stone, with its irregular shapes and textures, can create a visually appealing and slip-resistant surface. Gravel, while cost-effective, may require regular maintenance to prevent displacement on a slope. Concrete, although durable, can be slippery when wet and may require a textured finish or sealant to improve traction.
Consider incorporating retaining walls or steps to create different levels within the patio area. This can add visual interest and create distinct zones for various activities, such as dining, lounging, or gardening. Retaining walls can also help to manage the slope and prevent soil erosion. Steps should be carefully designed to ensure safe and comfortable access between different levels. The rise and run of the steps should be consistent and comply with local building codes.
Finally, consider the integration of landscaping elements into the patio design. Planting beds, trees, and shrubs can soften the hardscape and create a more inviting outdoor living space. Choose plants that are well-suited to the local climate and soil conditions. Ensure that the landscaping does not obstruct drainage pathways or create excessive shade that could contribute to moisture buildup.
Construction Techniques for a Stable Patio
Proper site preparation is essential for building a stable patio on a slope. Begin by removing any vegetation, topsoil, and debris from the area. Excavate the soil to the required depth, taking into account the thickness of the base material and the paving materials. The excavation should be slightly deeper at the lower end of the slope to create a level surface for the base layer.
The base layer is a critical component of the patio structure, providing support and stability for the paving materials. It typically consists of a compacted layer of gravel or crushed stone. The thickness of the base layer will depend on the type of soil, the slope of the ground, and the intended use of the patio. A general guideline is to use a minimum of 4 inches of compacted base material for patios intended for pedestrian traffic and a thicker layer for patios that will support heavier loads, such as outdoor furniture or vehicles. Compacting the base material is essential to prevent settling and shifting of the patio surface. Use a plate compactor or a hand tamper to compact the base layer in multiple passes, ensuring that it is firm and level.
Once the base layer is prepared, install a leveling layer of sand or gravel to create a smooth and even surface for the paving materials. The thickness of the leveling layer should be thin, typically around 1 inch. Use a screed board to level the sand or gravel, ensuring that it is perfectly flat. The leveling layer allows for minor adjustments in the height of the paving materials, creating a uniform and aesthetically pleasing surface.
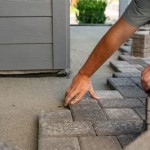
Install the paving materials according to the manufacturer's instructions. If using pavers, ensure that they are properly aligned and spaced. Use a rubber mallet to gently tap the pavers into place, ensuring that they are level and firmly seated in the leveling layer. If using natural stone, carefully select and arrange the stones to create a natural and visually appealing pattern. The joints between the stones should be filled with sand or gravel to provide stability and prevent movement.
For patios with a steeper slope, consider using a terraced approach. This involves creating a series of level platforms connected by steps or retaining walls. Terracing can effectively manage the slope and create a more usable and aesthetically pleasing outdoor space. The design and construction of terraced patios require careful planning and execution to ensure structural stability and proper drainage.
After the patio is completed, inspect the drainage system to ensure that it is functioning properly. Check for any areas where water may be pooling or eroding the soil. Make any necessary adjustments to the drainage system to ensure that water is effectively diverted away from the patio and the house foundation. Regularly maintain the patio by cleaning it and removing debris. Inspect the paving materials for any signs of damage or deterioration. Repair any cracks or loose pavers promptly to prevent further damage and ensure the long-term stability of the patio.

My Garden Is Sloped Can I Still Install A Patio Home Logic

Paver Patio Slope Diy Pavers Building A

How Much Should A Patio Slope Away From House

How To Cope With A Sloping Garden Alda Landscapes

Building A Terraced Deck In Outdoor Remodel Silent Rivers
.jpg?strip=all)
How To Install Patio Pavers Lv

How To Build A Deck On Slope

My Garden Is Sloped Can I Still Install A Patio Home Logic

How To Build A Raised Patio

Build A Deck On Sloping Yard Softwoods Pergola Decking Fencing Carports Roofing
Related Posts


