How to Build a Durable and Attractive Concrete Block Patio
Concrete block patios offer a cost-effective and relatively straightforward solution for creating an outdoor living space. They are durable, versatile, and can be customized to fit various design aesthetics. This article outlines the process of constructing a concrete block patio, covering each stage from planning to installation.
Planning and Preparation: The Foundation of Success
Effective planning is crucial for a successful concrete block patio project. This phase involves determining the patio's size and location, considering drainage, and selecting the appropriate materials. A well-defined plan minimizes errors and ensures a visually appealing and structurally sound final product.
Determining Size and Location: The size of the patio should be proportional to the size of the yard and the intended use of the space. Consider the number of people who will typically use the patio, the furniture that will be placed there, and any additional features like a grill or fire pit. The location should be chosen considering factors like sun exposure, proximity to the house, and prevailing winds. Avoid areas with poor drainage or significant slope unless you are prepared to address these issues during construction.
Checking Local Codes and Regulations: Before beginning any construction, check with your local building department to determine if permits are required. Some municipalities have regulations regarding the size, location, and height of patios. Failure to comply with these regulations can result in fines and delays.
Drainage Considerations: Proper drainage is essential to prevent water from pooling on the patio surface, leading to potential hazards and damage. Ensure the patio is sloped slightly away from the house (approximately 1/4 inch per foot) to allow water to run off. In areas with heavy rainfall or poor soil drainage, consider installing a subsurface drainage system, such as a French drain, along the perimeter of the patio.
Material Selection: Concrete blocks are available in various sizes, shapes, and colors. Choose blocks that complement your home's architecture and blend well with the surrounding landscape. Consider using interlocking blocks for added stability and ease of installation. In addition to the blocks, you will need gravel for the base, sand for leveling, edging material to contain the patio, and polymeric sand to fill the joints between the blocks.
Gathering Tools and Materials: Having the right tools and materials on hand will streamline the construction process. Essential tools include a shovel, rake, tamper, level, measuring tape, string line, rubber mallet, wheelbarrow, and safety glasses. Ensure you have sufficient quantities of each material to complete the project without interruption.
Excavation and Base Preparation: Creating a Solid Foundation
The base is the most critical part of a concrete block patio. A properly prepared base provides a stable, level surface for the blocks and prevents settling and shifting over time. The excavation and base preparation process involves removing the existing soil, installing a gravel base, and compacting the gravel to create a solid foundation.
Excavation: Begin by marking the perimeter of the patio with stakes and string lines. Use a shovel to remove the existing soil to a depth of approximately 6-8 inches. The exact depth will depend on the thickness of the gravel base and the desired height of the patio. Ensure the excavation is level and consistent throughout.
Installing the Gravel Base: Spread a layer of gravel (typically crushed stone or aggregate) to a depth of 4-6 inches over the excavated area. Use a rake to evenly distribute the gravel and ensure it is level. A well-graded aggregate material will provide optimal drainage and compaction. Avoid using rounded gravel, as it does not compact as effectively as angular gravel.
Compacting the Gravel: Use a hand tamper or plate compactor to thoroughly compact the gravel base. Compaction is essential to create a stable and durable foundation. Make several passes over the entire area, overlapping each pass slightly to ensure complete compaction. The compacted gravel base should be firm and level.
Adding a Layer of Sand: Spread a thin layer of leveling sand (about 1 inch thick) over the compacted gravel base. Use a rake to distribute the sand evenly and create a smooth, level surface. The sand layer will provide a cushion for the blocks and allow for minor adjustments during installation.
Screeding the Sand: Use a screed board to level the sand layer. A screed board is a long, straight piece of lumber that is pulled across the sand to create a perfectly level surface. Place two pipes or boards parallel to each other on the sand, spaced a few feet apart. Rest the screed board on the pipes and pull it across the sand to remove excess material and create a level surface. Remove the pipes and fill in the resulting gaps with sand, leveling it with a trowel.
Block Installation and Finishing Touches: Laying the Patio Surface
With the base properly prepared, the next step is to install the concrete blocks. This involves carefully placing the blocks on the sand, ensuring they are level and aligned, and then filling the joints between the blocks with polymeric sand. The finishing touches include installing edging to contain the patio and sweeping the surface clean.
Laying the Blocks: Begin laying the blocks along one edge of the patio, working outward in rows. Place each block carefully on the sand, ensuring it is level and aligned with the adjacent blocks. Use a rubber mallet to gently tap the blocks into place and make minor adjustments.
Maintaining Alignment: Use string lines and a level to ensure the blocks are aligned and level. Run string lines along the edges of the patio and check the alignment of each block against the string. Use a level to check the levelness of each block, both individually and in relation to the adjacent blocks. Adjust the sand underneath the blocks as needed to achieve a perfectly level surface.
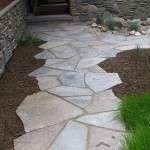
Cutting Blocks: In some cases, you may need to cut blocks to fit around obstacles or to create a specific pattern. Use a concrete saw or a chisel and hammer to cut the blocks. Always wear safety glasses and gloves when cutting concrete blocks.
Installing Edging: Install edging along the perimeter of the patio to contain the blocks and prevent them from shifting over time. Edging can be made of various materials, including plastic, metal, or stone. Dig a trench along the perimeter of the patio and install the edging according to the manufacturer's instructions. Backfill the trench with soil to secure the edging in place.
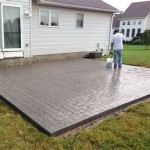
Filling the Joints: Once all the blocks are in place, fill the joints between the blocks with polymeric sand. Polymeric sand is a special type of sand that hardens when it comes into contact with water, creating a durable and weed-resistant joint. Sweep the polymeric sand into the joints, making sure to fill them completely. Use a broom to remove any excess sand from the surface of the blocks.
Activating the Polymeric Sand: Lightly mist the patio surface with water to activate the polymeric sand. Follow the manufacturer's instructions for the amount of water to use. Avoid over-watering, as this can cause the sand to wash away. Allow the polymeric sand to dry completely before using the patio.
Final Cleaning: Once the polymeric sand has dried, sweep the patio surface clean to remove any remaining sand or debris. Inspect the patio for any imperfections and make any necessary adjustments.
Building a concrete block patio is a rewarding DIY project that can significantly enhance your outdoor living space. By following these steps and taking the time to plan and prepare properly, one can create a durable and attractive patio that will provide years of enjoyment.

Budget Friendly Diy Paver Block Patio Interior Frugalista

Diy Patio With Grass Between Pavers And A Fire Pit

Installing A Diy Paver Patio Is The Ultimate Spring Project

Diy Concrete Paver Patio Simple And Inexpensive Method

Diy Concrete Patio In 8 Easy Steps How To Pour A Cement Slab

Diy Cinder Block Bench Mince Republic

Diy Cinder Block Bench C R A F T

Poured Concrete Pavers Create A Stylish Patio The Home Depot

Cinder Block And Pavers Step Patio Steps Diy Paver

How To Build A Raised Paver Patio Western Interlock
Related Posts