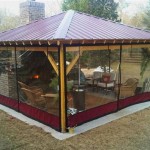
How To Attach Shade Aluminum Patio Cover Kits
Installing a shade aluminum patio cover kit can significantly enhance the usability and aesthetic appeal of an outdoor space. These kits offer protection from the sun and other elements, creating a comfortable area for relaxation, entertainment, and dining. The process involves several steps, from planning and preparation to final installation. This article provides a detailed guide on how to successfully attach a shade aluminum patio cover kit, ensuring a sturdy and aesthetically pleasing result.
Before embarking on the installation, careful consideration should be given to local building codes and homeowner association regulations. Obtaining the necessary permits and approvals can prevent potential issues and ensure compliance with local ordinances. Ignoring this step can lead to fines or the requirement to remove the structure.
Planning and Preparation
Thorough planning is crucial for a successful patio cover installation. This phase involves several key steps, including site assessment, material verification, and tool preparation. A well-executed preparation stage minimizes errors and streamlines the installation process.
The first step is to assess the installation site. This involves measuring the area where the patio cover will be installed, noting any obstructions such as trees, utility lines, or existing structures. Accurate measurements are essential for selecting the appropriate size of the aluminum patio cover kit. It is also important to determine the type of surface to which the cover will be attached, whether it is a concrete slab, a wooden deck, or directly to the house.
Next, the chosen aluminum patio cover kit should be unpacked and all components inventoried. Compare the contents against the parts list included in the kit to ensure that all necessary items are present. This includes aluminum posts, beams, rafters, panels, hardware (screws, bolts, brackets), and any decorative elements. If any parts are missing or damaged, contact the manufacturer or supplier immediately to request replacements.
Gathering the necessary tools is another critical aspect of preparation. Essential tools for installing a shade aluminum patio cover kit include: a measuring tape, a level, a drill with various bits (including concrete drill bits if attaching to concrete), a socket wrench set, a screwdriver (both Phillips head and flathead), a hammer, safety glasses, work gloves, a ladder, and potentially a circular saw or metal cutting saw for trimming components if necessary. A chalk line or laser level can also be helpful for ensuring accurate alignment.
Finally, it is advisable to review the manufacturer's instructions thoroughly before beginning the installation process. Pay close attention to any specific recommendations or warnings outlined in the manual. Familiarizing oneself with the instructions can prevent costly mistakes and ensure that the patio cover is installed correctly.
Attaching the Support Posts
The support posts are the foundation of the patio cover. Their proper installation is paramount to the overall stability and longevity of the structure. The process involves accurately positioning the posts, securely attaching them to the ground or existing structure, and ensuring they are plumb.
Begin by determining the location of each support post based on the layout specified in the manufacturer's instructions. Use a measuring tape and chalk line to mark the precise positions on the ground or deck surface. If attaching the posts to a concrete slab, use a concrete drill bit to create pilot holes for the anchor bolts. For wooden decks, pre-drill pilot holes to prevent the wood from splitting.
Next, attach the post mounting brackets to the concrete or deck using appropriate anchors or screws. Ensure that the brackets are aligned correctly and securely fastened. The type of anchor or screw will depend on the material being attached to; concrete anchors are necessary for concrete, while wood screws are suitable for wooden decks. Follow the manufacturer's recommendations for the specific type and size of fasteners.
Once the mounting brackets are in place, carefully position the support posts into the brackets. Use a level to ensure that each post is plumb, meaning it is perfectly vertical. Adjust the posts as needed until they are perfectly upright. Secure the posts to the mounting brackets using bolts and nuts, tightening them firmly to prevent any movement.
For added stability, consider adding concrete around the base of the posts, especially if they are installed directly into the ground. This provides a more secure foundation and helps to prevent the posts from shifting over time. Ensure that the concrete is properly mixed and poured, and allow it to cure fully before proceeding with the next steps.
If the patio cover is designed to be attached to the house, the posts may need to be connected to the house's framing. This involves using lag bolts or other appropriate fasteners to securely attach the posts to the wall studs or rafters. It is essential to locate the wall studs or rafters accurately to ensure a strong and stable connection. A stud finder can be used to locate the studs behind the drywall or siding.
Installing the Frame and Panels
With the support posts in place, the next step is to install the frame and panels of the patio cover. This involves assembling the beams and rafters, attaching them to the posts, and then installing the aluminum panels or other shading material. Accurate measurements and careful alignment are crucial for ensuring a professional-looking and structurally sound result.
Start by assembling the beams and rafters according to the manufacturer's instructions. These components typically consist of aluminum profiles that are connected using screws, bolts, or brackets. Ensure that all connections are tight and secure. The beams will run horizontally along the top of the support posts, while the rafters will span between the beams, providing support for the panels.
Next, lift the assembled beams into place, positioning them on top of the support posts. Use a level to ensure that the beams are horizontal. Secure the beams to the posts using bolts and nuts, tightening them firmly to prevent any movement. The beams should be evenly spaced and aligned to ensure a consistent and uniform appearance.
Once the beams are in place, install the rafters. These are typically spaced evenly along the beams, providing support for the aluminum panels. Attach the rafters to the beams using screws or bolts, following the manufacturer's instructions. Ensure that the rafters are aligned correctly and securely fastened. A chalk line can be helpful for ensuring that the rafters are spaced evenly.
With the frame fully assembled, the final step is to install the aluminum panels or other shading material. These panels are typically designed to interlock or overlap, creating a continuous and weatherproof surface. Follow the manufacturer's instructions for attaching the panels to the rafters. Use screws or clips to secure the panels, ensuring that they are properly aligned and tightly fastened.
If the patio cover kit includes any decorative elements, such as trim or fascia, now is the time to install them. These elements can enhance the appearance of the patio cover and provide a finished look. Attach the decorative elements using screws or clips, following the manufacturer's instructions.
Throughout the installation process, it is essential to double-check all connections and fasteners to ensure that they are tight and secure. Regularly use a level to verify that the frame and panels are aligned correctly. Any errors or misalignments should be corrected immediately to prevent potential problems in the future.
After the installation is complete, inspect the entire structure carefully. Look for any signs of damage or weakness. Tighten any loose bolts or screws. Clean the patio cover to remove any dirt or debris. With proper installation and maintenance, a shade aluminum patio cover kit can provide years of reliable protection and enjoyment.
Regular maintenance, such as cleaning the panels and inspecting the connections, is essential for prolonging the life of the patio cover. Additionally, consider applying a sealant to any exposed metal surfaces to prevent corrosion. By following these guidelines, a durable and aesthetically pleasing shade aluminum patio cover can be achieved.

Aluminum Patio Covers Flat Pan Awning Kits Usa

Aluminum Patio Cover Diy Kits Build It Yourself To Save Money

Integra 20 Ft X 12 White Aluminum Attached Solid Patio Cover With 4 Posts 10 Lbs Live Load 1251006701220 The Home Depot

Diy Alumawood Patio Cover Kits Shipped Nationwide

Design And Buy Alumawood Do It Yourself Aluminum Patio Cover Kits

Aluminum Patio Cover Solid 12 X 20

Windsor Patio Cover

Aluminum Patio Cover Solid 12 X 20

Aluminum W Pan Patio Covers Nationwide Delivery Included

Aluminum Patio Covers Flat Pan Awning Kits Usa
Related Posts

