How To Add Existing Concrete Patio
Extending an existing concrete patio can significantly enhance outdoor living space, providing increased area for relaxation, entertainment, and recreational activities. This process, while potentially demanding, can be approached as a manageable do-it-yourself project or entrusted to experienced professionals. The success of the extension hinges on meticulous planning, proper preparation, and adherence to established construction techniques. This article outlines the procedures involved in adding to an existing concrete patio, covering crucial aspects from site preparation to finishing the new surface.
Planning and Preparation: Laying the Groundwork for Success
Before commencing any physical work, a thorough planning phase is essential. This stage dictates the project's scope, budget, and potential limitations. Failure to adequately plan can result in costly errors, structural weaknesses, and aesthetic inconsistencies. The initial assessment must encompass the following:
Determining Patio Size and Design: The desired size and shape of the extension should be carefully considered, factoring in intended use, available space, and local zoning regulations. A scaled drawing or sketch will assist in visualizing the final product and determining material quantities. Take into account the existing patio's dimensions and shape to ensure a cohesive and aesthetically pleasing design. Consider features such as steps, curves, or decorative elements that may enhance the overall appearance.
Assessing Existing Patio Condition: A detailed inspection of the existing concrete is crucial. Look for cracks, spalling, settling, or other signs of deterioration. The structural integrity of the existing slab will directly impact the longevity and stability of the extension. Minor cracks can often be repaired, but significant damage may necessitate more extensive repairs or even slab replacement before proceeding with the extension.
Checking Local Building Codes and Permits: Contact the local building department to determine if permits are required for the patio extension. Building codes often specify minimum thickness requirements, required reinforcement, and proper drainage considerations. Ignoring these regulations can lead to fines, project delays, and the need to redo work.
Gathering Necessary Tools and Materials: Creating a comprehensive list of the required tools and materials is essential to avoid interruptions during the construction process. Essential tools typically include a concrete mixer (rental is often a viable option), shovels, rakes, wheelbarrow, measuring tape, level, concrete finishing tools (floats, trowels, edgers), saw or concrete cutter, safety glasses, work gloves, and appropriate personal protective equipment (PPE). Materials typically include concrete mix, reinforcing steel (rebar or wire mesh), form boards, stakes, gravel or crushed stone for the base, and expansion joint material.
Preparing the Site and Forming the Slab: Essential Steps for a Stable Foundation
Proper site preparation is paramount for ensuring the stability and longevity of the new concrete patio extension. The ground beneath the slab must be properly compacted and graded to prevent settling and cracking. Forming the slab accurately will define the shape and dimensions of the extension, ensuring a clean and professional finish. The following steps detail the site preparation and form construction process:
Excavation and Grading: Begin by excavating the area where the extension will be located. The depth of excavation should be determined by the desired concrete thickness plus the thickness of the gravel or crushed stone base. A general guideline is to excavate 6-8 inches. Ensure the excavated area slopes slightly away from the house to facilitate proper drainage. Use a level and measuring tape to ensure consistent depth and slope.
Compaction of the Subgrade: Thoroughly compact the exposed soil using a plate compactor or hand tamper. This step is crucial for preventing settling of the concrete slab. Add and compact the gravel or crushed stone base to the excavated area. This base layer provides a stable foundation for the concrete and aids in drainage. The base should be approximately 4 inches thick and evenly compacted. Use a level to ensure the base is uniformly compacted and leveled.
Constructing the Forms: Use form boards (typically 2x4s or 2x6s) to create the perimeter of the patio extension. The form boards should be securely staked in place using wooden or metal stakes. Ensure the forms are level and accurately aligned with the existing patio. Use screws or nails to connect the form boards at the corners. The forms should be strong enough to withstand the pressure of the wet concrete.
Installing Reinforcement: Reinforcement is essential to prevent cracking and improve the structural integrity of the concrete slab. Rebar or wire mesh can be used for reinforcement. Place the reinforcement within the forms, ensuring it is elevated within the concrete slab. Using chairs or bricks to elevate the reinforcement is recommended. Overlap the reinforcement with the existing patio concrete by at least 12 inches. This will tie the new section to the old and reduce cracking between the two.
Creating Expansion Joints: Expansion joints are critical for allowing the concrete to expand and contract with temperature changes, preventing cracking. Install expansion joint material (typically foam or asphalt-impregnated fiberboard) along the perimeter of the extension where it abuts the existing patio and any other structures. These joints should extend the full depth of the concrete slab. The expansion joint material should be slightly above the top of the slab so the expansion joint can allow for movement.
Pouring, Finishing, and Curing the Concrete: Achieving a Durable and Aesthetically Pleasing Surface
The pouring, finishing, and curing stages are critical for achieving a durable and aesthetically pleasing concrete patio extension. Proper techniques during these stages will ensure a strong, crack-resistant surface that will withstand the elements for years to come. The following steps detail the concrete pouring, finishing, and curing process:
Mixing and Pouring the Concrete: Mix the concrete according to the manufacturer's instructions. Use a concrete mixer or a wheelbarrow for small batches. Ensure the concrete is thoroughly mixed and free of lumps. Pour the concrete into the prepared forms, starting at one corner and working your way across the area. Distribute the concrete evenly, filling all areas to the top of the forms. Use a shovel or rake to spread the concrete and ensure it is evenly distributed.
Screeding: Screeding involves using a straight board (screed) to level the concrete surface. Rest the screed on the forms and pull it across the concrete, removing excess material. This creates a level and uniform surface. Overlap each pass of the screed slightly to ensure complete coverage. Fill any low spots with additional concrete and repeat the screeding process.
Floating: Floating is the process of using a float (typically made of wood or magnesium) to embed the aggregate just below the surface and consolidate the concrete. This step is typically performed after the concrete has bled off excess water. Use a circular motion to evenly float the surface. Do not overwork the concrete, as this can cause it to weaken.
Edging and Jointing: After floating, use an edger to round the edges of the patio, creating a professional finish that resists chipping and crumbling. Use a jointer to create control joints in the concrete. Control joints are shallow grooves that are cut or tooled into the concrete to control cracking. These joints should be spaced at intervals equal to the concrete thickness in feet (e.g., 4-inch-thick slab = 4-foot intervals). Align the control joints with any existing joints in the existing patio. Jointing will help reduce and control any cracking that may occur.
Troweling: Troweling creates a smooth and dense concrete surface. Use a steel trowel to smooth the surface, working in overlapping strokes. The troweling process should be repeated several times as the concrete hardens. The final troweling should be performed when the concrete is hard enough to support your weight without leaving deep footprints.
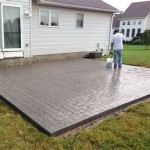
Curing the Concrete: Curing is the process of keeping the concrete moist for several days to allow it to properly hydrate and gain strength. Begin curing the concrete as soon as the surface is hard enough to avoid damage. There are several methods for curing concrete, including: covering the concrete with plastic sheeting, applying a curing compound, or misting the concrete with water regularly. Keep the concrete moist for at least 7 days, or according to the manufacturer's recommendations. Proper curing is critical for achieving a strong and durable concrete patio.
By adhering to these guidelines, the process of extending an existing concrete patio can be undertaken with confidence, resulting in an expanded outdoor living space that enhances both the functionality and aesthetic appeal of the property. Careful planning, meticulous preparation, and adherence to sound construction practices are key to achieving a successful and long-lasting result.

Patio Extension Ideas How To Extend A Concrete Network

How To Add Concrete Existing With Pictures Wikihow

Diy Concrete Patio In 8 Easy Steps How To Pour A Cement Slab

How To Add Concrete Existing With Pictures Wikihow

How To Add Concrete Existing With Pictures Wikihow

Building A Wall On An Existing Slab Fine Homebuilding

Cool Way To Extend A Concrete Slab Patio Backyard Designs

How To Extend A Patio Ask This Old House

Diy Turning A Concrete Slab Into Covered Deck Catz In The Kitchen

Diy Turning A Concrete Slab Into Covered Deck Catz In The Kitchen
Related Posts