Building a Patio With Cinder Blocks
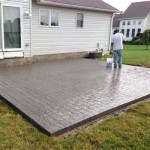
A patio is a wonderful addition to any home, providing an outdoor space for relaxation, entertaining, and enjoying the fresh air. While there are many materials that can be used for patio construction, cinder blocks offer a budget-friendly and durable option. With some planning and effort, you can build a sturdy and attractive patio using these readily available materials.
Planning and Preparation
Before you begin building your patio, it is crucial to plan and prepare the area. Measure the desired size and shape of your patio, taking into account existing structures and landscaping. Consider the location of drainage and ensure that the chosen spot provides adequate sunlight or shade, depending on your needs. Once you have determined the dimensions, you can begin preparing the site.
Clear the designated area of any vegetation, debris, and topsoil. You may need to excavate the area to level the ground, ensuring proper drainage and a stable foundation. For a more professional look, consider creating a level base using concrete or compacted gravel. This will provide a smooth surface for laying the cinder blocks.
Laying the Cinder Blocks
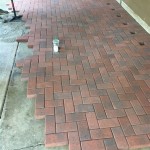
With the site prepared, you can begin laying the cinder blocks. Start by marking the perimeter of your patio using string lines or stakes. If desired, you can create a decorative pattern by alternating the direction of the blocks or incorporating different sizes. Using a level, ensure that each block is placed at the same height and that the rows are level.
To secure the blocks in place, you can use mortar or concrete. Apply mortar to the bottom and sides of each block, ensuring that the joints are evenly filled. If using concrete, mix it according to the manufacturer's instructions and pour it into the gaps between the blocks. Allow the mortar or concrete to cure completely before proceeding to the next step.
Finishing Touches
Once the cinder blocks are laid and the mortar or concrete has cured, you can add finishing touches to your patio. Consider using a sealant to protect the blocks from moisture and weather damage. You can also paint the blocks with a suitable outdoor paint to enhance their appearance and create a desired aesthetic.
Additionally, think about adding features such as a fire pit, a seating area, or a decorative border. You can use pavers, stones, or other materials to enhance the overall look of your patio. Planting flowers or shrubs around the perimeter can also add beauty and privacy to your outdoor space.
Safety Considerations
When building a patio with cinder blocks, it is essential to take safety precautions. Wear appropriate safety gear, such as gloves, goggles, and work boots, to protect yourself from injuries. Be aware of the weight of the blocks and lift them carefully to avoid strains or back injuries.
Ensure that the work area is well-ventilated and that you are working in a safe and stable manner. If you are using power tools, make sure they are in good working condition and that you are following all safety instructions.
Building a patio with cinder blocks can be a rewarding project. With proper planning, preparation, and safety measures, you can create a beautiful and functional outdoor space that will enhance your home and provide a place to relax, entertain, and enjoy the outdoors.

Diy Cinder Block Bench C R A F T

Create More Outdoor Seating With A Diy Cinderblock Bench

6 Creative Cinder Block Projects The Owner Builder Network Backyard Ideas For Small Yards Diy

Create More Outdoor Seating With A Diy Cinderblock Bench

Cinder Block And Pavers Step Patio Steps Diy Backyard Paver

Concrete Thinking How To Make Mod Stackable Sculptures With Blocks The Horticult

Diy Cinder Block Bench Only 4 Materials Somewhat Simple

Cute Outdoor Seating How To Diy A Cinder Block Bench Hometalk

Wonderful Free Outdoor Kitchen Cinder Block Strategies Backyard Patio Fireplace Seating

Diy Projects 15 Ideas For Using Cinder Blocks Survivopedia
Related Posts


