The Essential Guide to Leveling Patio Slabs
Transforming your outdoor living space into a cohesive and level oasis requires meticulous attention to detail, particularly when installing patio slabs. Leveling these slabs ensures not only aesthetic appeal but also structural stability and longevity. This comprehensive guide will delve into the essential aspects of leveling patio slabs, empowering you with the knowledge and techniques to achieve a flawless result.
1. Excavation and Base Preparation
Begin by excavating the area where the patio will be installed, ensuring a depth of at least 6 inches. Compact the soil to create a firm foundation, then add a layer of crushed rock or gravel as a base. The base should be at least 4 inches thick and adequately compacted using a plate compactor or a hand tamper.
2. Installing Edging
Establish the perimeter of your patio by installing edging, such as pavers or concrete borders. These edgings will provide support for the slabs and prevent them from shifting over time. Ensure that the edging is level and slightly higher than the intended height of the patio slabs.
3. Screed Rails and String Lines
To achieve a level surface, install screed rails perpendicular to the edging at desired intervals. These rails serve as temporary guides for leveling the slabs. Attach string lines to the screed rails and adjust them to the intended height of the patio.
4. Leveling Sand
Spread a layer of leveling sand over the prepared base, ensuring a depth of at least 1 inch. Use a rake to distribute the sand evenly and create a uniform surface. Compact the sand using a plate compactor or a hand tamper to provide a solid foundation for the slabs.
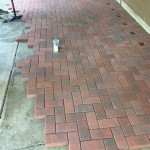
5. Laying the Slabs
Begin laying the patio slabs on the leveled sand, carefully aligning them with the string lines. Tap down each slab using a rubber mallet or a block of wood to ensure it is level with the adjacent slabs. Check for levelness both horizontally and laterally with a spirit level.
6. Joint Filling
Once all the slabs are in place, sweep fine sand into the joints between them. Use a broom or a sand spreader to fill the joints completely. Water the sand and let it settle, then repeat the process until the joints are fully filled and stable.
7. Compacting and Sealing
Use a plate compactor or a hand tamper to compact the patio slabs once more, ensuring they are firmly seated in the sand. Allow the slabs to cure for a few days before sealing them with a penetrating sealer. Sealing will protect the slabs from stains and weathering.
Conclusion
By following these essential steps, you can successfully level patio slabs, creating a durable and aesthetically pleasing outdoor living space. Remember to plan carefully, prepare the base adequately, and pay attention to the details throughout the process. With a little effort and meticulousness, you can transform your patio into a functional and inviting sanctuary for years to come.

How To Build And Lay A Patio Marshalls

How To Lay Paving Slabs For A Gravel Shed Base Trimetals

Dammann S Garden Company Diy Series How To Install Level Pavers And Patio Stones

How To Lay A Patio Expert Guide Laying Slabs Garden Ideas Tips Homebase

Low Cost Solution Laying Paving Slabs

Step By Guide To Laying A Patio

How To Lay Slabs On Soil Sand Grass Concrete Checkatrade

How To Lay A Patio Bbc Gardeners World

Concrete Slabs What S The Best Way To Lay Them

How To Lay Paving Slabs
Related Posts