Do you have an outdoor patio that you want to use year-round? Installing a patio cover can provide the perfect solution to your needs. Not only will it add value to your home, but it can help protect your patio from the elements and keep it looking great. Best of all, you can do it yourself with a little bit of know-how and the right materials. Here’s what you need to know about patio covers DIY.
The first step in building a patio cover is to choose the right materials. There are a variety of options to choose from, including wood, aluminum, and vinyl. Wood is the most traditional choice and can provide a natural look that blends in with the rest of your home. Aluminum and vinyl are more modern materials, and can be more durable and easier to maintain. Each option has its own advantages and disadvantages, so it’s important to consider your needs before making a decision.
Once you’ve decided on the material, you’ll need to measure the area of your patio so you can buy the right amount of supplies. It’s also a good idea to take some measurements of the area around the patio so you can make sure that the cover fits properly. If you’re not comfortable taking the measurements yourself, you can always hire a professional to do it for you.
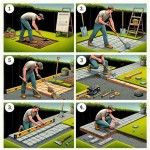
Next, you’ll need to assemble the patio cover. Depending on the material you’ve chosen, you may need to use screws, nails, bolts, or other fasteners to secure the pieces to one another. Be sure to follow the instructions carefully, as improper installation can result in a weak or unstable cover. If you’re not sure how to do this, you can always consult a professional for help.
Finally, you’ll need to finish the cover with a sealant or paint. This will help protect it from the elements and ensure that it lasts for years to come. Again, if you’re not comfortable with this step, you can hire a professional to do it for you. With a little bit of know-how and the right materials, you can easily build a durable and attractive patio cover yourself.


Related Posts


