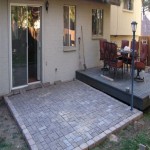
How To Lay Patio Pavers With Grass In Between
Creating a patio with pavers and grass between them offers a unique blend of hardscaping and landscaping, adding a touch of natural beauty to an outdoor space. This design approach not only enhances the aesthetic appeal but also allows for better drainage and can be more environmentally friendly than a completely paved surface. The process, while straightforward, requires careful planning and execution to ensure a long-lasting and visually pleasing result. This article provides a comprehensive guide to laying patio pavers with grass in between, covering site preparation, paver installation, and grass planting.
Planning and Preparation: The Foundation for Success
Proper planning is crucial for a successful patio project. Before any physical labor begins, consider the intended use of the patio, the desired size and shape, and the overall aesthetic you wish to achieve. Sketching a design can be helpful in visualizing the final product and determining the quantity of materials needed. This stage involves several key considerations:
1. Site Assessment: Begin by assessing the area where the patio will be located. Check for any underground utilities, such as gas lines, water pipes, or electrical cables. Contact local utility companies to mark their locations to avoid accidental damage during excavation. Evaluate the existing soil conditions. Is it predominantly clay, sand, or loam? The soil type will influence the drainage and the type of base material required. Identify any existing vegetation that needs to be removed. Weeds, grass, and other plants should be cleared to create a clean and level surface.
2. Design and Layout: Determine the desired shape and size of the patio. Consider the surrounding landscape and how the patio will integrate with it. Decide on the paver pattern. Common patterns include running bond, herringbone, and basketweave. The pattern will affect the amount of paver cutting required. Choose the appropriate paver size and material. Pavers come in various shapes, sizes, and materials, such as concrete, brick, and natural stone. Consider the aesthetic you want to achieve, the budget, and the durability of the material. Plan the spacing between pavers for the grass. The width of the gaps will influence the appearance and the ease of mowing. A wider gap generally allows for easier mowing but may require more maintenance to prevent weeds. Mark the perimeter of the patio using stakes and string. Ensure the string is level to provide a guideline for excavation and paver installation.
3. Material Calculation: Calculate the amount of pavers needed based on the patio area and the chosen paver size and pattern. Add approximately 10% extra for cuts and breakage. Estimate the amount of base material required. This typically includes a layer of crushed stone or gravel. The depth of the base layer will depend on the soil conditions and the anticipated load on the patio. A general rule of thumb is 4-6 inches for pedestrian traffic and 6-8 inches for vehicular traffic. Calculate the amount of sand needed for the paver bedding layer. This layer is typically 1-2 inches thick. Determine the amount of soil needed for filling the gaps between the pavers. Choose a soil that is suitable for the type of grass you intend to plant. Consider ordering slightly more material than estimated to account for settling and waste.
Installation Process: Laying the Foundation and Pavers
The installation process involves several stages, from excavating the site to laying the pavers. Each step is important for creating a stable and aesthetically pleasing patio. Accuracy and attention to detail are essential for achieving a professional-looking result.
1. Excavation: Excavate the area to the required depth. The depth will depend on the thickness of the pavers, the depth of the bedding layer, and the depth of the base material. Use a shovel and wheelbarrow to remove the excavated soil. Ensure the excavation is level and consistent across the entire area. Use a level and a long straight edge to check for any high or low spots. Compact the excavated soil using a plate compactor. This will provide a stable base for the subsequent layers.
2. Base Layer Installation: Spread the base material evenly across the excavated area. Use a shovel and rake to distribute the material. The depth of the base layer should be uniform. Use a plate compactor to compact the base material. Compact in multiple passes to ensure thorough compaction. This will create a solid and stable foundation for the pavers. Add more base material if needed to achieve the desired depth and level. Use a level and a long straight edge to check for any high or low spots. Slope the base layer slightly away from the house to promote drainage. A slope of 1/4 inch per foot is generally sufficient.
3. Bedding Layer Installation: Spread the sand evenly across the compacted base material. Use a rake to distribute the sand. The depth of the sand layer should be uniform and consistent. Use two pipes or straight edges as guides for screeding the sand. Place the pipes parallel to each other and separated by a distance slightly less than the length of a screed board. Fill the space between the pipes with sand and screed the sand by pulling the screed board across the pipes. This will create a smooth and level surface for the pavers. Remove the pipes and fill the resulting grooves with sand. Compact the sand layer lightly using a hand tamper. Avoid over-compacting the sand, as this can make it difficult to set the pavers correctly.
4. Paver Installation: Begin laying the pavers according to the chosen pattern. Start from a straight edge, such as a house foundation or a retaining wall. Place each paver carefully on the sand bedding layer. Ensure the pavers are level and aligned with the surrounding pavers. Use a rubber mallet to gently tap the pavers into place. This will ensure they are firmly seated in the sand. Maintain the desired spacing between the pavers for the grass. Use spacers to ensure consistent spacing. Cut the pavers as needed to fit the edges of the patio. Use a paver saw or a chisel and hammer. Wear safety glasses and gloves when cutting pavers. Fill the gaps between the pavers with sand to stabilize them during installation. Sweep the sand into the gaps using a broom. Avoid walking on the pavers until they are properly set and the gaps are filled with soil.
Planting Grass: Completing the Patio
Planting grass between the pavers adds the final touch to the patio. This step requires careful selection of grass seed and proper planting techniques to ensure successful growth. The type of grass should be chosen based on the climate, soil conditions, and the amount of sunlight the patio receives.
1. Soil Preparation: Choose a soil that is suitable for the type of grass you intend to plant. A mix of topsoil, compost, and sand is generally a good choice. Ensure the soil is free of rocks, weeds, and debris. Moisten the soil before filling the gaps between the pavers. This will help the soil settle and prevent it from drying out too quickly. Fill the gaps between the pavers with the prepared soil. Leave a small amount of space at the top of the gaps to allow for grass seed and future growth.
2. Grass Seed Selection: Choose a grass seed that is appropriate for the climate and soil conditions. Consider the amount of sunlight the patio receives. Some grass types are more shade-tolerant than others. Consider the desired appearance of the grass. Some grass types are finer-textured than others. Consider the maintenance requirements of the grass. Some grass types require more frequent mowing and watering than others. Common grass types for patios include fescue, bluegrass, and perennial ryegrass. Use a blend of different grass types to improve the overall resilience of the lawn.
3. Planting and Watering: Scatter the grass seed evenly over the soil in the gaps between the pavers. Use a seed spreader for even distribution. Lightly rake the soil to cover the grass seed. This will help the seed stay moist and protected. Water the grass seed gently using a fine spray nozzle. Avoid over-watering, as this can wash away the seed. Keep the soil moist but not soggy until the grass has germinated. This typically takes 1-2 weeks. Cover the grass seed with a thin layer of straw or burlap to help retain moisture and prevent erosion. Remove the straw or burlap once the grass has germinated.
4. Maintenance: Water the grass regularly, especially during dry periods. Water deeply and infrequently to encourage deep root growth. Mow the grass regularly to maintain a consistent height. Use a lawn mower with a sharp blade. Avoid mowing the grass too short. Fertilize the grass regularly to promote healthy growth. Use a fertilizer that is appropriate for the type of grass you have planted. Weed the grass regularly to prevent weeds from spreading. Use a hand trowel or a weed puller to remove weeds. Apply herbicides as needed to control weed growth. Overseed the grass in the fall to fill in any bare spots. Aerate the soil annually to improve drainage and promote root growth. Use a core aerator to remove small plugs of soil. Topdress the soil with compost to improve soil fertility.

Diy Patio With Grass Between Pavers And A Fire Pit

Diy Patio With Grass Between Pavers And A Fire Pit

Diy Patio With Grass Between Pavers And A Fire Pit

How To Install Artificial Grass Between Pavers Paving Ideas Festival Turf

Diy Patio With Grass Between Pavers And A Fire Pit

How To Lay Artificial Grass Between Pavers Turf Factory

How To Lay Artificial Grass Between Pavers Turf Factory

Diy Paver Artificial Turf Patio

Grass Between Pavers Gogreen Lands

Artificial Grass Between Pavers Faq Guide
Related Posts


