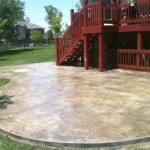
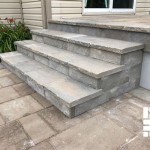
How To Build A Small Patio With Pavers and Stones Using Concrete Mix
Creating a small patio using pavers and stones is a manageable DIY project that can significantly enhance an outdoor living space. The integration of concrete mix is crucial for ensuring stability, longevity, and a professional-looking finish. This article provides a comprehensive guide on how to build a small patio using pavers and stones, incorporating concrete mix at key stages for optimal results.
Planning and Preparation: Essential First Steps
Prior to any physical labor, meticulous planning is paramount. This phase involves assessing the desired size and shape of the patio, selecting the appropriate pavers and stones, and determining the necessary materials. Overlooking this phase can lead to complications and increased costs down the line.
The first step is to define the patio area. Use stakes and string to mark the perimeter of the desired patio. Consider the existing landscape and how the patio will integrate with the surrounding environment. Ensure the patio size is proportionate to the overall yard.
Next, calculate the quantity of pavers and stones needed. Measure the area within the staked boundary. Most pavers are sold in square feet, making the calculation straightforward. Add approximately 10% to the total quantity to account for cuts and potential breakage. For stones, estimate the volume needed based on their size and intended use (e.g., as a border or infill).
Material selection is a critical decision. Pavers are available in various materials, including concrete, brick, and natural stone. Concrete pavers are often the most cost-effective and offer a wide range of colors and styles. Natural stone pavers provide a more rustic and unique aesthetic but typically come at a higher price point. Consider the overall design aesthetic and budget when making this selection.
Finally, gather the necessary tools and materials. These include: * Shovels and rakes for excavation and leveling * A tamper or plate compactor for compacting the base * Measuring tape and string for accurate layout * A level for ensuring a flat surface * A wheelbarrow for transporting materials * Safety glasses and gloves for protection * Pavers and stones of choice * Crushed stone or gravel for the base * Sand for the leveling layer * Concrete mix for setting the border and potentially for setting pavers.
Excavation and Base Construction: Creating a Solid Foundation
The foundation is the most important aspect of any patio build. Without a solid, well-compacted base, the patio will inevitably shift and sink over time. Proper excavation and base construction are crucial for preventing these issues.
Begin by excavating the area within the staked boundary. The depth of excavation depends on the type of soil and the intended use of the patio. Generally, an excavation depth of 6-8 inches is sufficient. If the soil is particularly soft or unstable, a deeper excavation may be necessary. Consider using a soil stabilizer if the ground is problematic. Remove any vegetation, topsoil, and loose debris from the excavated area.
Next, install a layer of crushed stone or gravel. This layer provides drainage and prevents the patio from becoming waterlogged. The recommended thickness of this layer is typically 4-6 inches. Spread the crushed stone evenly across the excavated area and use a rake to level it. Gradually increase the thickness as needed to achieve a uniform depth.
Compact the crushed stone thoroughly using a tamper or plate compactor. Compaction is essential for creating a stable base. Make multiple passes over the area, ensuring that the crushed stone is tightly packed. Add water lightly during compaction to improve the process. The base should be firm and solid, with no loose areas.
After compacting the crushed stone, add a layer of sand. This layer acts as a leveling bed for the pavers and stones. The recommended thickness of the sand layer is 1-2 inches. Spread the sand evenly over the compacted crushed stone and use a rake to level it. A long, straight board can be used to screed the sand to ensure a perfectly level surface.
Compact the sand layer lightly using a hand tamper or a roller. Avoid over-compacting the sand, as this can make it difficult to adjust the pavers later. The goal is to create a smooth, even surface that is slightly resistant to pressure.
Laying the Pavers and Stones: Precision and Aesthetics
With a solid foundation in place, the next step is to lay the pavers and stones. This requires careful planning and execution to achieve the desired aesthetic and ensure proper spacing and alignment.
Begin by planning the layout of the pavers and stones. Consider the pattern, color variations, and overall design. A common approach is to start from a corner or edge and work outwards. For more complex patterns, it can be helpful to dry-lay the pavers on the sand base to visualize the final result before permanently setting them. This allows for adjustments and refinements to the design.
When laying the pavers, ensure they are level and properly spaced. Use a rubber mallet to gently tap each paver into place. Check the level using a spirit level and make adjustments as needed by adding or removing sand beneath the paver. Maintain a consistent spacing between the pavers, typically around 1/8 to 1/4 inch. Paver spacers can be used to ensure uniform spacing.
If using stones in conjunction with pavers, consider their placement carefully. Stones can be used as a border, as accents within the patio surface, or as a more natural element interspersed among the pavers. Larger stones may require a deeper setting bed to ensure stability. Use a combination of sand and small amounts of concrete mix to provide a solid base for larger stones, ensuring they are level with the surrounding pavers.
For pavers or stones that require cutting, use a wet saw or paver splitter. A wet saw provides a cleaner cut and reduces dust. Always wear safety glasses and gloves when using these tools. Measure and mark the cutting line accurately before making the cut. Ensure cut edges are smooth and even before placing the paver or stone in the patio.
Incorporating Concrete Mix: Enhancing Stability and Durability
Concrete mix plays a vital role in enhancing the stability and durability of the patio, particularly for the border and potentially for setting pavers if desired. The proper use of concrete mix can prevent shifting, settling, and weed growth.
The primary use of concrete mix is to secure the patio border. This prevents the pavers and stones from shifting outwards over time. A concrete border also provides a clean and defined edge to the patio. The concrete border is typically formed by setting the edge pavers or stones in a bed of concrete mix. Mix the concrete according to the manufacturer's instructions, ensuring a consistent and workable consistency.
Dig a shallow trench around the perimeter of the patio, deep enough to accommodate the edge pavers or stones and a layer of concrete mix. Pour a layer of concrete mix into the trench and set the edge pavers or stones in place. Ensure the edge pavers are level with the main patio surface. Use a rubber mallet to gently tap the pavers into the concrete. Butt them closely together to form a continuous border. Backfill behind the pavers with more concrete mix, creating a solid and stable edge.
Allow the concrete border to cure fully before applying any weight or pressure. The curing time varies depending on the type of concrete mix used and the ambient temperature. Typically, a curing time of 24-48 hours is sufficient. Keep the concrete moist during the curing process to prevent cracking.
Another potential application of concrete mix is for setting the pavers themselves. This technique is often used for patios that will be subjected to heavy traffic or for areas with unstable soil. To set the pavers with concrete mix, prepare a slightly thicker base layer and mix the concrete to a drier consistency. Apply a small amount of concrete mix to the base of each paver before setting it in place. This creates a stronger bond between the paver and the base. This method requires more precision and can be more time-consuming than setting the pavers on a sand layer.
Finishing Touches: Completing the Patio Project
Once the pavers and stones are laid and the concrete border is cured, the final step is to add the finishing touches. These include filling the joints between the pavers, cleaning the patio surface, and sealing the pavers if desired.
Fill the joints between the pavers with polymeric sand. Polymeric sand is a special type of sand that hardens when activated with water. This helps to prevent weed growth and stabilizes the pavers. Sweep the polymeric sand into the joints, ensuring that all the gaps are filled. Use a broom or brush to remove any excess sand from the patio surface.
After sweeping the polymeric sand, lightly mist the patio surface with water. This activates the polymeric sand and causes it to harden. Follow the manufacturer's instructions for the proper amount of water to use. Avoid over-watering the polymeric sand, as this can cause it to wash away. Allow the polymeric sand to cure fully before walking on the patio.
Clean the patio surface to remove any dirt, debris, or stains. A simple garden hose can be used to rinse off the patio. For more stubborn stains, use a mild detergent or a pressure washer. Be careful when using a pressure washer, as it can damage the pavers if used improperly.
Consider sealing the pavers to protect them from staining and fading. A paver sealer can also enhance the color and appearance of the pavers. Choose a sealer that is appropriate for the type of pavers used. Apply the sealer according to the manufacturer's instructions. Allow the sealer to dry completely before using the patio.
With careful planning, proper execution, and the strategic use of concrete mix, building a small patio with pavers and stones can be a rewarding and satisfying DIY project. The resulting patio will provide a beautiful and functional outdoor living space for years to come.

See How 3 Patios Ingeniously Mix Pavers And Pebbles

Diy Pea Gravel Patio With Pavers Love Renovations

How To Make Stepping Stones With Concrete That Look Natural

Diy Pea Gravel Patio With Pavers Love Renovations

Installing A Diy Paver Patio Is The Ultimate Spring Project

Diy Concrete Stepping Stones Natural Looking Artsy Pretty Plants

How To Build A Patio That Will Last Lifetime Easton Outdoors

Make A Concrete Slab Paver

Mixed Material Patio Ideas Stone Solutions Maine

Diy Pea Gravel Patio With Pavers Love Renovations
Related Posts


