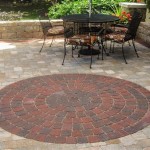
How to Re-Level Patio Stones: A Comprehensive Guide
A patio provides a valuable outdoor living space, enhancing the aesthetics and functionality of a property. Over time, however, patio stones can become uneven due to various factors, including ground settling, root intrusion, and weather-related erosion. Uneven patio stones not only detract from the visual appeal of the patio but also pose a safety hazard, increasing the risk of trips and falls. Re-leveling patio stones is a necessary maintenance task that, while potentially labor-intensive, can significantly improve the appearance and safety of the patio. This article provides a comprehensive guide on how to properly re-level patio stones.
Assessing the Problem and Planning the Solution
Before commencing the re-leveling process, a thorough assessment of the patio's condition is paramount. This assessment will determine the scope of the problem and inform the necessary steps for its resolution. The first step involves identifying all uneven stones. Use a level, ideally a long carpenter's level, to check each stone individually. Mark the stones that are significantly out of level. Note whether the issue is localized to a few stones or widespread throughout the patio.
Next, investigate the underlying cause of the unevenness. Look for signs of settling, such as dips or depressions in the surrounding soil. Check for evidence of root intrusion from nearby trees or shrubs. Consider the drainage of the patio area. Poor drainage can lead to soil erosion and subsequent stone displacement. Understanding the cause of the problem will help prevent its recurrence in the future.
Following the assessment, develop a plan for re-leveling the patio. Determine the tools and materials required based on the size of the project and the severity of the unevenness. Basic tools typically include a shovel, a level, a rubber mallet, a trowel, a wheelbarrow, a broom, and safety glasses. Materials usually consist of paver base (gravel), leveling sand, and potentially polymeric sand for joint stabilization. Ensure adequate time is allocated for the project, as re-leveling patio stones can be a physically demanding task.
Furthermore, consider the type of stone used in the patio. Some stones, such as natural stone, may require specialized tools or techniques for handling and resetting. Concrete pavers are generally more uniform in size and shape, simplifying the re-leveling process.
Preparing the Work Area
Proper preparation of the work area is critical for a successful re-leveling project. Begin by removing any furniture, planters, or other objects from the patio. This will provide unobstructed access to the stones that require attention.
Next, carefully lift and remove the uneven stones. Use a flathead screwdriver or a specialized paver removal tool to pry the stones loose from the surrounding joints. If the stones are difficult to remove, gently tap them with a rubber mallet to loosen their grip. Exercise caution to avoid damaging the stones during the removal process. Stack the removed stones neatly in a designated area, keeping them organized for easy reinstallation.
With the stones removed, the underlying base material is now exposed. This is where the real work begins. Remove the existing sand and paver base material from the area beneath the affected stones. The amount of material to remove will depend on the extent of the settling or erosion. Aim to remove enough material to create a level base that is slightly lower than the surrounding areas. This allows for the addition of fresh base material and leveling sand, which will bring the stones back to their original height.
Inspect the exposed soil beneath the base material. If the soil is compacted or poorly drained, loosen it with a shovel or garden fork. This will improve drainage and prevent future settling. If root intrusion is present, carefully remove the roots without disturbing the surrounding soil excessively.
Once the soil is prepared, compact the area using a hand tamper or plate compactor. A stable, compacted base is essential for preventing further settling and ensuring the long-term stability of the patio.
Re-Leveling and Resetting the Stones
With the work area properly prepared, the process of re-leveling and resetting the stones can begin. The first step is to rebuild the paver base. Spread a layer of paver base material, typically gravel, over the prepared soil. The thickness of this layer will depend on the original construction of the patio and the extent of the settling. A general guideline is to aim for a layer of at least 4 inches of paver base.
Compact the paver base material thoroughly using a hand tamper or plate compactor. This will create a stable foundation for the leveling sand. Ensure the compacted base is level and even across the entire area.
Next, add a layer of leveling sand. Leveling sand is a fine, granular material that provides a smooth and even surface for setting the stones. Spread the leveling sand evenly over the compacted paver base, using a trowel or screed to achieve a consistent thickness. A thickness of approximately 1 inch is generally sufficient.
Use a long, straight board or screed to level the sand bed. Drag the board across the sand, removing any excess material and filling in any low spots. The goal is to create a perfectly level and smooth surface that matches the desired height of the surrounding stones.
Carefully place the removed stones back into their original positions. Gently press each stone into the leveling sand, ensuring it sits flush with the surrounding stones. Use a rubber mallet to tap the stone into place, if necessary. Avoid using excessive force, as this could damage the stone. Continuously check the level of each stone using a carpenter's level, making adjustments as needed by adding or removing leveling sand.
Once all the stones are reset and leveled, sweep away any excess leveling sand from the surface of the patio. Inspect the joints between the stones, ensuring they are uniform and free of debris. If desired, polymeric sand can be used to stabilize the joints. Polymeric sand is a specialized sand that hardens when activated with water, creating a durable and weed-resistant barrier. Follow the manufacturer's instructions for applying polymeric sand, ensuring the surface of the patio is clean and dry before application.
After applying polymeric sand, lightly water the patio to activate the hardening process. Avoid overwatering, as this can cause the polymeric sand to wash away. Allow the patio to dry completely before placing furniture or other objects back on the surface.
Addressing Common Problems
Several common problems can arise during the patio re-leveling process. One common issue is dealing with stones that are cracked or broken. In such cases, the damaged stones should be replaced with new ones. It is essential to match the new stones as closely as possible to the existing ones in terms of size, shape, and color. If matching stones are not readily available, consider purchasing extra stones during the initial patio installation for future repairs.
Another common problem is dealing with root intrusion. If roots are found beneath the patio stones, they should be carefully removed. Consider installing a root barrier to prevent future intrusion. A root barrier is a physical barrier that prevents roots from growing beneath the patio. It can be installed along the perimeter of the patio or beneath the entire patio area.
Poor drainage can also contribute to uneven patio stones. If the patio area is prone to water accumulation, consider improving the drainage. This can be achieved by installing a French drain, which is a perforated pipe buried beneath the patio that collects and redirects excess water. Alternatively, the patio can be sloped slightly to allow water to drain away from the house.
Finally, settling can be an ongoing issue, particularly in areas with unstable soil. To minimize settling, ensure the paver base is properly compacted and consider using a geotextile fabric beneath the paver base. Geotextile fabric is a synthetic fabric that provides additional support and prevents soil from mixing with the paver base.
Maintaining a Level Patio
Once the patio stones have been re-leveled, regular maintenance is essential to prevent future unevenness. Sweep the patio regularly to remove debris and prevent weed growth. Inspect the joints between the stones periodically and refill them with sand or polymeric sand as needed.
Avoid placing heavy objects on the patio, as this can contribute to settling. If heavy objects are necessary, distribute the weight evenly by using pavers or boards beneath the objects. Be mindful of drainage and ensure water does not accumulate on the patio surface.
Repair any minor unevenness promptly before it becomes a major problem. Catching and addressing issues early will save time and effort in the long run. By following these maintenance tips, the patio will remain level and aesthetically pleasing for years to come.

Raising And Leveling Sunken Patio Pavers Toolbox Divas

Dammann S Garden Company Diy Series How To Install Level Pavers And Patio Stones

Dammann S Garden Company Diy Series How To Install Level Pavers And Patio Stones

How To Repair Paving At B Q

How To Re Level Sunken Driveway Blocks Easy Diy Fix

How To Level The Ground For Pavers 15 Steps With Pictures

How To Level The Ground For Base Prep Pavers Perfect Patio Series Part 2 Diy

How To Level The Ground For Pavers 15 Steps With Pictures

How To Lay Pavers Over Concrete A Step By Guide Diy

How To Repair Sinking Patio Pavers Diy
Related Posts