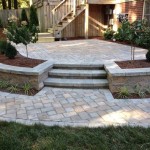
How To Build An Outdoor Patio
Constructing an outdoor patio significantly enhances a property's appeal and functionality, providing an inviting space for relaxation, entertainment, and outdoor dining. Careful planning and execution are crucial for creating a durable and aesthetically pleasing patio that complements the existing landscape and architecture. This article outlines the essential steps involved in building an outdoor patio, from initial planning to final installation.
Planning and Preparation
The initial phase of patio construction focuses on meticulous planning and preparation. This stage encompasses site selection, determining patio dimensions, selecting appropriate materials, and obtaining necessary permits. Thorough planning ensures a smoother and more cost-effective construction process.
Site Selection: Choosing the optimal location for the patio is paramount. Consider factors such as sunlight exposure, proximity to the house, prevailing winds, drainage patterns, and existing landscaping. A location that receives adequate sunlight but also offers shade during peak hours is often preferred. Proximity to the house facilitates easy access and integration with indoor living spaces. Evaluating drainage patterns is essential to prevent water accumulation and potential damage to the patio and surrounding areas. Furthermore, the selected site should be relatively level to minimize the amount of excavation required.
Patio Dimensions: Determining the appropriate size of the patio depends on its intended use and the available space. Consider the number of people who will typically use the patio, the type of furniture that will be placed on it, and the desired amount of open space. A common guideline is to allocate at least 25 square feet per person for comfortable seating and movement. It is advisable to mark out the proposed patio area with stakes and string to visualize its size and ensure it fits proportionally within the landscape.
Material Selection: The choice of materials significantly impacts the aesthetic appeal, durability, and cost of the patio. Common patio materials include concrete pavers, brick, natural stone, gravel, and composite decking. Concrete pavers offer a wide range of colors, shapes, and patterns, providing design flexibility. Brick provides a classic and timeless look, while natural stone offers a unique and organic feel. Gravel is a cost-effective option for creating a rustic and informal patio. Composite decking provides a low-maintenance and weather-resistant surface that mimics the appearance of wood. The selection of materials should consider the architectural style of the house, the surrounding landscape, and the desired level of maintenance.
Permits and Regulations: Before commencing any construction work, it is essential to check with the local municipality or homeowners association regarding permit requirements and building codes. Patio construction may be subject to zoning regulations, setback requirements, and drainage regulations. Obtaining the necessary permits ensures compliance with local laws and prevents potential fines or delays. Failure to obtain permits can also result in the requirement to dismantle the patio.
Excavation and Base Preparation
Proper excavation and base preparation are crucial for ensuring the stability and longevity of the patio. A well-prepared base provides a solid foundation that prevents settling, cracking, and weed growth. This phase involves excavating the site, installing a compacted gravel base, and leveling the surface.
Excavation: The excavation depth depends on the type of materials being used and the local climate. As a general rule, excavate to a depth of at least 6 to 8 inches below the finished patio level. This allows for a 4-inch gravel base and a 2-inch sand or setting bed. Remove any topsoil, vegetation, and debris from the excavated area. Using a shovel, pickaxe, or small excavator, dig out the soil to the desired depth. Ensure that the excavation is level and sloped slightly away from the house to facilitate drainage. Use a level and a measuring tape to check the depth and slope of the excavation.
Gravel Base Installation: A compacted gravel base provides drainage and stability for the patio. Use crushed gravel or road base material with a particle size ranging from 3/4 inch to dust. Spread the gravel evenly over the excavated area to a depth of 4 inches. Use a plate compactor to compact the gravel in layers, typically 2 inches at a time. Compacting the gravel ensures that it is dense and stable. The gravel base should extend slightly beyond the perimeter of the patio to provide additional support.
Sand or Setting Bed: A sand or setting bed provides a level surface for laying the patio materials. Use coarse sand or a specialized setting bed material designed for patio construction. Spread the sand evenly over the compacted gravel base to a depth of 1 to 2 inches. Screed the sand with a straight board or screed board to create a smooth and level surface. Use a level to check the sand bed for accuracy. Avoid walking on the sand bed after it has been leveled to prevent disturbing the surface.
Material Installation
The final phase involves installing the selected patio materials according to the manufacturer's instructions and established best practices. This stage requires careful attention to detail and precision to ensure a visually appealing and structurally sound patio. Laying the patio stones, bricks, or pavers is the most visible part of the process.
Laying the Patio Materials: Begin laying the patio materials along a straight edge or string line to ensure a consistent pattern. Use a rubber mallet to gently tap each paver or stone into place. Maintain consistent spacing between the materials using spacers or by eye, depending on the desired aesthetic. Check the level of each paver or stone with a level and adjust as needed by adding or removing sand. Work in small sections to maintain control and prevent disturbing the sand bed. For complex patterns, it is helpful to create a layout plan beforehand. Ensure that any cuts are made cleanly and accurately using a masonry saw or angle grinder with a diamond blade.
Cutting and Fitting: Cutting and fitting patio materials are often necessary, especially around the perimeter of the patio or around obstacles such as trees or landscaping features. Use a masonry saw or angle grinder with a diamond blade to make clean and precise cuts. Wear safety glasses and hearing protection when cutting masonry materials. Measure and mark the cutting lines accurately to minimize waste. For irregular shapes, create a template using cardboard or paper and transfer the outline to the patio material. Ensure that the cut pieces fit snugly and securely in place.
Joint Sanding and Sealing (Optional): After the patio materials have been installed, fill the joints between the pavers or stones with joint sand. Use polymeric sand for enhanced weed control and stabilization. Sweep the sand into the joints using a broom and compact it using a plate compactor with a rubber mat. Wet the sand lightly with water to activate the binding agents, if applicable. Sealing the patio is optional but can provide added protection against staining, weathering, and weed growth. Use a high-quality patio sealant designed for the specific type of material. Apply the sealant according to the manufacturer's instructions. Allow the sealant to dry completely before using the patio.

Thoughtful Ways To Build Your Outdoor Living Patios Design Dan330

How To Build A Diy Covered Patio

How To Design And Build Your Perfect Outdoor Patio Space

How To Build A Diy Patio For Less Than 300 The Rose Table

36 Ideas For Building The Ultimate Outdoor Kitchen Extra Space Storage

The Cost To Build An Outdoor Living Space You Ll Love

Diy Pergola How To Build A On Patio With Wood Slat Privacy Screen Sprucing Up Mamahood

Outdoor Living Rooms Traditional Patio St Louis By Heartlands Building Company Houzz

How To Build A Diy Patio For Less Than 300 The Rose Table
.jpg?strip=all "How To Build A Diy Platform Deck Dream Green")
How To Build A Diy Platform Deck Dream Green
Related Posts