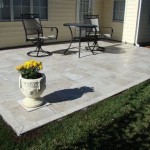
How to Seal Outdoor Concrete Patio Painting
Painting a concrete patio is a worthwhile endeavor that can significantly enhance the aesthetic appeal of outdoor living spaces. However, the longevity and vibrancy of the paint job are highly dependent on proper sealing. Sealing painted concrete patios protects the paint from weathering, abrasion, chemical damage, and moisture intrusion. This article provides a comprehensive guide on how to seal an outdoor concrete patio painting, ensuring a durable and visually pleasing result.
Before embarking on the sealing process, understanding the importance of specific sealers is paramount. Sealers function by penetrating the concrete pores or forming a protective layer on the surface, preventing water, salts, and oils from penetrating and damaging the paint film. Choosing the right sealer, preparing the surface adequately, and applying the sealer correctly are critical for achieving optimal protection and a long-lasting finish.
Key Considerations Before Sealing
Before applying a sealer, several key factors must be considered to ensure compatibility and effectiveness. Ignoring these considerations can lead to sealant failure, requiring costly repairs or reapplication.
Paint and Sealer Compatibility: The type of paint used on the patio is a primary factor in selecting the appropriate sealer. Water-based acrylic paints generally work well with water-based acrylic sealers. Oil-based paints may require solvent-based sealers, but compatibility testing is essential. Applying an incompatible sealer can cause the paint to lift, bubble, or discolor. Always consult the manufacturer's guidelines for both the paint and the sealer to ensure compatibility.
Weather Conditions: Weather conditions significantly impact sealer application and curing. Avoid sealing when rain is imminent or the temperature is excessively high or low. Ideal temperatures for sealer application typically range between 50°F and 90°F (10°C and 32°C). High humidity can prolong the drying time and affect the sealer's adhesion. Direct sunlight can cause the sealer to dry too quickly, leading to uneven coverage and potential bubbling. Aim to apply the sealer during a period of stable weather with moderate temperatures and low humidity.
Surface Preparation: Proper surface preparation is crucial for the sealer to adhere correctly and provide optimal protection. The concrete surface must be clean, dry, and free of any contaminants, such as dirt, dust, grease, oil, or loose paint. Failing to properly prepare the surface can result in poor adhesion and premature sealant failure. Thorough cleaning and proper drying are non-negotiable steps in the sealing process.
Surface Preparation: A Step-by-Step Guide
Adequate surface preparation is essential for the successful application of any sealer. Thorough preparation ensures the sealer bonds properly with the paint and concrete, providing long-lasting protection.
Cleaning the Surface: Begin by thoroughly cleaning the painted concrete surface. Use a stiff-bristled brush or broom to remove loose dirt, debris, and any visible contaminants. For stubborn stains or oily residues, a pressure washer may be necessary. When using a pressure washer, exercise caution to avoid damaging the paint film. Hold the nozzle at a safe distance and use a wide spray pattern. A mild detergent specifically designed for concrete surfaces can be added to the pressure washer for enhanced cleaning power.
Repairing Cracks and Imperfections: Inspect the painted concrete surface for any cracks, chips, or other imperfections. Small cracks can be filled with a concrete patching compound, following the manufacturer's instructions. For larger cracks or damaged areas, more extensive repairs may be necessary. Ensure the patching compound is fully cured and sanded smooth before proceeding to the next step. Addressing any imperfections before sealing will prevent moisture from penetrating and causing further damage.
Etching the Concrete (Optional): Etching the concrete surface can improve sealer adhesion, particularly on smooth or previously sealed concrete. Etching involves applying a mild acid solution to open up the concrete pores, creating a better surface for the sealer to grip. Follow the manufacturer's instructions for the etching solution carefully, as improper use can damage the concrete. Rinse the etched surface thoroughly with water and allow it to dry completely before applying the sealer. Etching is not always necessary, especially if the concrete is already porous or has a rough texture.
Drying the Surface: After cleaning and repairing the surface, allow it to dry completely. The drying time will depend on the weather conditions and the porosity of the concrete. Generally, it is recommended to wait at least 24 to 48 hours before applying the sealer. Use a moisture meter to ensure the concrete is sufficiently dry. Excessive moisture can prevent the sealer from bonding properly and lead to blistering or peeling.
Selecting the Right Sealer
Choosing the appropriate sealer is critical for achieving optimal protection and a long-lasting finish for a painted concrete patio. Different sealers offer varying levels of protection, durability, and aesthetic effects. Understanding the different types of sealers and their specific properties is essential for making an informed decision.
Acrylic Sealers: Acrylic sealers are a popular choice for painted concrete patios due to their ease of application, affordability, and good UV resistance. They provide a clear, durable finish that protects the paint from weathering and abrasion. Water-based acrylic sealers are environmentally friendly and easy to clean up with soap and water. Solvent-based acrylic sealers offer better penetration and durability but require more caution during application due to their flammability and VOC content. Acrylic sealers are suitable for patios with moderate traffic and exposure to the elements.
Polyurethane Sealers: Polyurethane sealers offer superior durability and chemical resistance compared to acrylic sealers. They form a tough, abrasion-resistant film that protects the paint from heavy traffic, spills, and chemicals. Polyurethane sealers are available in both water-based and solvent-based formulations. Solvent-based polyurethane sealers provide the highest level of durability but require proper ventilation during application due to their strong odor and VOC content. Polyurethane sealers are ideal for patios that experience heavy use or are exposed to harsh chemicals.
Epoxy Sealers: Epoxy sealers are known for their exceptional hardness, chemical resistance, and adhesion. They create a thick, durable coating that protects the paint from impact, abrasion, and corrosive substances. Epoxy sealers are typically two-part systems that require careful mixing and application. They are more challenging to apply than acrylic or polyurethane sealers but offer superior protection in demanding environments. Epoxy sealers are typically recommended for specialized applications but they can enhance the look and protection of a painted patio.
Penetrating Sealers: Penetrating sealers, such as silane and siloxane sealers, soak into the concrete pores and create a hydrophobic barrier that repels water and prevents moisture intrusion. They do not form a surface film and therefore do not alter the appearance of the painted concrete. Penetrating sealers are ideal for maintaining the natural look of the paint while providing excellent water resistance. They are particularly useful in areas with high humidity or frequent rainfall. However, penetrating sealers may not offer the same level of abrasion resistance as film-forming sealers.
Consider the expected traffic, weather conditions, and chemical exposure when selecting a sealer. For high-traffic areas or patios exposed to harsh chemicals, a durable polyurethane or epoxy sealer may be the best choice. For patios with moderate traffic and exposure to the elements, an acrylic sealer may be sufficient. In areas with high humidity or frequent rainfall, a penetrating sealer can provide excellent water resistance without altering the appearance of the paint.
Applying the Sealer: A Step-by-Step Guide
Proper application is essential to ensure the sealer performs as intended. Careful attention to detail during the application process will result in a durable, long-lasting finish.
Gathering Materials: Before starting, gather all the necessary materials. This typically includes the selected sealer, a roller or sprayer, a paint tray, painter's tape, drop cloths, and appropriate safety gear, such as gloves and a respirator. Read the manufacturer's instructions on the sealer container carefully to ensure you have the correct equipment and are prepared for the application process.
Preparing the Application Area: Protect surrounding surfaces from overspray or drips by using painter's tape and drop cloths. Cover any plants, furniture, or other objects in the vicinity. Ensure the application area is well-ventilated, especially when using solvent-based sealers. Proper preparation will prevent damage to surrounding areas and create a clean working environment.
Mixing the Sealer: Some sealers, particularly two-part epoxy systems, require mixing before application. Follow the manufacturer's instructions carefully to ensure the components are mixed in the correct proportions. Thorough mixing is essential for proper curing and performance. Use a mixing stick or a power mixer to combine the components until they are uniformly blended.
Applying the First Coat: Apply the first coat of sealer using a roller or sprayer, depending on the type of sealer and the size of the patio. Apply the sealer in thin, even coats, avoiding drips or puddles. Overlapping each pass slightly ensures uniform coverage. Work in small sections to maintain a wet edge and prevent the sealer from drying unevenly. Follow the manufacturer's recommended coverage rate to avoid applying too much or too little sealer.
Applying Additional Coats (if necessary): Some sealers may require multiple coats for optimal protection. Allow the first coat to dry completely according to the manufacturer's instructions before applying the second coat. Apply the second coat in the same manner as the first, ensuring uniform coverage. Follow the manufacturer's recommendations for the number of coats and the drying time between coats. Multiple coats provide enhanced durability and protection.
Curing the Sealer: After applying the final coat, allow the sealer to cure completely before using the patio. The curing time will vary depending on the type of sealer and the environmental conditions. Typically, it is recommended to wait at least 24 to 72 hours before walking on the sealed surface. Avoid placing heavy objects on the patio during the curing process. Proper curing is essential for the sealer to reach its full strength and durability.

How To Paint And Seal Your Concrete Driveway Like New Pro Diy

Resincoat Outdoor Patio Paint

How To Paint Your Concrete Patio In 2024 What Use

How To Repaint A Painted Concrete Porch Cuckoo4design

Patio Paint And How To Transform An Old Concrete Path Claire Douglas Styling

How To Paint And Stencil A Concrete Porch Or Patio Average But Inspired

How To Repaint A Painted Concrete Porch Cuckoo4design

Tips For Painting A Textured Concrete Patio

How To Paint A Concrete Porch Or Patio

Concrete Stain And Sealer Patio Makeover Exchange
Related Posts