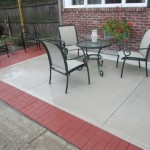
How To Build a Paver Patio Without Digging: A Comprehensive Guide
Constructing a paver patio typically involves extensive excavation, a task that can be physically demanding and time-consuming. However, a no-dig paver patio offers a less invasive and often faster alternative. This approach is particularly suitable for situations where minimal disruption to the existing landscape is desired, or where excavation is simply impractical due to shallow utility lines, tree roots, or other subsurface obstacles. This article provides a detailed guide on how to build a paver patio without digging, outlining the necessary steps and considerations for a successful project.
The fundamental principle behind a no-dig paver patio is to create a stable and level surface directly on top of the existing ground, rather than removing a significant layer of soil. This method still requires careful preparation and attention to detail to ensure the patio remains level, stable, and aesthetically pleasing over time. The key lies in utilizing appropriate materials and techniques to minimize settling and movement.
Key Point 1: Assessing and Preparing the Existing Surface
The success of a no-dig paver patio hinges on proper assessment and preparation of the existing ground. This initial step is crucial for ensuring the patio's long-term stability and preventing future issues such as uneven settling or weed growth. Careful evaluation and preparation will ultimately contribute to a more durable and visually appealing outdoor space.
The first step is to thoroughly evaluate the existing ground. This assessment should consider the type of soil present (clay, sand, loam, etc.), its compaction level, and its drainage characteristics. Areas with poor drainage or highly expansive clay soil may require additional stabilization measures. If the existing ground is soft or uneven, compaction will be essential.
Remove any existing vegetation, including grass, weeds, and debris, from the area where the patio will be built. This can be done manually using a shovel or hoe, or by using a sod cutter for larger areas. Ensure all roots and organic matter are completely removed to prevent decomposition and settling beneath the patio surface. Ideally, consider applying a non-selective herbicide to kill any remaining vegetation and prevent regrowth.
Address any existing drainage issues. If water tends to pool in the area, consider incorporating a slight slope into the patio design to direct water away from the house or towards a designated drainage area. This may involve adding a layer of permeable material such as gravel to improve drainage. Proper drainage is essential to prevent water from accumulating under the pavers, which can lead to instability and damage over time.
Compaction is critical to create a stable base. Use a plate compactor to thoroughly compact the existing soil. This process compresses the soil particles, reducing air pockets and increasing its density, which minimizes settling. Multiple passes with the plate compactor may be necessary to achieve optimal compaction. It is crucial to compact the entire area designated for the patio, paying particular attention to edges and corners.
After compaction, level the surface. Any significant dips or bumps need to be addressed to ensure a perfectly level base for the pavers. Use a level and a shovel to adjust the soil as needed. For larger imperfections, consider using a leveling compound specifically designed for outdoor use. Proper leveling is essential for creating a visually appealing patio and preventing tripping hazards.
Key Point 2: Utilizing Geotextile Fabric and a Gravel Base
Geotextile fabric and a gravel base are integral components of a no-dig paver patio. They provide essential support, drainage, and weed control, contributing significantly to the patio's longevity and stability. Choosing the right materials and installing them correctly is paramount for a successful outcome.
Geotextile fabric serves several important functions. It acts as a barrier between the existing soil and the gravel base, preventing soil from migrating into the gravel and compromising its drainage capacity. It also provides a degree of separation, inhibiting weed growth by preventing weeds from penetrating the paver surface from below. Choose a high-quality geotextile fabric specifically designed for landscaping applications. The fabric should be durable, UV-resistant, and permeable to allow water to drain through.
Install the geotextile fabric over the prepared and compacted surface. Overlap the edges of the fabric by at least 12 inches to ensure complete coverage. Secure the fabric in place with landscape staples or pins to prevent it from shifting during the installation process. Ensure the fabric is smooth and free of wrinkles to maintain a consistent barrier between the soil and the gravel base.
The gravel base provides a stable and well-draining foundation for the pavers. It helps to distribute weight evenly across the underlying soil, minimizing settling and preventing the pavers from shifting. Choose a crushed gravel or aggregate that is angular in shape, as this type of gravel interlocks more effectively, providing greater stability. The gravel should be approximately 3/4 inch in diameter.
Spread the gravel evenly over the geotextile fabric to a depth of approximately 4-6 inches. The specific depth will depend on the soil conditions and the intended use of the patio. For areas with heavy foot traffic or furniture, a thicker gravel base may be necessary. Use a shovel or rake to distribute the gravel evenly, ensuring a uniform depth across the entire patio area.
Compact the gravel base using a plate compactor. This will further stabilize the base and ensure that it is level and even. Multiple passes with the plate compactor may be necessary to achieve optimal compaction. Pay particular attention to the edges and corners of the patio area. A well-compacted gravel base is essential for preventing settling and maintaining the integrity of the patio over time.
After compaction, level the gravel base. Use a level and a screed board to create a perfectly level surface for the pavers. Any imperfections in the gravel base will be reflected in the finished patio surface. Accurate leveling is critical for creating a visually appealing and functional outdoor space.
Key Point 3: Installing the Pavers and Joint Sand
The final steps involve laying the pavers and filling the joints with sand. Proper installation techniques are crucial for achieving a durable and aesthetically pleasing patio surface. Careful attention to detail in these steps will ensure that the pavers are stable, evenly spaced, and resistant to weed growth.
Begin laying the pavers according to the desired pattern. Start at one edge of the patio and work your way across, ensuring that each paver is level and properly aligned. Use a rubber mallet to gently tap the pavers into place, ensuring that they are firmly seated in the gravel base. Maintain consistent spacing between the pavers, typically around 1/4 to 3/8 inch, to allow for joint sand.
Check the level of each paver as you lay it, using a level and adjusting the gravel base as needed. It is important to maintain a consistent level across the entire patio surface to prevent tripping hazards and ensure proper drainage. Use a string line or a laser level to maintain alignment, especially when laying pavers in a straight line or a specific pattern.
Cut pavers as needed to fit the edges of the patio or to create specific patterns. Use a paver splitter or a wet saw to make clean, accurate cuts. Wear appropriate safety gear, including eye protection and gloves, when cutting pavers. Ensure that the cut edges of the pavers are smooth and even to prevent chipping and cracking.
Once all the pavers are laid, sweep joint sand into the spaces between them. Use a fine, polymeric sand specifically designed for paver joints. Polymeric sand contains additives that bind the sand particles together, creating a firm, weed-resistant joint. Sweep the sand diagonally across the paver surface, ensuring that all joints are completely filled.
Compact the pavers with a plate compactor equipped with a rubber mat. This will help to settle the pavers and the joint sand, creating a more stable and even surface. The rubber mat protects the pavers from damage during the compaction process. Make multiple passes with the plate compactor, ensuring that the entire patio surface is compacted.
After compaction, sweep away any excess joint sand from the paver surface. Use a broom or a leaf blower to remove any remaining sand. Lightly mist the patio surface with water to activate the polymeric sand. The water helps the binding agents in the sand to harden, creating a strong and durable joint. Allow the patio to dry completely before using it.
Regular maintenance is essential for preserving the beauty and integrity of the paver patio. Sweep the patio regularly to remove debris and prevent weed growth. Inspect the patio periodically for any signs of settling or damage and address any issues promptly. Reapply joint sand as needed to maintain a weed-resistant surface. By following these maintenance tips, the no-dig paver patio can provide years of enjoyment.
While a no-dig paver patio offers several advantages, it is important to be aware of its limitations. This method may not be suitable for all soil conditions or for areas with heavy traffic or extreme weather conditions. In some cases, a traditional excavation and base construction may be necessary to ensure long-term stability. However, for many applications, a no-dig paver patio provides a cost-effective and efficient alternative to traditional patio construction.

Diy Paver Patio For Normal People

Diy Paver Patio For Normal People

Diy Paver Patio For Normal People

Diy Paver Patio For Normal People

How To Lay Pavers Without Digging Ehow

Diy Patio Installation How To Build A Paver Scrappy Geek

Urban Landworks Blog

How To Build A Paver Patio Budget Dumpster

Diy Booster Learn How To Lay Pavers Like A Pros

Patio Pavers Over Clay Soil Lawn Care Forum
Related Posts


