How To Build A Small Stone Patio
Constructing a small stone patio can significantly enhance a yard’s aesthetic appeal and functionality, providing an inviting outdoor living space. This project, while requiring some physical labor, is manageable for many homeowners with basic landscaping skills and the right tools. This article provides a comprehensive guide on how to build a small stone patio, covering everything from planning and preparation to the final laying of the stones.
The choice of stone is a critical factor that impacts both the appearance and durability of the patio. Common options include flagstone, slate, brick pavers, and concrete pavers that mimic natural stone. Each material offers unique characteristics in terms of color, texture, and cost. Flagstone, for example, is known for its irregular shapes and natural variations, creating a rustic look. Slate is a fine-grained, foliated metamorphic rock, usually with a distinctive hue ranging from gray to black. Concrete pavers provide a consistent shape and color, making installation easier and faster. Brick pavers offer a classic, versatile option that can be arranged in various patterns.
Beyond the choice of stone, proper site preparation is essential for a stable and long-lasting patio. This involves defining the patio’s boundaries, excavating the area, and creating a solid base with compacted gravel. A level and well-compacted base prevents settling and ensures that the patio remains even over time. Ignoring this crucial step can lead to uneven surfaces, drainage issues, and ultimately, the need for costly repairs.
Selecting appropriate tools is also crucial for efficiently completing the project. Essential tools include a shovel, rake, tamper, level, measuring tape, rubber mallet, and potentially a circular saw or masonry saw for cutting stones. Investing in quality tools can significantly improve the ease and accuracy of the installation process.
Planning and Design
The first step in building a stone patio involves careful planning and design. This includes determining the size and shape of the patio, selecting the type of stone, and marking the area. Accurately measuring the space and creating a detailed sketch is crucial for calculating the amount of materials needed. This also helps visualize the final product and ensures that the patio fits seamlessly into the surrounding landscape.
Consider the intended use of the patio when determining its size. A small patio for a bistro set will require less space than one designed for outdoor dining. Estimate the square footage needed based on the furniture and activities planned for the area. It is generally advisable to err on the side of larger rather than smaller, as extra space provides flexibility and prevents the patio from feeling cramped.
When selecting the shape of the patio, consider both aesthetic appeal and functionality. Rectangular and square patios are relatively easier to install, while curved or irregular shapes can add visual interest. However, more complex shapes may require more cutting and fitting of stones. Mark the area clearly using stakes and string, ensuring that the boundaries are accurate and level.
Selecting the type of stone depends on personal preference, budget, and the overall style of the landscape. Consider the color, texture, and size of the stones. Obtain samples of different stones and place them in the area to see how they look in natural light. Also, consider the ease of installation and maintenance requirements of each stone type.
Once the area is marked and the stone is selected, calculate the amount of materials needed. Measure the area and add an extra 10% allowance for waste and cuts. This prevents running out of materials mid-project and ensures a consistent look throughout the patio. In addition to the stones, calculate the amount of gravel base and leveling sand required for the project.
Site Preparation
Proper site preparation is foundational to the longevity and stability of the stone patio. It involves excavation, grading, and compacting the base material. The goal is to create a level and solid surface that supports the weight of the stone and prevents settling over time.
Start by removing any existing vegetation, topsoil, and debris from the marked area. Excavate to a depth of approximately 6-8 inches. This depth allows for a 4-inch gravel base and a 1-2 inch layer of leveling sand. Use a shovel and wheelbarrow to remove the excavated material.
Once the area is excavated, grade the soil to create a slight slope away from the house. This ensures proper drainage and prevents water from pooling on the patio surface. A slope of approximately 1/4 inch per foot is generally sufficient. Use a level and measuring tape to ensure accurate grading.
After grading, lay down a layer of landscape fabric. This fabric acts as a barrier between the soil and the gravel base, preventing weeds from growing up through the patio. Overlap the edges of the fabric by at least 6 inches. Secure the fabric with landscape staples to prevent it from shifting during the installation process.
Next, spread a 4-inch layer of crushed gravel over the landscape fabric. Use a rake to evenly distribute the gravel and then compact it using a hand tamper or plate compactor. Compacting the gravel creates a solid base that will support the weight of the stones. Repeat the compacting process several times to ensure that the gravel is thoroughly compacted.
After compacting the gravel, add a 1-2 inch layer of leveling sand. Use a rake to evenly distribute the sand. Level the sand using a screed board, a long, straight board used to create a perfectly smooth surface. Drag the screed board across the sand, filling in any low spots and removing any excess sand. Check the levelness of the sand with a level and make any necessary adjustments.
Laying the Stone
With the base properly prepared, the next step is to lay the stones. This involves arranging the stones in the desired pattern, cutting them to fit if necessary, and securing them in place. Careful attention to detail ensures a visually appealing and structurally sound patio.
Begin by laying the stones along the perimeter of the patio. This creates a border that defines the shape and size of the patio. Place the stones close together, leaving a small gap of approximately 1/4 inch between them. This gap allows for expansion and contraction of the stones due to temperature changes. Use a rubber mallet to gently tap the stones into place, ensuring that they are level with the surrounding stones.
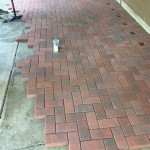
As you lay the stones, consider the pattern you want to create. Simple patterns, such as running bond or herringbone, are relatively easy to install. More complex patterns may require more cutting and fitting of stones. Experiment with different arrangements to find a pattern that you like.
When laying irregular shaped stones, such as flagstone, fit the stones together like a puzzle. Rotate the stones to find the best fit and use a masonry saw or circular saw with a diamond blade to cut the stones if necessary. Wear safety glasses and hearing protection when cutting stones.
Periodically check the levelness of the stones with a level. If a stone is not level, add or remove sand under the stone to adjust its height. Use a rubber mallet to gently tap the stone into place and recheck the levelness. Continue this process until all the stones are level.
Once all the stones are laid, fill the gaps between the stones with polymeric sand or crushed stone. Polymeric sand is a special type of sand that hardens when wet, creating a durable and weed-resistant surface. Crushed stone provides a more natural look and allows for better drainage. Sweep the chosen material into the gaps using a broom. For polymeric sand, follow the manufacturer's instructions for wetting and setting the sand.
Finally, compact the entire patio surface with a plate compactor. This helps to settle the stones and the joint filling material, creating a solid and stable surface. After compacting, sweep off any excess filling material and water the patio to help set the polymeric sand. Allow the patio to dry completely before using it. Proper maintenance, such as periodic cleaning and resealing, will ensure that the stone patio remains beautiful and functional for many years to come.

How To Build A Patio An Easy Do It Yourself Project

How To Build A Patio In Weekend Fine Gardening

How To Install A Flagstone Patio Step By
:strip_icc()/101427270-f2fbe431e7174e86945a62e011e4d361.jpg?strip=all "How To Install A Flagstone Patio Our Step By Guide")
How To Install A Flagstone Patio Our Step By Guide

How To Build A Rock Patio Saunders Landscape Supply

Diy Pea Gravel Patio Lowe S

Flagstone Patio Installation Enhance Your Outdoor Space

Flagstone Patios How To Guide Paving Cost Diy Vs Contractor Install Mutualmaterials Com

How To Build A Paver Patio Young House Love

Diy Pea Gravel Patio With Pavers Love Renovations
Related Posts