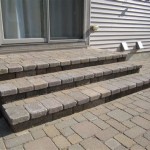
How to Install a Paver Patio Base
A well-installed paver patio base is essential for creating a beautiful and durable outdoor space. The base provides a stable foundation for the pavers, preventing settling and cracking over time. It also allows for proper drainage, ensuring water flows away from the patio, reducing the risk of frost heave and erosion.
1. Prepare the Site
Before installing the paver base, it is crucial to prepare the site properly. This involves removing any existing vegetation, debris, and topsoil.
The following steps should be followed:
- Mark the area: Use stakes and string to mark the perimeter of your desired patio area.
- Remove vegetation: Cut down any trees or shrubs growing within the patio area.
- Remove topsoil: Dig out the topsoil to a depth of 4-6 inches, depending on local frost depth.
- Level the ground: Use a rake and a level to create a smooth, even surface for the base.
2. Install the Base Layers
Once the site is prepared, you can begin installing the base layers. This typically involves using a combination of materials, such as gravel, sand, and geotextile fabric.
The following steps are commonly used:
- Lay geotextile fabric: Spread a layer of geotextile fabric over the prepared ground. This helps to prevent soil from mixing with the gravel layers and provides a barrier against weeds.
- Install the first gravel layer: Pour a 4-6 inch layer of compacted gravel, also known as a drainage layer. This layer helps to improve drainage and prevent water from pooling beneath the pavers. Compact the gravel with a plate compactor or tamper.
- Add sand: Spread a 2-3 inch layer of compacted sand over the gravel. This layer provides a more stable and even surface for the pavers. Compact the sand with a tamp or plate compactor.
- Install the pavers: Lay your pavers on the compacted sand, ensuring they are level and evenly spaced. Use a rubber mallet to tap them into place.
3. Finish the Installation
After installing the pavers, there are a few final steps to complete the installation. These include adding joint sand, sealing the pavers, and cleaning up the site.
The following final steps should be taken::
- Sweep joint sand: Apply joint sand to the spaces between the pavers. This helps fill in the gaps, preventing weeds from growing and creating a solid surface. Sweep the sand into the joints with a broom.
- Seal the pavers: Apply a sealer to protect the pavers and enhance their appearance. This will help to make them more resistant to staining and weathering.
- Clean up the site: Remove any leftover sand or debris from the patio area.
Following these steps will help you successfully install a paver patio base that is structurally sound and aesthetically pleasing. Remember to use the proper materials and tools, and check with your local building codes to ensure your project meets all necessary requirements.

How To Prep Lay A Base For Pavers Western Interlock

Urban Landworks Blog

Paver Patios That Will Save You Time And Effort Family Handyman

What Kind Of Base Should You Use For Patio Pavers Installation

How To Install A Paver Patio Base Diy Family Handyman
.jpg?strip=all)
How To Install Patio Pavers Lv

Paver Installation How Important Is The Base

How To Install A Paver Patio Base Diy Family Handyman

Do S And Don Ts Of Paver Installation Step 2 3 Base Preparation

Paver Installation Landscaping Network
Related Posts


