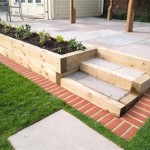
How to Level Ground for Concrete Patio Slabs
Laying concrete patio slabs on uneven ground is a recipe for disaster. Uneven slabs can shift, crack, and become dangerous to walk on. To ensure a long-lasting and safe patio, leveling the ground is a crucial step. This process involves removing excess soil, filling in low spots, and compacting the base for a solid foundation.
This article outlines the essential steps involved in leveling ground for concrete patio slabs, providing detailed information on tools, materials, and techniques to achieve a smooth and stable surface for your new patio.
1. Preparing the Area
Before you start leveling, you need to prepare the area for the project. This includes:
- Clearing the site: Remove any existing vegetation, debris, and large rocks.
- Marking the patio area: Using string and stakes, define the perimeter of your desired patio area.
- Considering drainage: Ensure the patio area has a slight slope (about 1/4 inch per foot) to allow rainwater to drain away from the house, preventing water buildup and potential damage.
2. Establishing a Level Reference Point
To accurately level the ground, you need a reference point. This can be achieved using:
- String line: Stretch a string line across the patio area, using a level to ensure it is horizontal.
- Laser level: A laser level projects a horizontal beam, making it easier to identify high and low spots.
- Leveling tool: Use a carpenter's level to check the ground level at various points.
Once you have established a level reference, you can identify areas that need to be adjusted.
3. Removing Excess Soil
High spots in the ground need to be removed to create a consistent base. You can use various tools for this:
- Shovel: This is the most common and affordable tool for removing excess soil, especially for smaller areas.
- Wheelbarrow: Use a wheelbarrow to transport the removed soil easily.
- Power tools: For larger areas, consider using a power tiller or excavator to quickly remove excess soil.
As you remove soil, check the level regularly against your reference point and make adjustments as needed.
4. Filling in Low Spots
Once you've removed the high spots, low spots need to be filled in with suitable material:
- Compacted gravel: This is a common and cost-effective material for filling low spots. It provides drainage and a solid base for the concrete.
- Sand: Sand is a finer material that can be used for filling in small depressions. Ensure you compact it thoroughly to prevent settling.
- Crushed stone: Crushed stone provides excellent drainage and can be used for filling larger dips in the ground.
Avoid using topsoil as it can compact unevenly and may not provide a stable surface for your concrete slabs.
5. Compacting the Base
Once you've filled in all the low spots, it is crucial to compact the base material. This ensures a solid foundation for your concrete slabs.
Here are some methods for compacting the base:
- Hand tamper: A hand tamper is a simple and effective tool for compacting smaller areas.
- Plate compactor: For larger areas, a plate compactor is a more efficient solution. It uses its weight and vibrations to compact the base material.
- Roller compactor: For very large areas, a roller compactor can compact the base quickly and efficiently.
Compact the base material in layers, ensuring each layer is well compacted before adding the next.
6. Checking for Level
After compacting the base, recheck the level using your chosen reference point. If any areas are still uneven, make any necessary adjustments by adding or removing material and compacting again.
The final step before pouring concrete is to meticulously check for level throughout the entire patio area. This will ensure a smooth and even surface for your concrete slabs and a long-lasting, safe patio.

How To Level The Ground For A Concrete Slab Hk Contractors

How To Level The Ground For Pavers 15 Steps With Pictures

How To Prep Form Pour A Concrete Slab For Beginners Start Finish

How To Level The Ground For Pavers 15 Steps With Pictures

How To Prep Lay A Base For Pavers Diy

How To Level Ground For A Patio In Step By Guide

Leveling The Ground For Your Paver Patio Pavertime

How To Level The Ground For Pavers 15 Steps With Pictures

Dry Laying Slabs On Gravel Or Sand Instruction Kronos Ceramiche Floor Coverings In Porcelain Stoneware

How To Level The Ground For Base Prep Pavers Perfect Patio Series Part 2 Diy
Related Posts


