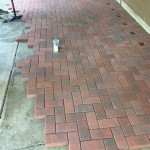
Build a Sturdy and Long-Lasting Brick Patio with Ease
Transform your outdoor space into a charming and durable extension of your home with a custom brick patio. While the process may seem daunting at first, it can be a rewarding and relatively straightforward project with careful planning and the right materials.
Here's a comprehensive guide to help you create a long-lasting and visually appealing brick patio:
Materials and Tools
- Bricks: Choose high-quality, durable bricks.
- Sand: Coarse sand for the base and fine sand for the joints.
- Concrete mix: For the base and laying the bricks.
- Edging: To contain the patio and prevent movement.
- Level: To ensure a flat surface.
- String line: For marking the layout.
- Trowel: For mixing and spreading concrete.
- Brick chisel: For cutting bricks.
- Tamper: For compacting the sand.
- Jointing tool: For finishing the joints between bricks.
Preparation
1. Plan and Mark the Patio: Determine the shape and size of your patio and mark the area with stakes and string lines.
2. Excavate the Area: Remove the top layer of soil to a depth of 6-8 inches, creating a level base for the patio.
3. Install Edging (Optional): If desired, install edging around the perimeter of the patio to retain the bricks and prevent shifting.
Base Layer
1. Spread Coarse Sand: Fill the excavated area with a 4-inch layer of coarse sand, ensuring a level surface using the level and tamper.
2. Create a Concrete Base: Mix concrete according to the manufacturer's instructions and pour a 2-inch layer over the sand. Smooth and level the concrete using a trowel.
Laying the Bricks
1. Spread Fine Sand: Once the concrete base has set, spread a thin layer of fine sand over the surface.
2. Lay the Bricks: Start from one corner and lay the bricks on the sand in a running bond pattern (alternating rows of bricks). Gently tap each brick into place using a rubber mallet.
3. Cut and Fit Bricks: For irregular areas or edges, cut bricks to fit using a brick chisel and hammer.
Jointing and Finishing
1. Mix Joint Mortar: Mix joint mortar according to the manufacturer's instructions and fill a jointing tool.
2. Apply Mortar to Joints: Press the jointing tool along the joints of the bricks, filling them completely.
3. Tool the Joints: Use a jointing tool to create a desired finish for the joints (concave, convex, or flush).
Final Touches
1. Compact the Joints: Once the mortar has set, use a tamper to compact the joints, ensuring a firm and even surface.
2. Protect the Patio: After 24 hours, seal the patio with a water-resistant sealant to protect it from stains and moisture.
Maintenance
To ensure the longevity of your brick patio, follow these maintenance tips:
- Sweep or hose down the patio regularly to remove dirt and debris.
- Seal the patio every 2-3 years to protect it from the elements.
- Check for any loose or damaged bricks and repair them promptly.

How To Build A Brick Patio

How I Made A Brick Patio In Just Three Terrible Months Simcha Fisher
Can A Diyer Build Brick Patio Quora
How To Build Stunning Brick Patios And Sidewalks The Post
/SPR-how-to-build-a-brick-patio-2130893-hero-02f39b478c4242dfaa6cdabe2ff00c2b.jpg?strip=all)
How To Make An Easy Brick Patio Pattern For Beginners
:strip_icc()/brick-patio-pergola-c5785361-e12deeb47bf7475894b200e7a98eae9d.jpg?strip=all)
How To Build A Diy Paver Patio In Just One Day

Diy Patio Brick Paver
:max_bytes(150000):strip_icc()/SPR-how-to-build-a-brick-patio-2130893-step-9-1315-7e5d893d46ec4510b5cf916fcb48b7e9.jpg?strip=all)
How To Make An Easy Brick Patio Pattern For Beginners
How To Lay A Patio From Reclaimed Bricks Alice De Araujo

How To Build A Paver Patio
Related Posts


