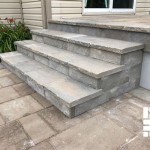
Enhancing Your Patio With Pavers Over Concrete Slab
Many homeowners with existing concrete patios find themselves considering ways to upgrade the aesthetic appeal and functionality of their outdoor living spaces. While concrete provides a stable and durable base, its appearance can often be stark and uninviting. Installing pavers over a concrete slab presents a viable and attractive solution for transforming a plain patio into a visually appealing and functional extension of the home.
This article explores the process of enhancing a patio with pavers over an existing concrete slab, detailing the benefits, preparation steps, installation techniques, and necessary considerations for a successful project. It explains the advantages of using pavers, the importance of proper surface preparation, and the different methods available for achieving a durable and aesthetically pleasing patio surface.
Advantages of Pavers Over Concrete
Choosing pavers to cover an existing concrete slab offers several distinct advantages over simply leaving the concrete exposed or pursuing other surfacing options like paint or stain. These advantages extend to both the aesthetic and functional aspects of the patio.
One primary advantage is the enhanced aesthetic appeal. Pavers are available in a wide array of colors, shapes, sizes, and textures, allowing homeowners to create a customized design that complements their home's architecture and landscaping. From classic brick patterns to modern geometric designs, pavers offer a level of design flexibility that concrete simply cannot match. The visual texture and dimensional quality of pavers add depth and character to the patio, transforming it into a more inviting and visually interesting space.
Beyond aesthetics, pavers offer improved durability and longevity. While concrete is durable, it is still susceptible to cracking and damage from freeze-thaw cycles, heavy loads, and ground movement. Pavers, particularly those designed for outdoor use, are often manufactured to withstand these conditions more effectively. The interlocking nature of paver installations also allows for some flexibility, minimizing the risk of cracking in response to minor ground movement. Should a paver become damaged, it can be individually replaced without affecting the rest of the patio, which is a significant advantage over repairing a cracked concrete slab.
Another benefit of pavers is their permeability. While some paver installations are designed to be impermeable, many modern paver systems incorporate designs that allow water to infiltrate through the joints between the pavers. This permeability reduces surface runoff, minimizes puddling, and can contribute to better stormwater management. Permeable paver systems can also help to reduce the risk of erosion and protect surrounding vegetation.
Finally, pavers offer a more comfortable surface for walking and standing. Concrete can become uncomfortably hot in direct sunlight, especially during the summer months. Pavers, particularly those with lighter colors and textured surfaces, tend to absorb less heat and provide a cooler, more comfortable surface underfoot. The textured surface of many pavers also provides better traction, reducing the risk of slipping, especially when the patio is wet.
Surface Preparation: The Foundation for Success
Proper surface preparation is arguably the most critical step in installing pavers over a concrete slab. A poorly prepared surface can lead to uneven settling, shifting pavers, and ultimately, a failed installation. Thorough preparation ensures that the pavers have a stable and level base, which is essential for long-term durability and aesthetic appeal.
The first step in surface preparation involves thoroughly cleaning the existing concrete slab. This includes removing all debris, dirt, oil, grease, and any other contaminants that could interfere with the adhesion of the bedding layer. A pressure washer is often an effective tool for this task, but stubborn stains may require the use of a concrete cleaner or degreaser. Any loose or flaking concrete should also be removed at this stage.
Next, the concrete slab should be inspected for cracks and imperfections. Small hairline cracks may not require any special attention, but larger cracks or areas with significant damage should be repaired before proceeding. Concrete patching compounds can be used to fill cracks and level out any uneven areas. It is important to follow the manufacturer's instructions carefully when using these products to ensure proper adhesion and a durable repair.
After the concrete slab has been cleaned and repaired, a leveling layer is typically applied. This layer serves to create a perfectly level and smooth surface for the pavers to rest on. The type of leveling layer used will depend on the specific paver system being installed and the condition of the underlying concrete slab. Common options include a layer of sand, a layer of crushed stone, or a specialized paver base panel system.
If using sand, it is important to choose a coarse, angular sand that will compact well and provide a stable base. The sand should be spread evenly over the concrete slab and compacted using a plate compactor. If using crushed stone, a layer of geotextile fabric should be placed between the concrete slab and the crushed stone to prevent the stone from settling into the cracks and imperfections of the concrete.
Paver base panel systems offer a more advanced and often easier-to-install alternative to sand or crushed stone. These panels are typically made of recycled plastic and feature interlocking edges that allow them to be quickly and easily installed over the concrete slab. They provide a level and stable base for the pavers and can also improve drainage and reduce the risk of frost heave.
Regardless of the leveling method used, it is essential to ensure that the surface is perfectly level before proceeding with paver installation. A laser level or a long level can be used to check the surface for any high or low spots. Any necessary adjustments should be made before the pavers are installed.
Paver Installation Techniques
With the surface properly prepared, the next step is to install the pavers. There are several different techniques that can be used, depending on the type of pavers being used and the desired aesthetic. The two primary methods are mortar setting and sand setting.
Mortar setting involves adhering the pavers directly to the concrete slab using a layer of mortar. This method provides a very strong and durable installation and is often used when the pavers are subject to heavy traffic or loads. However, mortar setting is also more labor-intensive and requires more skill than sand setting.
Before installing the pavers with mortar, a thin layer of mortar should be applied to the concrete slab using a trowel. The paver is then carefully placed on the mortar bed and tapped into place with a rubber mallet. It is important to ensure that the paver is level and properly aligned with the surrounding pavers. A consistent joint spacing should be maintained between the pavers to create a uniform appearance. The joints between the pavers are then filled with grout, which should be carefully applied to avoid staining the pavers.
Sand setting, also known as dry setting, involves placing the pavers on a bed of sand or gravel without using mortar. This method is less labor-intensive and more forgiving than mortar setting, making it a popular choice for DIY projects. Sand setting also allows for some flexibility in the paver installation, which can help to prevent cracking in response to ground movement.
When using sand setting, a layer of sand or gravel should be spread evenly over the prepared base. The sand or gravel should be compacted using a plate compactor to create a stable base for the pavers. The pavers are then carefully placed on the sand bed and tapped into place with a rubber mallet. As with mortar setting, it is important to ensure that the pavers are level and properly aligned with the surrounding pavers. A consistent joint spacing should be maintained between the pavers. After the pavers have been installed, the joints are filled with polymeric sand, which helps to lock the pavers in place and prevent weed growth.
Regardless of the installation method used, it is important to cut the pavers to fit the edges of the patio. A paver splitter or a wet saw can be used to cut the pavers to the desired size and shape. Safety glasses and gloves should be worn when cutting pavers to protect the eyes and hands.
Once all of the pavers have been installed, the patio should be thoroughly cleaned to remove any dirt or debris. The patio should then be sealed with a paver sealer to protect the pavers from staining and weathering. A paver sealer can also enhance the color and appearance of the pavers.
Key Considerations for a Successful Project
Several key considerations can impact the success of a paver installation over a concrete slab. Addressing these factors proactively can prevent issues and ensure a long-lasting, aesthetically pleasing patio.
Drainage is a crucial consideration. Concrete slabs are often designed with a slight slope to facilitate water runoff. When installing pavers, it is important to maintain this slope or create a new drainage system to prevent water from pooling on the patio surface. Improper drainage can lead to water damage, mold growth, and structural issues.
The weight of the pavers and the underlying base material should also be considered. The existing concrete slab must be able to support the added weight without experiencing excessive settling or cracking. It may be necessary to consult with a structural engineer to assess the load-bearing capacity of the concrete slab, especially if using heavy pavers or a thick base layer.
Local building codes and regulations should be reviewed before starting the project. Some municipalities may require permits for paver installations, particularly if the patio is located near property lines or drainage areas. Failing to comply with local codes can result in fines and delays.
The choice of paver material is another important consideration. Pavers are available in a wide range of materials, including concrete, brick, natural stone, and clay. Each material has its own unique characteristics in terms of durability, aesthetics, and cost. The selection should align with budget, desired aesthetic, and anticipated use of the patio.
Finally, proper maintenance is essential for preserving the beauty and longevity of the paver patio. Regular cleaning, sealing, and joint stabilization will help to prevent staining, weed growth, and paver shifting. A proactive maintenance schedule will extend the lifespan of the patio and minimize the need for costly repairs.

How To Install Pavers Over A Concrete Patio Family Handyman

How To Install Patio Pavers Over An Existing Concrete Slab

How To Install Patio Pavers Over An Existing Concrete Slab

Can You Put Pavers Over Concrete And Is It A Good Idea

How To Install Patio Pavers Over An Existing Concrete Slab

How To Install Pavers Over A Concrete Patio Family Handyman

Can You Overlay Paver Stones Over A Concrete Slab

How To Lay A Patio On Concrete Or Over Paving Marshalls

Don T Remove That Concrete Slab Try Dry Mudset And Thin Overlay Pavers

6 Concrete Patio Ideas To Boost The Appeal Of That Drab Slab
Related Posts


