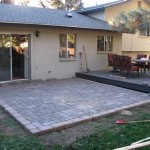
How to Level Concrete Slab Outside for Patio Pavers
Creating a beautiful and functional patio requires a solid foundation, and that often means ensuring a level concrete slab. A level slab provides a stable base for pavers, preventing uneven settling, tripping hazards, and unattractive gaps. The process may seem daunting, but with careful planning and the right tools, leveling a concrete slab is achievable for even the novice DIYer.
1. Preparation is Key:
Before any work begins, it is crucial to prepare the area thoroughly. This involves removing any existing vegetation, debris, and loose soil. Next, compact the ground using a tamper or plate compactor to create a firm base. If the ground is uneven, consider adding a layer of gravel or compacted sand to level the base further.
Once the base is prepared, it is time to establish the desired level for the concrete slab. This can be achieved using a level, measuring tape, and stakes. Set the stakes around the perimeter of the patio area at the desired height, ensuring they are level with one another. String lines can then be attached to the stakes, creating a visual guide for the concrete pouring.
2. Consider the Concrete Mix:
The strength and durability of your concrete slab depend on the mix you use. Standard concrete mixes typically consist of cement, sand, and gravel. However, consider adding a concrete additive specifically designed for patios, which can enhance strength and durability. Consult your local building supply store for recommendations on the best mix for your project.
It's important to note that a thicker slab will generally be more stable and less prone to cracking. However, it also requires more concrete, increasing the cost of the project. Consider the anticipated weight of the pavers, the soil conditions, and the size of the patio when determining the appropriate slab thickness.
3. Pouring and Leveling the Slab:
Once the concrete is mixed, it's time to pour it onto the prepared base. This is best done in sections to ensure even distribution. Use a shovel or concrete rake to spread the concrete evenly across the base, ensuring it reaches the desired height. A concrete float is then used to smooth the surface and create a uniform texture.
A crucial step in leveling the slab is using a level and a straight edge. Run the straight edge across the surface in multiple directions, checking for deviations. If there are high spots, use a trowel or float to remove excess concrete. For low areas, add more concrete and re-float the surface until it is level.
4. Curing and Finishing:
After pouring and leveling, the concrete needs time to cure and harden. This process typically takes 24 to 72 hours, depending on the temperature and humidity. During this time, it's essential to keep the concrete moist by spraying it with water or covering it with a damp cloth. This prevents the concrete from cracking and ensures optimal strength.
Once the concrete has cured, it can be finished. This often involves sweeping the surface to remove any loose debris and applying a sealant or stain. The sealant protects the concrete from stains and wear, while the stain adds color and enhances the aesthetics of the patio.
5. Installing the Pavers:
After the concrete slab has fully cured and is ready, you can begin installing your patio pavers. Start by laying out the pavers according to your design. Use a rubber mallet to gently tap the pavers into place and ensure they are level with one another. Leave small gaps between the pavers to allow for drainage and expansion. Fill these gaps with paver sand, which will solidify as the pavers settle.
With the pavers installed and compacted, the patio is ready for use. Enjoy your new outdoor space! Remember to regularly clean and maintain your pavers to ensure their longevity and beauty.

Level Your Paver Base Outdoor Diy From Home Work With Hank

Level Your Paver Base Outdoor Diy From Home Work With Hank

How To Level A Concrete Patio Homeserve Usa
Dammann S Garden Company Diy Series How To Install Level Pavers And Patio Stones

Diy Installing Concrete Pavers

How To Level The Ground For Pavers 15 Steps With Pictures

How To Level The Ground For Pavers 15 Steps With Pictures

How To Install Patio Pavers Over An Existing Concrete Slab

Quikrete Building A Concrete Patio

How To Install Patio Pavers Over An Existing Concrete Slab
Related Posts


